Friday, November 29, 2013

Swapetition: Project Bags -- One for Her. One for Me.

I've never participated in a "swap" before, so this experience is completely new to me. One of the things I decided to make for my swap recipient are project bags. Every knitter can always use more (or at least I can).  Plus one of her children knits as well, so I also thought to include a project bag for her and a little something else for her other child.

Because making project (or ditty) bags is fairly easy, I decided to make some for myself as well. The kittens have been extremely curious about my yarn and my WIPs, but not about the bags. After finding that they had dragged one of my waste yarn balls all over the house (and around the dining room table and chairs several times over) that anything fiber related needed to be in a project bag.

I dove through my fabric stash and found some suitable items, but nothing that really was my swap recipient. JoAnn's was having a 60% off sale on their printed fabics, and I managed to find something that seems to fit her.  Then I went somewhat "hog wild" and ended up making about a dozen (or more) project bags. I had a fat quarter of each fabric, which was enough to make 2-3 bags.

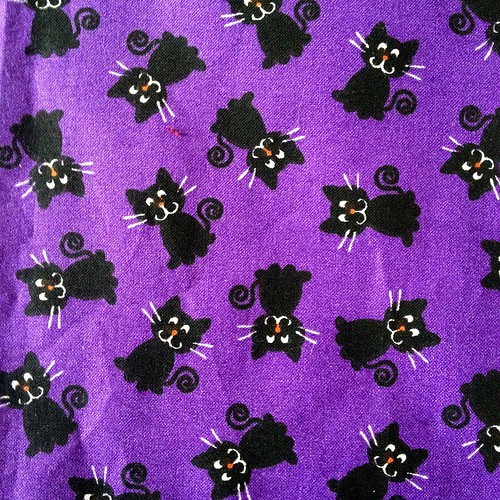
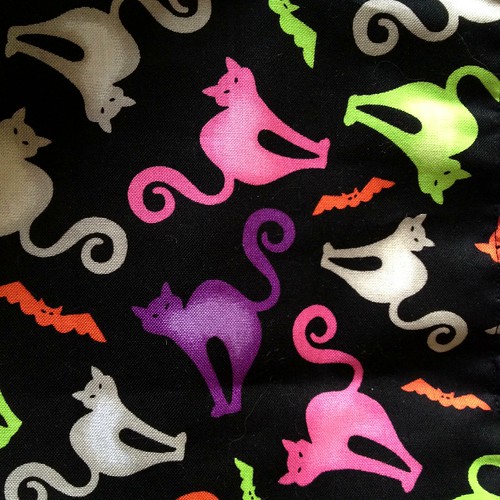
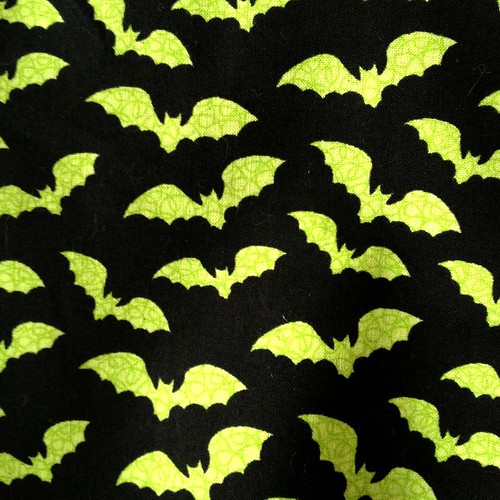
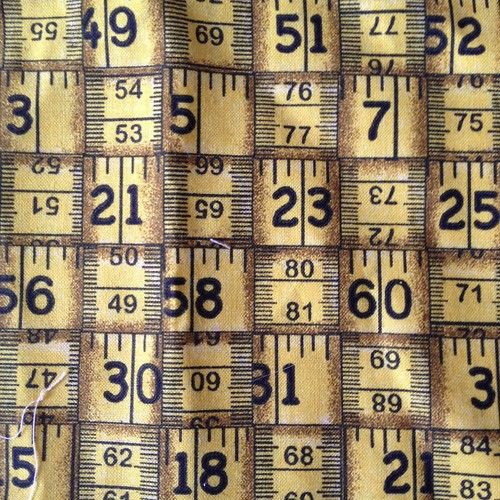
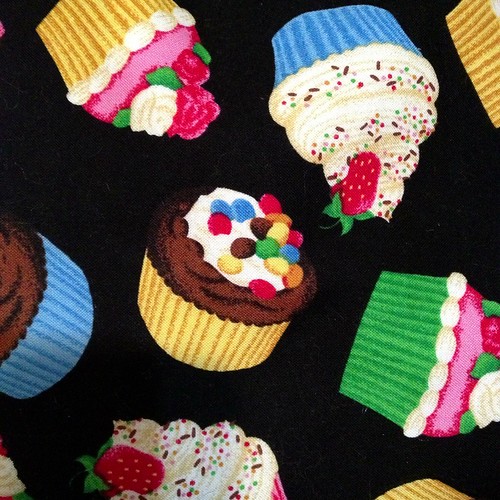
Without going into too many spoilers of what I made for my swap recipient, here are the fabrics I used to make the project bags.

Untitled Untitled Untitled Untitled Untitled Untitled

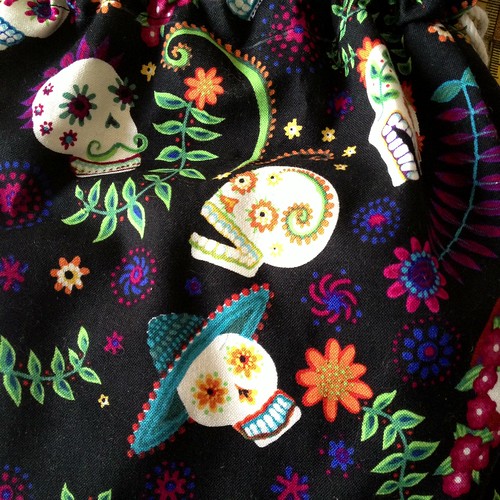
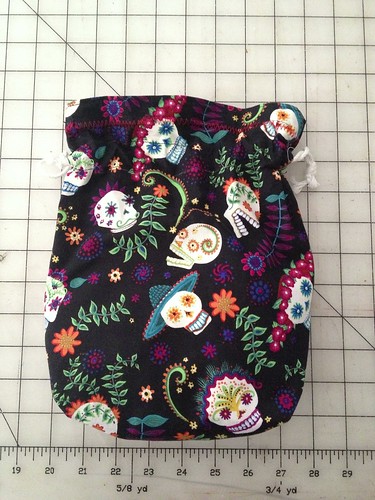
Here's one ditty bag that I made for a friend. I used it as the wrapping for her birthday gift. Untitled

Wednesday, November 27, 2013

Giving Thanks

For those of us in the United States, it's the day before Thanksgiving. It's a day of celebration, of eating a lot of food, and being thankful for what we have...and helping those that don't.

I have a lot in my life for which I am very thankful for, and a lot that brings absolute joy in my life. I won't list them all here, but I consider myself very lucky for what I have, and I appreciate it. And I try to help out those that need it by donating to a variety of charities and causes.

Two of my most treasured gifts are my boys that I adopted back in August from Nine Lives Shelter --- a local non-profit no-kill shelter. They were about 3.5 pounds.

In three months, they've tripled in size. Sammy is 10lbs, while Dean is about 9.6 lbs. They've brought so much joy into my life. I am very thankful for Nine Lives and all of the hard work they are doing.


During the holiday season, please consider donating time or money to any of the worthwhile charities out there. There are many who could use your help.

We have a lot to be thankful for in our lives. Please considering helping those who aren't as fortunate.

Monday, November 25, 2013

Swapetition: Stitch Markers

This year, I'm taking part in the Savvy Girls' "Swapetition". A swap is like a Secret Santa gifting circle where all participants are given a name to whom they give a package of gifts (for under $30). The "competition" portion of "swapetition" means that there are prizes to those who give the best gifts. This involves a bit of stalking the other person via Ravelry, blogs, and other places to find out what best things to give to your recipient.

Because the Savvy Girls is (technically) a knitting podcast, one of the rules is that you must include a handmade gift that you made (of any given craft). Luckily, for my recipient, I'm somewhat proficient in several different types of crafts.

One of the things I have created for my swap recipient are some stitch markers. In my stalking of her, she mentions in one of her Ravelry posts that she always loses her stitch markers and wanted to get some pretty ones. So, using some of the beading stash (and bought some pretty glass on sale), I made her markers that I like using (that I learned from Cat Bordhi).

They include letters (i.e. A, B, C) in order to denote potential differences in lace or cable patterns. I hvae found them very useful in the past.

And of course, I took the time to make myself some stitch markers as well. :-)

Wednesday, November 20, 2013

Holiday Gifting for the Kids

Last year, I had made my eldest nephew a fleece blanket with a Star Wars theme. His siblings (especially his brother) also wanted blankets as well for this year after seeing their brother get a lot of use out of his.

So, I found some polar fleece that I thought they might like. Owls for her.

Robots for him.

The fleece kits were on sale at JoAnns, and came with a matching colored fleece for the underside. What's nice about polar fleece is that it doesn't fray. However, I don't like the "fringe" finishings that many kits suggest. Instead, I used a zig-zag stitch on my machine. I rounded all of the edges of the blanket and lengthened the stitch to over two inches and made it as wide as possible, then hemmed it completely around.

The cats found the fabric very warm and snuggly. I had to keep removing them from the table in order to cut and pin the large swaths of fabric. However, they were awfully cute.


If you want some helpful tips on sewing with fleece, Craftsy just came out with 12 helpful hints.

Monday, November 18, 2013

Sewing Flannel Night Shirts

In addition to the different cotton flannels that I picked up at JoAnn's, I also found these fabrics as well. These are pretty thick versions of cotton flannel -- much thicker than the ones I had bought for my pajama bottoms.
 

I remembered that I owned an old cotton flannel night shirt from Mervyns that I think I "borrowed" from my mom when I was a kid (and never gave back). I had worn the poor thing absolutely to the bare threads; it's how much I loved it. It was falling apart. I think one more washing would have ended it for good.

I wanted to recreate the general look and feel of it, but I didn't want to have the pockets or the buttons.

So, I traced out the relative dimension of it on my pattern paper. The garment was simple: Front, Back, Sleeves, and Facings. Everything is fairly "oversized" (four inches of ease) so I didn't have to worry about fitting the garment to my specific measurements. And even the sleeves had no easing. (I hate easing sleeves.)

It was a nice change of pace. Here's the night shirt laid out on the dining room table. I traced around each piece, then added a generous seam allowance. I used a V-neck opening to make things simple. This is probably the simplest pattern I've recreated.

I even had a helper who supervised my drawing and cutting out the pattern.

This time, I did make a mock-up of my pattern (as it was not tried and tested). And I made a few adjustments in different places. I marked locations for a "long" and "short" night shirt. I made two: one in read and the other in the plaid. I also did some stylistic variations between the two. It only took about 2.5 yards of the fabric with plenty of fabric left over.


Now, DH wants one too. I test drove the red one for a few days. And me tell you, these are really comfy! I need to make more.

Thursday, November 14, 2013

Sewing up a Pajama-jam!

With all the sewing I did for the Goblin Ball, you'd think I'd be done with sewing for a while, but apparently not!

Several weeks ago, I was looking for some fun pajama bottoms at various stores, and didn't find anything to my liking. But, when I was perusing JoAnn's looking for lining fabric for my ballgown, I discovered that they were having a 60% off sale on their cotton flannels. So with the coming of winter, I thought to make myself some flannel jammies.

It's not very often that I sew more utilitarian clothing, but I thought, "What the heck?!?" Plus, they were having their $0.99 sale on McCall's patterns and I found this pattern. (I opted to make the long pajama bottoms.)


Between their sale on flannel and their patterns, I felt the Universe was trying to tell me to go ahead and make pajamas. So, I picked up a traditional plaid.


But I wanted to have some FUN sewing. I found these nifty fabrics as well. They suit my taste. I can even forgive the pink in the skull & crossbones fabric.


(I really love the monsters one!)

I washed all of the fabric in hot water to help pre-shrink and pre-soften the fabric. (Cotton gets softer with washing. And flannel tends to shrink.) Then, I started sewing.

The pattern was fairly easy to follow, and took very little time to make. Once all of the fabric was cut, it only took an hour to assemble each pajama bottom. The only change I made to the patterns was to shorten the legs a bit to fit me. Otherwise, I used the pattern "as-is". Heck, I didn't even bother with a mockup! (I'm living on the edge...I know. LOL.)

However, I did serge all the edges of the cut fabric as flannel tends to fray quite a bit.


And comfy jammies are the result.

I probably spent more time shoo'ing the kittens off the fabric as they tried to "help" me cut the fabric or pinning things together. (Apparently, they love laying on flannel -- or any other fabric for that matter!)

I think I'm set for winter. (Not to mention the Pajama-Jam-Jam at Purlescence Yarns....)


Tuesday, November 12, 2013

Sweing for the Ball: Ball Gown Inspiration

On the podcast, I mentioned some of my inspiration for making my ballgown. From the HBO show, Game of Thrones, Cersei Lannister has some beautiful outfits that I just absolutely adore. I think they are beautiful, elegant, and simply stunning. They remind me of a cross between Asian clothing and something more Elvish. I especially love this red outfit.

Speaking of Elvish, my other inspiration came from some of the various elvish costumes from the Lord of the Rings. (I had previously made an Elvish inspired gown based on Arwyn's Blue & Red gown for a "Nazzgrrl - the Jilted Brides of Sauron" cosplay.

These are two shots from one of the costume books of Elrond's outfit. I love the sleeves.

So, I opted to make a cross between these two.
Unfortunately, I don't have shots of myself in the gown, because I totally forgot to take photos of myself IN them. I'm currently awaiting some friends to post some of their photos of me in my outfit.

Tuesday, November 5, 2013

Sewing for the Ball: Purse

Yes, we're back from ConVolution. And no, I don't have photos of the ballgown yet, because I forgot to take photos of me with the ballgown on during the actual Ball. However, many of my friends did, and I hope to get those photos relatively soon.

For now, I'll just discuss the accessories I made, and eventually, get to the actual ballgown images as well as a report on ConVolution, so forgive me for now.

No ballgown is really complete without a few accessories here and there. Because I found myself with finished a bit ahead of the Ball, I went ahead and made a matching "petal" purse to go with my outfit.

I find small purses are very easy to make, and really complete an outfit, especially one that matches in fabric or texture. Petal (or tear-drop) purses are relatively easy to make. It's simply four pieces of fabric. When you put the purse on the ground, the bottom flattens out so that it stands up.

First, I made an approximate template of a pattern and make a quicky mock-up out of muslin. I was relatively happy with how it looked, so I took the leftover fabric and cut out my pieces.


And did the same for the lining. Each side is simply sewn together to every other side. (You stop at the bottom of the "petal". ) When you've added all four sides, hem along the top of the purse.

I had originally made some frogs for the ballgown, but they didn't seem to work with it.

So, instead, I used them on the purse. I made a Pipa button combined with a Three-Flower Knot. Instructions can easily be found on the internet.

I also made some straps out of the leftover lining fabric. Luckily, I had some ribbon in the correct color and width to add a bit of "flare" for the purse. When I folded over the top of the purse to sew, I simply added the straps to the inside. And, viola! A purse!

And here are the cats being very curious about my Chinese knotwork buttons. :-)

I promise to have pictures of the Ballgown AND from the ball very very soon! I need to get all of the photos from the evening in one location.