Showing posts with label FO. Show all posts

Thursday, June 8, 2017

Completed Katarina

Within the course of a week, I finished two projects! It feels so good to get things completed and to have two in one week feels doubly good.

This time around, I finished Katarina by CocoKnits out of Cascade Greenland, which is a discontinued yarn, but of which I have at least 3 sweater's worth in my Stash. I love Julie Weisenberger's aesthetic, and this sweater is no exception.


There's a seamless version of this sweater, but I chose to knit the seamed version. I don't mind seaming and I knit this in pieces as a substitute for my sock knitting at work. Because I did it piecemeal, it  meant that I could finish it a bit faster as it was always accompanying me to different places. (I also prefer having a bit more structure to my knitted garments that seaming affords).

While the body of the sweater took very little time, the garter stitch shawl collar took forever to finish and was fairly boring to knit. I also did some short-rows along the collar because I wanted the collar to have more substance and to stand a bit taller.


Consequently, I ended up working on the Viajante instead or reserved the Katarina for mindless t.v. knitting whenever we binge watched on Netflix or Hulu. However, I'm very pleased with how the collar turned out.


Here's the final sweater on me. It fits perfectly.

And the Greenland softened up considerably after washing it. I didn't quite block the sweater, but rather threw it into the dryer. It handled the dryer very well and didn't lose any of its shape.

Tuesday, June 6, 2017

Completed Viajante!

It's been a long time since I finished a project that wasn't sock related. I took on two big knitting projects and have been somewhat faithful to just knitting on them (except for my ever-present sock projects).

So, I'm glad to announce that I finally, finally finished the behemoth that is the Viajante that I started back in March, and I love this "shawl". Okay, let's be honest here....the Viajante really isn't a shawl but more of a fancy poncho. And I've discovered that I really like ponchos, especially in the frigid climate that is my work office.

As a recap, I used Miss Babs Katahdin, which is 1750 yards / 397 grams of wool. I used nearly all of it. I think I might have 40-50 grams left.

I also discovered that I like to add beads to things, despite it adds a multitude of time to finish a project! Because this was my first time beading a project, I didn't know what size beads to use. Consequently, I ended up using two sizes of beads: 2/0 clear-esque beads for the stockinette portion of the beading and 6/0 for the lace. For the larger 6/0 beads, I found some that perfectly matched the yarn.


The beads & lace look great, and I even bound off with beads.

Despite beading bits of this poncho, the vast majority of this project is a lot of stockinette. This poncho is huge and served as a 'blanket' while I was working on it. The neck opening is about 13" wide and the "tip" of the poncho/shawl is very long.


When worn as a poncho, it reaches down to the floor.


It can also be worn as an actual shawl when you double over the fabric, which makes it warm and toasty

I love this thing. This project definitely fell under the "project knitting" aspect versus the "process knitting". I really wanted the Viajante for use in the office, travel, and I think it's elegant enough to wear for evenings out, etc.

I'm actually contemplating on making another, but out of sport weight yarn just to cut down on the amount of time that it'll take to complete. And the next one will be out of a more solid or kettle dyed yarn.


Tuesday, January 10, 2017

Hawaiian Waters Cardigan -- First FO of 2017!

Before we left for vacation, I started working on a new cardigan, Watercourse by Carina Spencer. 
I had the opportunity to try on this cardigan while at Stitches two years ago, and I fell in love with the sample. I knew I had to knit it.

However, it was fraught with mistakes of my own making and I ended up tinking back multiple times and frogging back at least once. But, it did become my very first finished object for 2017!!

For this sweater, I used Malabrigo yarn for the very first time. I had this yarn in my stash from an impulse buy ....to my credit, the yarn was on sale. And luckily, I had just enough for this project. I have to say, this yarn is just simply amazing to use for knitting. It has a superb hand and feel. I can see why so many knitters love this yarn.

I had a hard time getting gauge (pre-block), so I used several different sized needles. It bloomed a lot after washing, and I definitely got gauge with a US 6.

My Knit Companion app makes keeping track easy. It was only coincidence that the yarn I selected was the same color as the pattern.
I knit on this cardigan throughout our Hawaiian vacation. The blue was nearly the same color as many of the beaches we visited.

The pattern itself is well written. There are a few mistakes in the ribbing pattern, especially as it transitions from one part of the pattern to another, but if you're very careful, you can tell where it goes off and catch it quickly -- unless you're like me and aren't paying attention, and therefore have to tink back a couple of rows to fix the issue.

Or in one case, I had to rip back about 10 inches, because I put the waist decreases in the completely wrong place. I almost threw the entire project in the time-out bin. However, the only saving grace was that
  1. I wanted this sweater.
  2. Malabrigo yarn is amazing and is such a joy to knit.
After much teeth gnashing, I eventually I got to the point where I was finished with the body. I was very happy


The instructions for knitting the sleeve cap is rather clever and one that reminds me of a set-in sleeve for sewing. I was worried that I wouldn't have enough yarn to do both the sleeves and a deep enough hood, so I started with the sleeves first.

In the end, it turned out that I had more than enough yarn so I have enough for any repairs, if needed. I knew that the finished sweater would grow slightly once I washed and blocked it, and it did!

It grew slightly in length and width, but I prefer it that way.

And the hood grew slightly too, which I wanted. Many Ravelers had lamented that the hood was a bit too shallow per the original instructions so I had made it longer and deeper while knitting.


I'm so very glad that I finished this cardigan!  It's going to prove rather stylish and versatile in the office, especially with our wonky A/C and heat issues.

I love the color. It'll always remind me of our vacation.

Wednesday, February 10, 2016

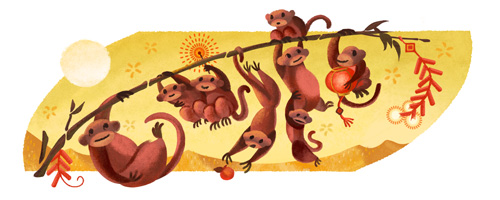
Celebrating Chinese New Year with Finished Objects

Happy Chinese New Year! It's the year of the monkey.....the year of smart & clever people (more or less).

(Image from Google Doodle)

I'm hoping to be smart & clever this year, at least with my crafting and making. And auspiciously, I finished my Fire socks just in time for Chinese New Year.

Tuesday, January 19, 2016

Finished Objects for 2016

Knitting-wise, 2016 has gotten off to a great start. I've finished a bunch of projects this January alone. Of course, I've also had a bit of start-itis, so finishing these projects is a good thing. Surprisingly, all of my knitting has been gift-knitting thus far.

It's an unusual occurrence for me, but my recipients have been pretty happy.

Thursday, December 31, 2015

Last Finished Object of the Year: Red Iced Cardigan

Well, the sweater that I was trying to get finished in two weeks...didn't. However, it did get finished on Christmas day; a small present to myself. It took a total of 21 days to finish this sweater, which all things considering, isn't too shabby.

I really did try to get it finished in 14 days. At day 15 (December 16th), it looked like this:


It wasn't quite done, but it definitely looked like a sweater. I had finished the whole body including the sleeves. But the shawl collar wasn't anywhere near started. 

However, I had to put it aside because we were going to be hosting a Christmas Eve dinner at our house. There was a LOT to get done, which wasn't going to happen if I knitted on the sweater.

Part of the house cleaning involved completing the organization of the craft room, which meant that a lot of stuff would get taken out of the dining room (i.e. off the dining room table), which meant that we could actually using the dining table AS a table. (I'll post about THAT later...)

Insofar as this sweater, I really loved this pattern. It was extremely simple, yet elegant and functional. The seed stitch looks awesome on the shawl. There's a bit of waist shaping so that, despite it being a chunky yarn, it is slightly fitted. 


I LOVE the yarn too -- Queensland Chunky Kathmandu -- is a Merino, Cashmere, Silk blend. It's warm AND soft. Heck, I wore it a few times before I got around to putting buttons on it.

Finding the right buttons was a bit of a challenge. I went through my button box and tried a few that I had. I picked these out as they seemed to work, but I'm not even sure that I like the buttons. The jacket was perfectly serviceable without them.


I might replace the buttons at a later date, when and if I can find something more appropriate. But for now, these will do.

Have I mentioned that I LOVE this sweater?

Thursday, October 15, 2015

FO: Lava Socks!

I realized that I had been so busy posting about my cosplays that I have completely neglected posting anything about fiber arts as of late. Although, admittedly, I haven't had much in terms of a lot of finished objects. Plus, as I am knitting a lot of solid color projects, it almost seems like there's no progress on some of them.

However, for now, I shall give you this one! I finished this last month (yes, I know, I'm super late in even posting about it). I bought some self-striping yarn at my LYS. They had this colorway specifically made for them -- they wanted something with fire. The dyer came back with this beautiful colorway called "Pele" -- after the Hawaiian goddess of the volcano.

It's a lovely dark grey (for the rocks) and a variegated striped section of yellows, oranges, and reds. I love the combination of self-striping and variegated colors. Plus, the yarn is really a delight to knit.

As a precaution, I took a page out of the Knitmore's playbook, and performed a citric acid soak on the socks, as a precautionary measure. It was well worth the 5 minutes of extra time to perform this little task to ensure that the colors don't bleed, run, or fade.

Then, of course, I realized that these are also the colors of the Gryffindor House from the Harry Potter Universe.


I'm okay with that.

Yarn: Berry Colorful Yarnings - Saturated Sport, Self-Striping
Colorway: Pele -- special custom dye from Purlescence Yarns.

Wednesday, July 22, 2015

Cutting off a Few Heads -- Finished Objects

I finally got a few heads off my Hydra Project cut-off, in terms of finished objects.
First up! The Viking Hat that I had promised for a dear friend.

Then I finished up the tabi socks that had been languishing in my project basket.


It feels good to get things finished. Now, onto the rest of the heads!

Monday, April 20, 2015

Making a Jacques Cousteau Hat

A dear friend of mine told me that for the summer, she was going to be spending it on a boat doing marine geology. As she is a close friend, I offered to make her the iconic Jacques Cousteau red hat.She loved the idea, so I set about making one for her.

Luckily, there is a pattern on Ravelry --- everything is on Ravelry.


It's a pretty straight-forward pattern, and a lot of folks have made it with a lots of modifications, so it was just a matter of finding what would work for me.

For this hat, I cast on: 110 stitches, for a 22" head. My gauge is 6 stitches in 3x2 rib over 1" (ribbing is relaxed & not stretched out). I wanted it to fit over all of her hair.

I probably could have gone down to 100 stitches without issue given this gauge. The hat fits even with all my hair down. For a guy with close-cut hair, I think 100 would be just fine.

It worked up pretty well. I really liked the decreases.


I made it long enough so I could have a two inch brim.


Overall, a most excellent hat pattern. Now, I just have to mail it off to her.

Friday, April 17, 2015

Finishing a 5-Month Sweater

After more than few months, I finally finished my 3-in-1 Sweater by Atelier Alfa. It's made with Cascade 220 Superwash Sport. It's so soft.  I started this sweater back in October 2014!!!  I remember when I could finish a sweater in under two months, but then again, I used to have a one-hour one-way commute. Now, I have a 15-minute commute and 5-month-sweaters.  I think I can live with the trade-off. (Maybe....)

Of course, now that I've finished said sweater, the weather is gorgeous outside...and WARM....very warm; the type of weather where people wear t-shirts & shorts outside, not sweaters. Ah well.

When I finally bound off everything and wove in all the loose ends, I found that I had a problem. I had absolutely no buttons that would work with this sweater, despite having a fairly large collection of buttons.

I'm sure there must be some a law somewhere that says you will never have the right buttons for your project, despite your overly large button stash.


So, I had to go to the store to get buttons. It's always a chore to decide what type of buttons to get. The store has so many to choose from, but it's a matter of size and availability. I eventually  chose red ones for some contrast, although, admittedly, the red button on red fabric doesn't show up all that well. I thought to put contrasting green one on the red fabric, but I didn't think it looked all that great.


It's a bit longer than I had anticipated (a little past butt length), but I don't mind it. I also lengthened out the sleeves so I could add thumbholes or fold it into a cuff.


Overall, I'm pretty happy with it. I think it'll look great with jeans or some black leggings. Now, I just have to wait for it to get cold again.

Tuesday, April 7, 2015

FO Round Up for April - March

I just wanted to post some of the finished objects that I've finished in the past 1.5 months. I've been suppressing my start-itis syndrome by going on a finishing jag.


First my completed tiger socks, using Regia. My cat informs me that the toes needed to be white like his toe socks.

In March, I started a quick project so I can try out a new yarn from Yarn on the House (YOTH) that is a merino, nylon, cashmere blend in DK weight. I bought the skein at Stitches West.


So, I made the Honey cowl from it. I made an intermediary size, casting on 180 stitches.

It's a relatively quick knit, and I love the patterning of the slipped stitches.

The yarn is a mottled / heathered green. And after being blocked, it is rather soft and squishy. It also stood up to being ripped several times over. I really love this yarn.

Sometime in early March, I also finished up a pair of fingerless gloves using Stray Cat Yarn's Electric Avenue. I love the self-striping aspect of her yarns. And yes, I did line up the stripes as much as possible.


Of course, now, that I've finished these projects, I can start a LOT MORE!

Wednesday, February 11, 2015

My Opus Medius -- Finishing my Aran Sweater.

Remember the St. Brigid sweater by Alice Starmore that I started nearly two years ago? Well, this past weekend, despite, many trials and tribulations, I finally finished it! (kinda sorta).

This cardigan has become somewhat of a opus magnus for me. (Okay, maybe not quite opus magnus, more like opus medius....) Nothing about it was overly complicated, but, it did take a lot of work and effort to finish. It is definitely one of those things on my knitting bucket list that I can now cross off -- completing an Aran sweater!

But, before I could cross it off, I still had some finishing work that needed to be completed over the weekend. And I was very determined to finish this cardigan!

First, I had to do surgery on the sleeves that were much too long for me. My Viking had helped me determine where the sleeve needed to end.  I cut nearly four inches off, and then proceeded to tink back several rows.

Then carefully seamed the sleeve band onto the sleeve.

This process took nearly two entire weeknight evenings to complete. After work, I would eat dinner, then sit down and work on a sleeve. The cutting of the sleeve was quick. The tinking back to the appropriate location took a while to finish. And I had to carefully graft the band onto the sleeve.

At this point, the cardigan looked pretty darn good....or so I thought. When the weekend rolled around, I hoped to have the cardigan fully completed and wearable after the weekend. At one point during the weekend, I wasn't sure I was going to live up to that early expectation!

The nearly finished cardigan...or so I thought

The second thing I did was all of the necessary finishing work, including:

  • Putting an edging treatment on the sides of the cardigan to keep it from rolling and to add a zipper later.
  • Reinforcing the seams (shoulder, side, and neck) with a single crochet. (For how's and why's, see this article by Tech Knitter or this old blog post by the Yarn Harlot).
  • Adding grosgrain ribbon down the length of the saddle shoulder.
  • Adding grosgrain ribbon along the edges of the cardigan.
  • Adding a backing ribbon on the sleeve cuffs and collar.

I used Nancy Wiseman's book, "The Knitters Book of Finishing Techniques" to help guide me.


It was a lot of extra work, but the extra finishing work that I put into this sweater helped take it to the next level. I actually finished one side first (all the seam reinforcements, etc), and wore the garment for my Viking. He told me he could see a difference in the finishing work, and pointed to the correct side that I just completed.

Finishing Work Details

Edging Treatment: For the edging treatment, I was undecided between an icord edging or using a crochet edging. There are pros & cons to both, and the hive-mind of Facebook suggested using icord. I took my original swatch for this sweater and tried both things, and found I could get the look of an icord using a crochet hook with a lot less hassle. I completed both sides.

Sleeve Band Facing: At my local sewing store, I found a pretty ribbon (width= 2 inches/5cm) that I wanted to use as a neckband and facing to the sleeves. The ribbon has very little give so would act like grosgrain.

Sleeve cuff band

Attack of the Sweater

At this point, I tried it on, and saw my first big issue. If you look at the photo of the finished cardigan above, you'll notice something about the collar. It's TOO BIG. I tried to fix it....using darts, taking it in at the back of the collar, but to no avail. The collar band was simply too big by nearly 10 inches, and I was going to have to completely undo a lot of the work that took me a few hours to complete.

Why 10 inches? Because I measured the length of the seamed body and came up with a number (26 inches). However, where I wanted it to sit only required 17.5 inches of collar......

Isn't amazing how it only takes 20 minutes to undo about 2.5 hours worth of work?!? Ugh...I was kicking myself while I ripped out the edging and remove the collar. My Viking was nice enough to help me figure out how much of the collar to rip out. I put the sweater on myself, where I wanted it to sit, then he took the collar and marked where it should end. The collar was SIX inches too big.

I pinned the sweater on my dress dummy, Esmerelda (or maybe Harley? Or Morticia? I have still yet to decide....), where I wanted it to sit as the finished garment, and pinned the collar to it. There was some easing that needed to occur, but it wasn't too bad.


Afterwards, I seamed the collar onto the body with the aforementioned easing. I added seam reinforcement to the back of the neck, and then added the crochet pseudo icord back.

Neck Band Facing: With the neck finally completed (and sitting correctly), I added the grosgrain ribbon and neck facing. The grosgrain and crochet seam reinforcement would help keep the saddle shoulders from slipping and stay where they should when I wear the cardigan.

Grosgrain down the side saddle (along with seam reinforcement)

The ribbon would add additional structure to the collar and keep it from flopping over.

Neck band with the edging grosgrain pinned to a tailor's ham

It's looking pretty darn sharp! I really like the splash of color that the ribbon gives.

Now, I just need to find an appropriate length zipper in a matching color. My local sewing supply store didn't have them in the correct length of a matching or similar color. Nor did any of the other colors work. :-(


I love these cables!

As a costumer, I know how much finishing work can make or break your costume.
I'm really pleased with how much the finishing work helped pull the cardigan together....even if it took two days to finish all of the finishing work! For a sweater that took nearly two years to complete, what's an extra two days?

I might wear it as is, until I find a zipper of the right color / length. I'm extremely happy with it.


Could this be one of my opus magnus? I'm not sure yet. I'll let you know when I work on something far more complicated.