Showing posts with label Princess Mononoke. Show all posts

Thursday, May 28, 2015

Making the Princess Mononoke Cosplay Accessories: Part 2

For every costume, accessories must usually be made to complete the outfit. Luckily, the accessories for the Princess Mononoke cosplay were few and fairly simplistic to make.


She had:
1) Headband & arm bands
2) Earrings
3) Claw necklace, which acts as a counterweight to the cloack
4) A dagger (or spear)
5) Her masks.

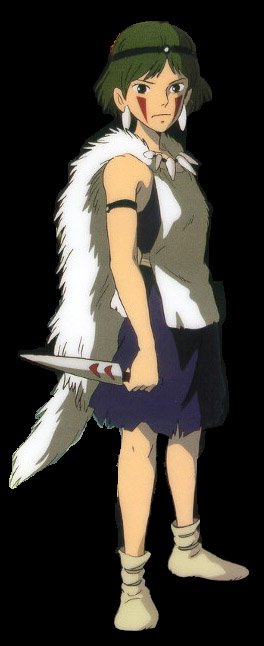
For Fanime 2015, I ran out of time to make her masks, but I managed to pull enough together to go as depicted in the above image. Since she is seen in the movie without her masks, I felt I could get away with not having it, especially as I was going to be working at Fanime.

The complete dress diary is here, including the costume creation.

Headbands & Armbands
At Joann's, I found thick round shell beads and black elastic. I simply sewed the shells into black elastic from Dritz.


I made 3 versions that could be easily tied onto my head and arms.


Earrings
The same trip to Joann's landed me these shell pendants (also on sale). They were the right shape and lightness. I picked up some cheap nail polish (White French tips for $0.99) and painted them.


Then I added earring findings.

Necklace
For the necklace, I wanted something 'heavy' to act as a counterbalance to the weight of the cloak. I bought 3 packages of white Sculpy and 2 packages of black.

Then sat around for an hour trying to get the shapes correct, especially for the claws. I added holes before baking the lot in the oven, per the directions.


Then I took leather and strung up the beads. The loops are for where I would hook them into the cloak via very large buttons.


Dagger

I could have made the dagger out of Sculpty as well. And I've also seen cosplayers make it out of cardboard. However, I have a 3D printer at work, so I thought to use that instead.

I modified an existing 3D project on Thingiverse to create the dagger for San. (The dagger files can be downloaded here, and are under a Creative Commons - Attribution Share Alike license. You can also find the original files that I modified.) 

The knife was printed in 7 different pieces. Six pieces made up two halves of the blade, then I created a new handle for it. Unfortunately, I forgot to take photos of the print job.

I've glued each half with an acetone/ABS glue that I made (using scraps of orange ABS). Hence, why you see orange on the handles.

After glueing the whole thing together, I sanded and painted it. 


Then it was a matter of putting on the final touches. I made a template of the "V"s on the dagger.

Then I wrapped the handle in leather to make it easier to hold.

As I mentioned before, I didn't have time to finish her mask, but I think I'll go ahead and finish up the entire outfit for next year again.


Wednesday, May 27, 2015

Making the Princess Mononoke Cosplay Outfit: Part 1

First up in making the Princess Mononoke costume was to get the main pieces of clothing:
  • The blue dress
  • The white apron
  • The white fur cloak.

Luckily, they were really easy to make.
You can find a complete dress diary for this cosplay here, including all of the accessories.


Blue Dress
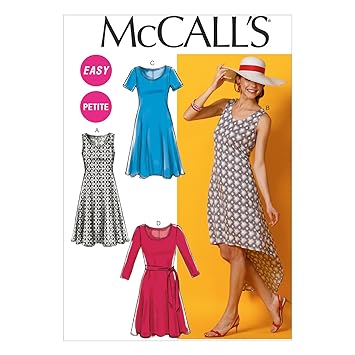
I used McCalls M6957 to create the dress. The pattern was very easy to make and the first mock-up fit nearly perfectly with only a few minor tweaks to the armscye.


It turned out fairly well, and very comfortable to wear. I chose a dark blue knit jersey. I'll probably end up wearing this dress during the summer with a nice shawl.


Apron
For the "apron", I draped and drafted it out on Esme, my dress dummy. 

I had imagined the white apron to be a leather of somesort, maybe doe-skin, but I didn't want the cost. Consequently, I used suedeclothe instead.


Because there's some inconsistencies on how the apron is drawn, I opted to go with a "tab" closure on the apron.

As a finishing touch, I used a leather stitch "X" to attach the tabs to the sides of the dress


Fur Cloak

For the fur cloak, I just didn't want plain white fur, because, outside of arctic or albino wolves, no wolf has complete white fur. Plus, there are photography issues when you have bright white fur.

I checked around all of my local fabric stores and ended up buying the fur cloak online from Fabric.com.  I found fur that was labeled "Husky" (as the dog), and really liked it. The fabric arrived in plenty of time. The fur is white with dark fur bits running through it.


There are two important things you need for cutting fur is a marker (or pencil) and a utility knife (not scissors) You draw out the shape you want, then use the utility knife to score and cut the fabric along the lines.


First, I sketched out the shape of a wolf hide. Here's the haunches and where I'd attach the tail

I cut the tail separately, although on hindsight, I could have just cut everything in one piece. The tail is attached to the cloak after.

I sewed bits of the tail to the inside to simulate curling.


Here's the cloak just pinned to the rest of the outfit.

Here's the back with the attached tail


Fake fur tends to lay flat without any movement. I added some tacks to the inside so that it would look better when worn as a cloak. Here are BEFORE the tacks (left) and AFTER adding the tacks (right)


And of course, the cats LOVED the extra bits of scrap fur laying around, which I let them play with, but I did put away the cloak when I wasn't working on it.


  • Go here for the complete making of the outfit.