Monday, January 26, 2015

Knitting in Seattle

I recently went on a trip to Seattle for a bit of business, but I also had enough time for a bit of fun. I managed to see friends and family, as well as stop by the LYS that was about a 5-minute drive from my hotel.


The place was very nice, well-lit, and had a good selection of different fibers and yarns. The staff were pleasant and very helpful.


I wanted to get something to remember my trip to Seattle, but that was also a specialized item. They had Black Trillium fibers (a local yarn company in Portland, OR, which is 3 hours from Seattle.). After much agonizing on choice, I picked up a fingering weight merino/silk blend in the colorway, "Decay" --- a lovely varigated of greys, purples, blues, and golds. It somewhat reminds me of the grey skies of Seattle with a hint of the sun and blue skies peaking through the clouds.

They also had these magnetic button shawl "pins" that were pretty strong. So, I picked one up.


Because I was travelling, I brought three projects with me (two shawls and a pair of gloves). I ended up working primarily on  Unleaving from Knitty 2012, which I managed to finish!

The pre-blocked version

I'm very pleased with how it turned out. I had about 20 yards of yarn left over (which meant I could have probably knit a longer version), but I can mix it with another similar yarn to make a matching set of gloves or whatnought.

But for now, the shawl is blocked and drying.

I'm finally getting through my backlog of UFOs from 2014!

Monday, January 19, 2015

Re-Working Your Existing Projects -- TARDIS

Recently, I got a chance to test-drive my TARDIS messenger bag out in the real-world. I had to spend a good chunk of time away from home during one weekend, so I packed it with stuff, including a water bottle, three knitting projects (including a sweater WIP), my iPad mini, and small things (wallet, phone, knitting accessories, etc.).

While it was extremely serviceable, I noticed a few flaws that REALLY bothered me that needed to be fixed before I used it at a Convention. I could completely re-make the bag from scratch, or I could take apart the existing bag and re-work it with modifications.

As creating a new bag from scratch would entail more work (and more fabric), I opted to re-work it instead, as the issues could be fixed.

There were two issues:
  1. The biggest thing that bothered me was that the bag was too soft and floppy. It would fall over and not hold its shape; the front and back would fall into each other. It oozed, much like Pile-o-Cat, where I wanted the Tall-Cat bag.
  2. The way I had placed the buckles were not holding the bag closed well. The front flap would slip to one side of the buckles, thus creating a gap. 
Both were relatively easy solutions to fix the problem.

Problem #2 was extremely easy to solve. Because the front flap was shifting away from the buckles,  I sewed them to the front flap at several locations. I also added a magnetic closure to the very middle of the bag flap so that there would be minimal shifting.


Problem #2 was also a relatively easy solution, but it entailed that I take the bag apart, and add thicker padding between the lining and fabric so that the bag was sturdier.  I took some thicker Pellon #70 Ultra-Firm Stabilizer that I sandwiched between some pre-quilted padding that I already had lying about.


The end result was about ~ 5mm (or 0.25 inch) thick.


I inserted this extra padding at the bottom of the bag (to help it stand up), as well as the front and back of the bag.

Here's the bag BEFORE I added the padding. See how it wraps itself around the mannequin slightly and appears to be floppy?

Before

After. 

The re-worked bag can stand on it's own now with a few things inside.

However, because of the extra padding, I wasn't able follow the pattern instructions of turning the lining right-side-out. In addition, the added padding required expanded the width of the bag slightly so that I had to add a front facing all around the edges of the bag in order to seam up properly. This new facing also required that the bag straps be attached differently to the bag -- to the edge of the facing on the inside of the bag. Luckily, this didn't affect the overall aesthetic.

Here's the previous bag without the extra facing.

Unfortunately, the facing had to be hand-sewn into the bag, but it was still faster than creating a new one from scratch.
Here's the modified version with the extra facing

I think these modifications will make the bag more usable. I'm really glad that I took out for a trial run before taking it to a convention.


Previous posts on the TARDIS Messenger Bag:

Tuesday, January 13, 2015

My New Dress Dummy

Many years ago, I bought an adjustable dress dummy that was on sale at one of the big box stores to use. It was useful, but it had its issues. I could only really use it for hemming skirts or pants, but nothing for the upper body as it was not particularly wide enough along the shoulders & back, no matter how much I adjusted it.

I finally decided to actually get one that was a bitter fit for my actually measurements, so I ordered the Uniquely You dress dummy in October 2014. It's made of high density foam and comes with a dress cover that you modify to your specific measurements, which then goes over the foam dummy. Theoretically, if you ever change sizes, you can remake the dress cover appropriately.

I FINALLY got around to altering the dress cover (yes, it took this long). It required some help from my Viking to help me mark the alterations on the dress cover whilst I was wearing it.  We had to coordinate around his work travel schedule, the holidays, and some illnesses (like the flu).

When we eventually got around to making alterations, the dress cover fit relatively well. It only required minor alterations along the back side seams and shoulder seams to take in extra fabric.


Now, getting the dress cover OVER the foam dress dummy took myself & the Viking to accomplish, but we eventually got there. It took several attempts, and my Viking climbing ontop of it to help compress the foam.

There were several adjustments that had to be made because of the nature of the compressed foam -- we had to take the cover off the dummy twice.  According to the instructions, once you initially put on the cover, the foam might overly stretch out the dress cover so you need to make further adjustments.

In my case, the dress cover fit me, but when placed on the dress dummy, the foam expanded over nearly TWO inches over my measurements. I had to take in both side seams by one inch to compensate for the expanding foam. There was also the matter of getting the bust measurements correct and moving the foam around into the proper locations.

However, it's a lot closer to my measurements than the older dummy. The difference between the two is pretty significant.


I can use her to drape out more patterns, as well as check for a better fit on mockups.

Now, I just need to settle on a name for her....

Thursday, January 8, 2015

First FO for 2015

I finally finished my first project for 2015. (Although, yes, I did start it in 2014....) My Sammy cat was very considerate in letting me use him as a prop to show off my socks.

Hopefully, this is a sign that more FOs are in the works for the year.

Wednesday, January 7, 2015

Yearly Roundup

Every year, I take stock on the finished projects that I finished for that year.

It’s not a contest, but rather a progression bar of how much I've actually finished. It helps me realize that I DID get a lot of stuff done in the year (crafting wise), whereas sometimes I tend to think I didn't get a lot done (which is a fallacy by all rights).

So, for 2014, I made the following things:

  • Three full cosplay sewing projects that had a lot of pieces made:
    • Melinda May - learned how to sew leather with the machine
    • 10th Doctor - learned how to tailor a suit jacket and pants. I also made a bonus waistcoat piece.
    • Han Solo - this was a big project, where I made the entire costume (pants, shirt, and vest)
  • Medium sewing project, where I made a TARDIS messenger bag.
  • Little sewing projects, including pajamas, project bags, and donation blankets
  • Leatherworking projects, where I learned how to tool leather and where I made a quiver
  • Beading projects, where I made a few new pieces of bling for me.
  • 19 knitting projects.  Last year, I knitted 24 projects, but I also did a lot of sewing, as indicated above, so I'm okay with this number. It still comes out to 1.5 projects per month.

Overall, I'm pleased with how my crafting and DIY went this year. I learned a lot of new techniques and got to play with a lot of new crafting toys!

For 2015, I hope to get just as much done as I did this year, if hoping for a little bit more. I already have a backlog of things that will definitely be finished, since I started them late in 2014.

Here's a small sampling of the stuff I made. If you want to go back and read about the others, then check out the link --  2014-list-of-projects.


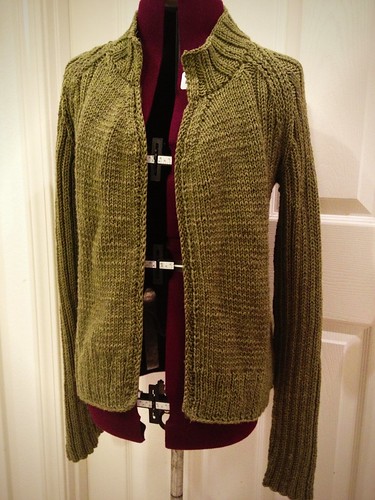
Scotch Moss Cardigan - full