However, a friend and former costuming instructor (who taught a class on corsets) highly recommended these plastic bones from Germany. I used them with great success on my 17thc corset (which I'll post about at a later date), and have been using them for garments that require very light boning.
Plus, the added benefit is that they can be shaped with a pair of scissors.

I cut the boning down to size. (Your garment must be mostly completed in order to size boning correctly. ) Then, using the oversized seam allowances, I created boning channels in the lining of the fabric.

I only added boning to the two side-back seams, as well as in the front piece where I'd be placing the grommets. The boning would add some structure and keep the laced grommets from de-forming the fabric.
Here's the finished front/back of the waist cincher. I sewed down the bottom edge, then top seamed all of the edges accordingly.

As you can see, it's only about 4 inches wide at the narrowest point, so it acts more like a "belt" than an infrastructure garment.

Once all of the sewing was done, I got out all of my grommetting tools:
- a marble slab to pound upon
- a plastic mallet
- an stiletto awl
- a grommet anvil & setter
- nice heavy duty grommets (from Tandy Leather.)
- a piece of leather to place under the anvil.

I use the stiletto awl to pierce a hole through the fabric. I prefer this technique versus "punching" a hole through the favric.

I insert the grommet and use the setter to anchor it into the anvil. Then I use the rubber mallet to pound the grommet close. (I much prefer using "leather" grommets that you can get at Tandy Leather versus the very cheap metal versions from JoAnns or other big box stores.)

Viola! One nicely attached grommet. (You can see the two bone channels that will add stability to the grommets.

Whenever I add grommets to a garment, I always place the non-negotiable grommets (top and bottom) accordingly, then space out the rest as needed. I finished grommetting one side in under 10 minutes.

Once I finish up an edge, then use it as a "template" for the other side. In this way, I know that the grommets always line up. Here's the finished waist cincher pinned onto my mannequin (which doesn't fit it correctly as the mannequin "torso" doesn't match my own so it sits differently).
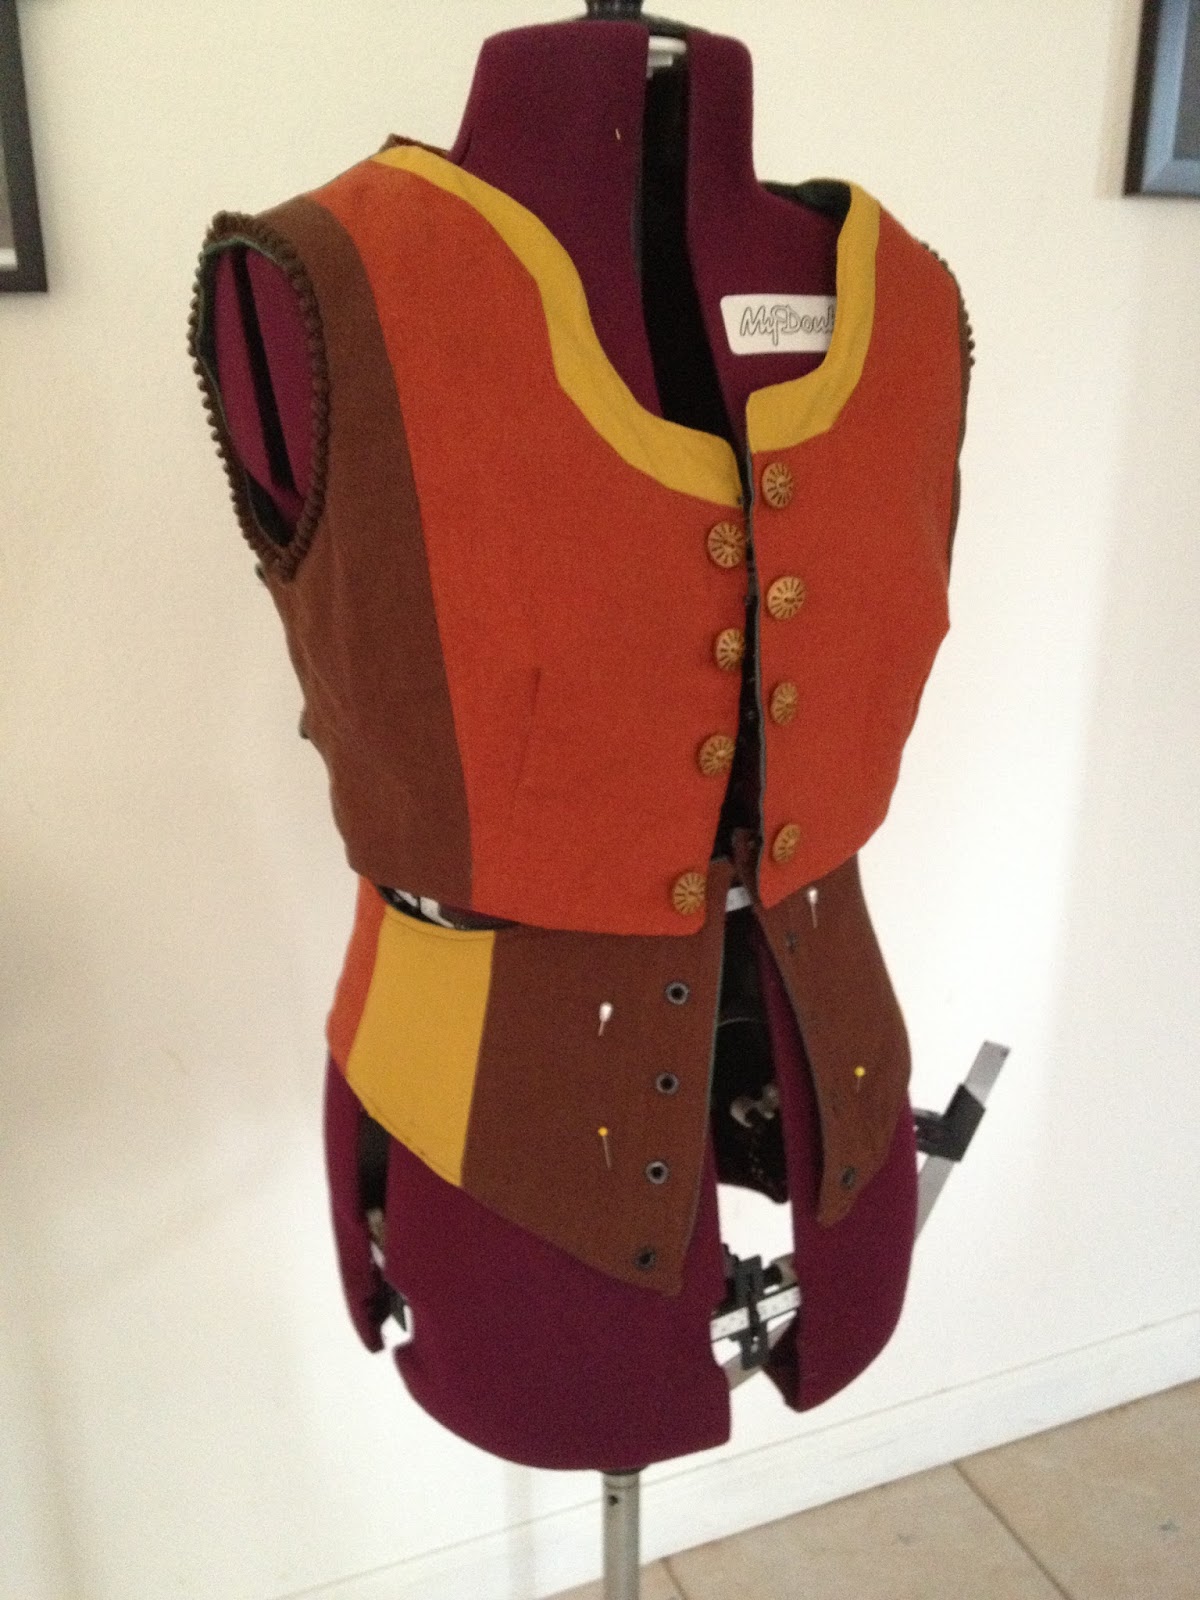
(On me, there is an 1.5" gap between the bottom of the vest and the top of the cincher)
The last thing added to the cincher was the lacing. I learned a nifty trick from looking at various costumes made especially for theatre-use -- sew the lacing directly into the garment bottom so you never have to look for lacing AND the lacing will always be the right "size" for your garment.

I tend to use flat cotton show laces whenever possible. This time, I used nylon ones, but you have to carefully burn the edges of the lacing so that it doesn't fray too badly. (Make sure you do this outside or with good ventilation!)
So, I am DONE with the sewing portion of particular costume. I tried on the whole outfit and it looks great. I still have to make a few accessories to go with the costume, but that'll be later.
And, of course, photos of the cats "supervising" my sewing efforts, and making sure the roll of boning doesn't fly off the table.

No comments:
Post a Comment