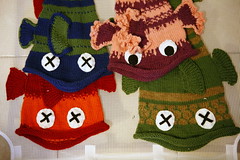
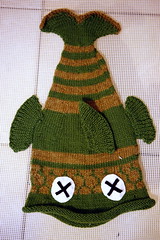
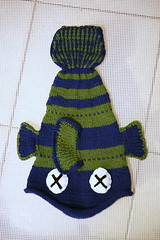
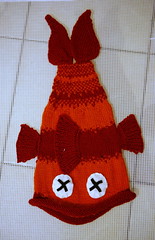
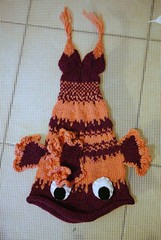
After making the dead fish hat for my Youngest Nephew and being requested by the rest of his family to ALSO make them fish.....
DH also asked if he could have a fish. And after watching me peruse Ravelry, he exclaimed, "I WANT THAT!!!!"
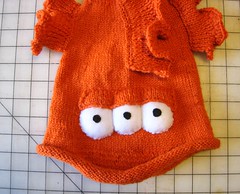
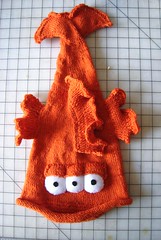
....which just happened to be Blinky, the 3-eyed fish from the t.v. show, The Simpsons.
So, his yarn was ordered alongside the rest of the family to make fish hats. Of course, by the time I had finished making 4 more fish hats (even with variations), I was more than done with this particular pattern. BUT, DH really wanted his hat, so I obliged.
And, although parts of it were very very boring, I did have to figure out how best to make the eyes for Blinky, which ended up being felt and not knitted. I didn't quite like how other Ravelry projects looked with knitted bulging eyes, nor did I want it to be merely flat 2-dimensional eyes.
In addition, I added a bit more depth to the bulging felt eyes by adding an "eyelid"
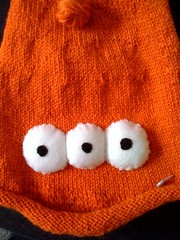
The eyelid is nothing more than a piece of knitted fabric that is knit to the length of the 3 eyes, then containing matching decreases on both sides. A little bit of stuffing is added to make them "puff" up a bit. The whole piece is then sewed/grafted onto to fish body.
After that, the dorsal and pectoral fins are added. The "curvy" bits of the fins are added using a scallop crochet stitch using a combination of double & triple crochet stitches as I saw fit.
The resulting fish is quite handsome. And quite fetching on DH's head
Showing posts with label blinky. Show all posts
Monday, December 27, 2010
Sunday, December 26, 2010
Felt Eyes for Blinky
The following is a brief guideline on how to make the eyes for Blinky.
Items needed:
Making the template for the eyes:
The size of your felt eyes depends on exactly how big your fish is and how big you want your eyes. The items I used were:
a) (for the large template) the small end of one of my spinning bobbins.
b) (for the small template) the tape measure I carry around in my knitting kit -- it's one of those plastic tape measures that are rather commonplace at locales like JoAnns
I would have used a compass, if I had one in the house, but you can use anything, really.
Instructions:
1) Cut out the pieces for the white eyeball using your template. You need 1 pair of a small & large circle. (For Blinky, I cut out 3 large & 3 small)
2) Pair up one small & one large circle and pin them together in the center of both circles
3) Take your needle and thread and sew 90% of the edges together. (Obviously, one is bigger than the other so the big circle will fold over "slightly".) You're creating a dome-like shape using these two pieces of felt.
4) Stuff little dome
5) Sew shut.
6) Repeat steps 1-5.
7) Put two eyeballs together along one "edge" and sew those two pieces together
8) Repeat step 7 for the 3rd eyeball.
9) Cut out your black felt irises and sew them onto the white felt. (I did this last because I wasn't sure how the three eyeballs would look after being attached and didn't want Blinky looking cross-eyed.)
Items needed:
- white & black felt
- needle & thread
- stuffing of some sort
- 2 circle cardboard templates (one large, one small)
- a pin
Making the template for the eyes:
The size of your felt eyes depends on exactly how big your fish is and how big you want your eyes. The items I used were:
a) (for the large template) the small end of one of my spinning bobbins.
b) (for the small template) the tape measure I carry around in my knitting kit -- it's one of those plastic tape measures that are rather commonplace at locales like JoAnns
I would have used a compass, if I had one in the house, but you can use anything, really.
Instructions:
1) Cut out the pieces for the white eyeball using your template. You need 1 pair of a small & large circle. (For Blinky, I cut out 3 large & 3 small)
2) Pair up one small & one large circle and pin them together in the center of both circles
3) Take your needle and thread and sew 90% of the edges together. (Obviously, one is bigger than the other so the big circle will fold over "slightly".) You're creating a dome-like shape using these two pieces of felt.
4) Stuff little dome
5) Sew shut.
6) Repeat steps 1-5.
7) Put two eyeballs together along one "edge" and sew those two pieces together
8) Repeat step 7 for the 3rd eyeball.
9) Cut out your black felt irises and sew them onto the white felt. (I did this last because I wasn't sure how the three eyeballs would look after being attached and didn't want Blinky looking cross-eyed.)
Friday, December 17, 2010
Never Say Never
Yesterday, I got a few minutes to put the eyes on my School of Mostly Dead Fish. I had picked up some felt, cut out the whites, then black felt for the dead irises. Everyone except Eldest Niece wanted 'dead' eyes. She's such a girly-girl, but absolutely adorable.
I really thought I was done with this pattern (after all, I'd already made 5 of these at this point), except then DH asked about HIS fish (which I did promise to make)....*facepalm*
On the flip side, it's is going to be a Most Awesome Fish, because it will be this fish.
So, I cast that on yesterday, and since I really don't have an official deadline, it'll be made in good time. However, I think I shall try and finish it before Xmas so we can take photos of everyone in their hats.
I really thought I was done with this pattern (after all, I'd already made 5 of these at this point), except then DH asked about HIS fish (which I did promise to make)....*facepalm*
On the flip side, it's is going to be a Most Awesome Fish, because it will be this fish.
So, I cast that on yesterday, and since I really don't have an official deadline, it'll be made in good time. However, I think I shall try and finish it before Xmas so we can take photos of everyone in their hats.
Subscribe to:
Posts (Atom)