Showing posts with label 3d printing. Show all posts

Wednesday, September 30, 2015

Cosplaying Hawkingbird: Making Arrows

It's a couple day before Convolution 2016, and this is probably the 2nd to last project entries for this cosplay. I'll get photos of myself and my partner together.


Bow Props

As Hawkingbird is an archer -- something that I am proud to also call myself -- I figured it was going to be relatively easy to put together her archery weaponry.  I was proved wrong. I should really learn that things that appear easy, tend to not be THAT easy.

I didn't need to make any bow, because I already have a bow -- a simple Samick Sage.


The bow is pretty light, but I wanted to make a bow sling --- in purple -- for me to hold it with little effort, so I learned how to make one from paracord, using various tutorials on the web (like this Indestructible tut and others).

My prototype of the sling was made out of black & red. I made a 4-strand braid first, then added a cobra braid.

4-strand braid & cobra braid

I added some "bling" to my cobra braid by stringing the green cord and adding some large beads I found at the store.


I made a purple & black version, which I forgot to take photos of, but you get the gist. Then, it was a matter of making the leather piece for the braid. I made a quick template, based on some photos I saw online, then cut out the piece from some scrap leather that I had.


It came out a little bigger than I anticipated. However, luckily, I found a seller on ebay that sold them for about $3.00 a piece, which is a lot less than I can make it, so I ordered one.

But I still needed arrows for the costume. The arrows were easier to make than the mask or belt, but some work had to be put into it.  First, I couldn't use my REAL arrows, because they are weapons with sharp point tips and can be potentially dangerous, so I didn't want to use them. Plus, I wanted to be larger than life. (Real arrows are tiny things that you don't realize are arrows because they're small in order for them to fly very far at very fast speeds.)

Building Arrowheads

I started making arrow heads using my 3D printer at work. The "real Hawkeye" (aka Clint Barton) had his own set of special arrows.
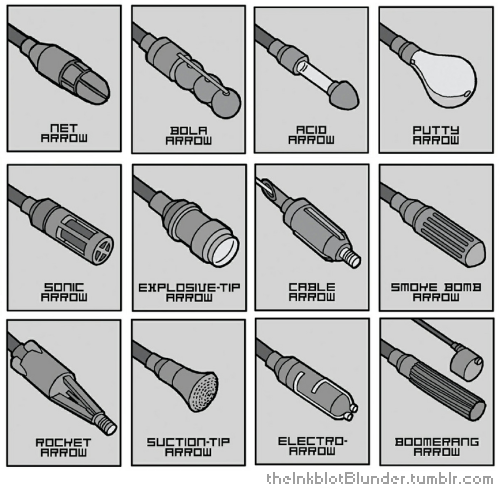

Luckily, I found a 3D print file that let me print out some of them.


You might recall me discussing printing out cosplay props in a previous post. I printed several different types, which came out looking great.

Building Arrow Shafts

What's an arrow head without shafts?  I know that some cosplayers use wooden dowels to build their arrows. However, I had a easier source of arrows. My archery club has old unused arrows that are discarded by other archers. They told me I could use them for any purpose, as long as it wasn't for shooting.  So, I picked up a few very fat arrow shafts.

I primed and spray painted a deep dark purple, as all of Hawkingbird's outfit is a deep dark purple. Then I finished them off with a gloss coating


Fletching Arrows

All arrows need fletches, which act as stabilizers when they fly through the air. I was going to get some large feather fletchings from the archery store, but then found out that they were super expensive for what is simply a costume prop. (If I was putting them on REAL arrows, sure...but, they were $5.00 a piece and I needed about 9 of them, so no.) 

I thought, "Okay, how hard can it be to actually make my own fletchings?" The answer is....not as easy as I thought. An entire profession was once based on being able to fletch arrows. However, I did manage to make passable fletchings. They aren't suitable for real arrows, but look good enough for cosplay.

I got some turkey feathers from my local craft store for about $3.00.

I split the feather in half, cutting down the spine using an exacto knife. This is harder than it sounds. 
TIP: Start at the top of the feather instead of the bottom quill. Make a very short cut towards the top of the feather, then continue making small cuts until you reach the "quill" part of the feather.

Then I shaved down the uneven bits of the feather so that it would attach easier to the arrows.

Afterwards, I cut them into appropriate sizes for my arrows. In my case, as the arrows are really fat, I made four inch vanes.

Luckily, as an archer myself, I have a fletching jig, which helps me correctly place the feathers into place. If you don't have one, put a very thin line of super glue onto your feather and place the first one onto your arrow. Then equally space 3-4 feathers around the shaft.


I opted for three fletches because it's my preference for my real arrows. And I didn't have that many feather vanes. However, the finished arrow looks pretty darn good! 

Here's an entire quiver of arrows.


And here are my prop arrows versus my real arrows for comparison.
(left-to-right: Fake, Aluminum, Carbon Fiber)

Insofar as props, these were easier than the others, although the battle staves only required minimal effort on my part, but I really liked how they came out.

A little effort went a long way.


For those following at home:

The Making of....


Friday, September 11, 2015

Cosplaying Hawkingbird: 3D Printing Battle staves

While I was working on Hawkingbird's dress, I started working on her weapons. First, I started with Mockingbird's battlestaves that she finds in the Avenger's Mansion.


I looked at reference photos of Mockingbird's battle staves for clarification. They are segmented pieces of a steel-alloy that can extend up to 4 feet. In addition, they can be screwed together to form a longer staff of about 8 feet.


Using some online software, I fashioned cylindrical pieces that could be made pieced together individually, then used the 3D printer at work to bring those pieces into reality. I made multiple "middle" pieces so I could make the staves as long as I needed to fit me.

The individual pieces. 

Although Mockingbird's staves are pretty long, they don't appear that long for Kate. Also as Kate wears them on her thigh (with a single elastic strap), mine needed to actually fit my body regardless of how long they are actually "supposed" to be in the comic book.


When assembled complete, each staves were about 13 inches long. I even made a connector piece that would allow me to connect the two staves into a larger staff.


I had some one inch elastic & velcro, and made a thigh holster. In the comic book, she is shown with one holster (as shown above), as well as dual holster in some frames. As more frames show the one holster, I opted to go with the one holster setup.


Mockingbird's battle staves are supposed to be a steel-alloy, and appear to be a white silvery color. I kinda liked the 3D material I used, so I am not going to paint them just yet and might keep them this color.

The Making of....

Tuesday, June 2, 2015

Using a 3D Printer for Props

One of the perks that I get at work is the use of a 3D printer (a Makerbot Replicator 2x). An entire group of employees chipped in to purchase the printer and our company was gracious enough to donate some funds for it.

I've been wanting a 3D printer ever since I saw one at Maker Faire all those many years ago. Each year that we attend (like this year), there are more printers out there at various prices and qualities. It's getting to the point where they are very affordable. This year at Maker Faire (2015), there was an very large tent dedicated to just 3D printers and CNC machines. I counted at least 15 different 3D printer vendors with some very reasonable prices.


But since I have one at work, I haven't felt quite the need (yet) to have one in my own house. So, I've been making copious use of the 3D printer at work to create props for my cosplays.  I've already written about one of the props that I made -- San's dagger from Princess Mononoke -- which has already gotten a lot of "likes" and people adding it to their own collections.


For this prop, I modified someone's existing design (under a Creative Commons - Attribution Share Alike license) to make the dagger. For anyone who wants to make it, I uploaded the files to Thingiverse.com so that you can print out one for yourself. (Princess Mononoke - San's Dagger)


I've also been printing out other props for other cosplays. There's actually a large number of makers who have created costume props from various movies, t.v. shows, and comic books. And the files are free, so I'm making use of their generous creativity.

Printing, printing, printing...

Here's the final object. I won't tell you what it's for....just yet...until I get the other pieces printed.


Let's just say that I've been having fun with many of the existing files on Thingiverse and Youmagine. Plus, since I can print things at work, I start the files and come back some time later to a finished print since it takes anywhere from 1-7 hours for a print, depending on the size.

Here's another set of props. Can you guess what it is?

And, I'm also at the point of making my own very simple props using TinkerCad, which I'll write about later once I get the prints finalized. 

But needless to say, I've been having fun using the 3D printer. It's also changing how I think about certain prop pieces. Once prices have come down a lot further, I'll seriously consider adding one to our home. Now, I just need to hone my painting skills somewhat.


Thursday, May 28, 2015

Making the Princess Mononoke Cosplay Accessories: Part 2

For every costume, accessories must usually be made to complete the outfit. Luckily, the accessories for the Princess Mononoke cosplay were few and fairly simplistic to make.


She had:
1) Headband & arm bands
2) Earrings
3) Claw necklace, which acts as a counterweight to the cloack
4) A dagger (or spear)
5) Her masks.

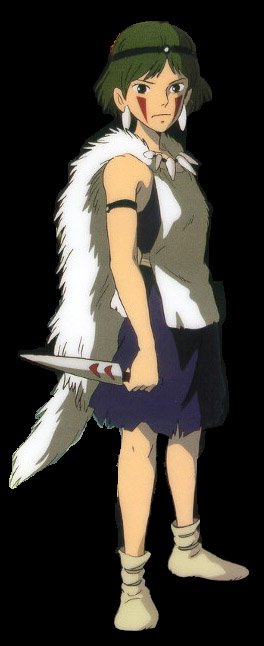
For Fanime 2015, I ran out of time to make her masks, but I managed to pull enough together to go as depicted in the above image. Since she is seen in the movie without her masks, I felt I could get away with not having it, especially as I was going to be working at Fanime.

The complete dress diary is here, including the costume creation.

Headbands & Armbands
At Joann's, I found thick round shell beads and black elastic. I simply sewed the shells into black elastic from Dritz.


I made 3 versions that could be easily tied onto my head and arms.


Earrings
The same trip to Joann's landed me these shell pendants (also on sale). They were the right shape and lightness. I picked up some cheap nail polish (White French tips for $0.99) and painted them.


Then I added earring findings.

Necklace
For the necklace, I wanted something 'heavy' to act as a counterbalance to the weight of the cloak. I bought 3 packages of white Sculpy and 2 packages of black.

Then sat around for an hour trying to get the shapes correct, especially for the claws. I added holes before baking the lot in the oven, per the directions.


Then I took leather and strung up the beads. The loops are for where I would hook them into the cloak via very large buttons.


Dagger

I could have made the dagger out of Sculpty as well. And I've also seen cosplayers make it out of cardboard. However, I have a 3D printer at work, so I thought to use that instead.

I modified an existing 3D project on Thingiverse to create the dagger for San. (The dagger files can be downloaded here, and are under a Creative Commons - Attribution Share Alike license. You can also find the original files that I modified.) 

The knife was printed in 7 different pieces. Six pieces made up two halves of the blade, then I created a new handle for it. Unfortunately, I forgot to take photos of the print job.

I've glued each half with an acetone/ABS glue that I made (using scraps of orange ABS). Hence, why you see orange on the handles.

After glueing the whole thing together, I sanded and painted it. 


Then it was a matter of putting on the final touches. I made a template of the "V"s on the dagger.

Then I wrapped the handle in leather to make it easier to hold.

As I mentioned before, I didn't have time to finish her mask, but I think I'll go ahead and finish up the entire outfit for next year again.