Monday, July 29, 2013

Sewing with Eldest Niece

Last week, I had the distinct pleasure of hosting my niece for a whole week. Luckily, she's an easy going kid, so we had fun visiting bookstores, getting hot chocolate, and seeing a bunch of museums (and one theme park for the roller coasters).

I also taught her some basic sewing skills.  She needed a new skirt for the various Renaissance fairs that she attends with her family. I had recently gifted her an bodice and blouse that no longer fit me (as they were from my college days), but she needed a matching skirt. This skirt was going to be a very simple circle skirt that doesn't really require a pattern, just a bit of simple math.

First, we started off with her basic measurements --- her waist size and waist-to-floor height. Then I had her do the math to figure out the radius/diameter of the skirt and the necessary circumferences.


(If you've never done a circle skirt before, it's quite simple. There are a lot of tutorials out there for circle skirts like this one, this one, and even a calculator to help you figure out how to cut.)

For her skirt, we went to a chain fabric store and found a lovely linen/cotton blend fabric that was a deep dark plum color that was in the same color tone as her new blouse and bodice. We got the last of the 3.5 yards they had.  We also picked up some bias tape that was similar enough in color to her blouse.

I measured out the skirt pieces while she watched. We didn't have enough yardage to do the whole skirt in one piece, so we measured the circle into fourths. I used tailor's chalk to draw out the lines of the skirt.  Then she cut out the fabric.

For added stability, I used my serger to bind the edges of the fabric so they wouldn't fray. Then we pinned the skirt pieces together, and I taught her how to use my sewing machine to do a simple straight stitch.

She sewed all four panels together, while I cut out the waistband for her skirt. At first, she was a bit hesitant in her sewing, and went very very slowly. But as she got a bit more confident, she started going faster and faster. By the last skirt panel, she was ripping through the straight seams.


I helped her attach the waistband to the skirt, and she sewed the waistband onto the skirt. I sewed the channel for an elastic waistband, and she helped to pull the elastic through it.

As a final step, instead of hemming the skirt, we pinned bias tape to the bottom of her skirt (which was also serged) as a form of decoration as well as to tie the skirt color back to her blouse.  She sewed the bias tape onto the skirt.

Viola! The finished skirt along with the blouse and bodice.


Wednesday, July 24, 2013

Final TDF 2013

Sorry that I haven't been posting. I have my Eldest Niece this whole week, and we've been busy doing auntie and niece type things!

But, I took a couple of quick (crappy) shots of my final skein of the 3-2 cable for the tour de fleece 2013.


The final skein is about 8 WPI instead of the 6 WPI I had estimated, but it's close enough. It's about 217 yards @ 5 ounces. There's an assorted 1 ounce spread over  a couple of bobbins that I still need to finish plying, but my plying bobbin was full.

Friday, July 19, 2013

Tour de Fleece 2013: Finished!

My goals for Tour de Fleece 2013 were fairly simple, because I knew that I'd be travelling for a few conventions and other events during the 20-something days of the tour.  Consequently, I decided to do a "simple" 3-2 braid yarn

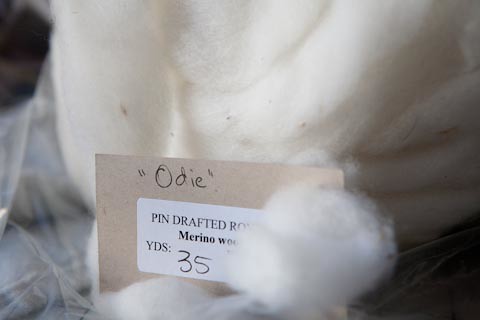
I had a white merino hogget fleece that I wanted to play with during the tour; his name was Odie. My plan was only to spin up 6 ounces for this 3-2 braid.

Odie

Here are two of the singles in quills, where each single is ~ 36 WPI. These singles were true woolen spun on my Traddy. They are "loosely" spun singles -- and in fact, I could be heard swearing up a storm on a fairly regular basis.


All 6 quills were then 2-plied into 3 separate bobbins, which are very overspun (because I'm going to be plying them again). The resulting 2-ply yarn is about ~18 WPI.


All of these singles & 2plies led to a HUGE bobbin of a 3-2 cable ply, which according to calculations, should be approximately 6 WPI, which is going to give me a slightly bulky yarn once I full the resulting skein.


I needed to finish up early for the Tour de Fleece, because we were going to be away (again) for the last few days of the Tour. I don't have time to completely finish up the skein, so pictures of the completed skein will have to wait until my return.

Next year, I'm going to work with a bit more color. It's hard to post progress photos of a WHITE fleece being spun into yarn. It's not very exciting.

Monday, July 15, 2013

Halos of Hope-a-thon


This past weekend was one that somewhat went full circle for me. The weekend that the Purlescence Yarns was hosting the "Halos of Hope" knit-a-thon -- which is a charity organization that collects crafted hats for chemo-patients. They stayed up for 24 hours knitting towards a goal of 200 hats.


On this very weekend, I attended a memorial and wake for a friend who recently died of cancer and who was a knitter herself. So, this event was a particularly poignant one for me. I stopped by briefly after the memorial, and it was good to see so many people taking part in it.

The box in the center is filled with hats!

I did not stay for the whole Halos of Hope-athon (as much as I wanted to, but couldn't because of my commitments that same weekend). But I followed their progress closely on Facebook. By the end of the K.A.T, they collected 210 hats. There were 30-40 knitters working away at any given time; the shop was full of knitters!. Many stayed the evening to knit hats the whole night.

The Knitmores were there giving away swag bags and doing their part in the K.A.T.


You can see more photos on the Purlescence Yarns Facebook page. You can also donate any knitted hats or money to Halos of Hope to help cancer patients. It's never too early or late.


Wednesday, July 10, 2013

Avengers Gowns

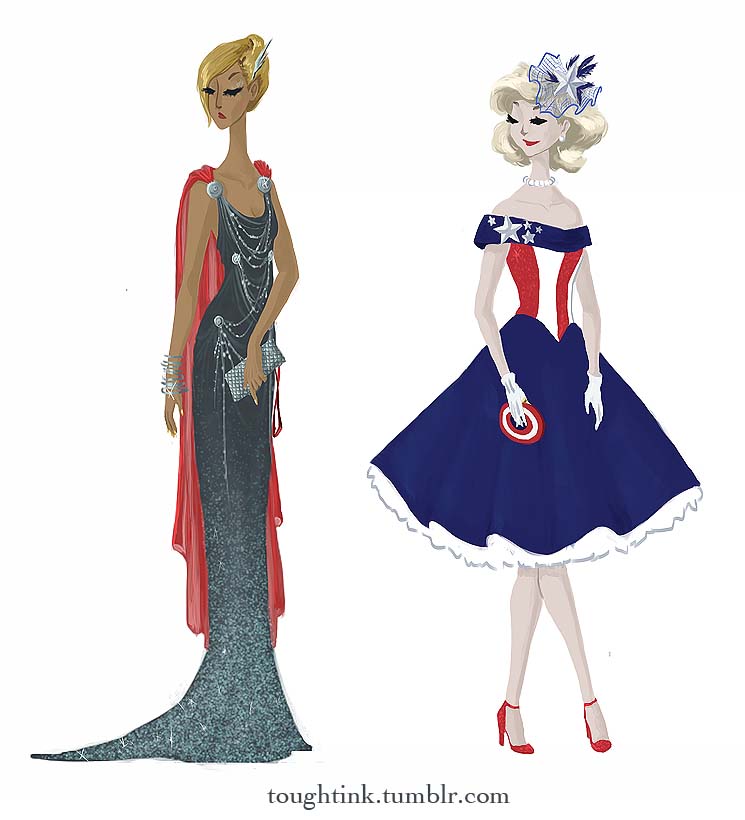
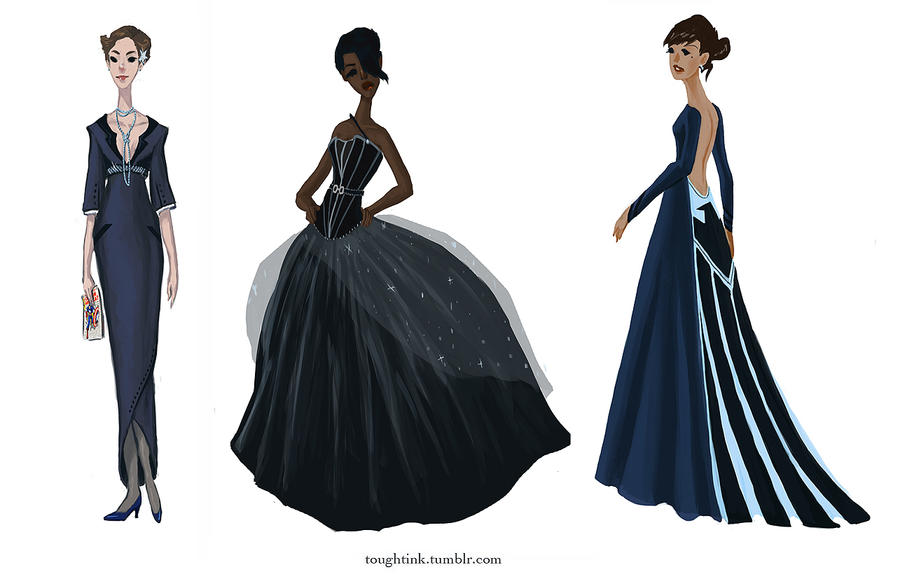
Some time ago, a wonder illustration appeared on DeviantArt by Kelsey Michele, called "Avengers Gowns". I love how many artists take beloved characters into completely new directions.

For the Avengers Gowns, Kelsey flipped most of the genders and put them into evening gowns (of a sort). And my wonderful friends decided to do interpretations of these gowns, and I was lucky enough to be able to photograph them at the WesterCon66 Masquerade.

First up, Thor & Captain America:


Then IronMan & the Hulk

Loki in her green gown and wonderful headdress

Then there's Hawkeye (right) decked out in PVC

And Agent Maria Hill (rightmost)


It's a wonderful take on all of the characters of the movie, and I think they did a spectacular job costuming for their chosen outfits. Their costuming talents are superb and the attention to detail really shows.

Tuesday, July 9, 2013

Knitted Klingon!

As masquerade photographer, I often get to view a costumer's creations before the convention public, and many of them just blow my mind of the craftsmanship, creativity, and effort that these costumers put into their outfits. It's a little perk, but I enjoy it immensely.

This WesterCon had a motley of spectacular costumes, and I enjoyed every single one of them. However, when someone mixes my two loves -- crafting and science fiction/fantasy -- and bring them together in a grand mash-up of creativity -- well, I just have to stand up and take notice. And this particular masquerade entry just blew my mind as a knitter!

IT'S A KNITTED KLINGON!

©Jade Falcon

Yes, you see that right! It's an entire Klingon outfit that has been knitted head to ankle.

The costumer in question (Shael Hawman) knitted an entire Klingon outfit --- from her cabled hat to mimic the Klingon forehead ridges, to her braided yarn wig, to her simple ribbed dress. This Klingon is dressed head to foot in yarn-y goodness! And her bat'leth was knitted out of yarn over a bat'leth form! (Or at least I think so -- I'm not quite sure how she created her bat'leth.)

©Copyright Jade Falcon

This costume was something that I hadn't even conceived of creating, but now that I see the finished object, it is definitely a marvel to behold. She knitted the whole thing out of acrylic yarn -- as she told me it would be much too expensive to knit completely out of wool. Even so, she said was very warm underneath all those knitted garments.

I found out later that she won Best in Show - Workmanship at BayCon2013. So much kudos to Shael on her amazing outfit.

(I'm still working on getting the rest of the Masquerade photos up, but I thought you guys might enjoy a sneak peak.)

Monday, July 8, 2013

WesterCon66


This past July 4th weekend, we went up to WesterCon66. I was slated to photograph the masquerade contestants for the convention. My lighting gear had been shipped up to the convention, held in Sacramento, CA earlier in the week.


Needless to say, the convention was fun to attend. It was a small convention (~approx 900-1000 people), but a good convention. Some of our friends were in attendance, including folks whom I hadn't seen in about 2 years, so it was good to catch up. Much like a knitting get-together, much of fandom are amazing and gracious people and I fully enjoyed their company.  Many of the costumes walking the hallways were pretty spectacular, and I enjoyed many of the panels there.

 
(Clark & Superman together in one location!)

Also, the masquerade shoot went off with nary a hitch. The costumers were varied and extremely creative in their work. I'm still in the process of processing the photos I took of the masquerade contestants, which I'll post here as time progresses and I get through the backlog.

So, gentle readers, I am here, just swamped with the post-con work that needs to happen. I'll do a write-up of the convention as time permits.

Thursday, July 4, 2013

3rd of July Fireworks

Tonite, we went off to a local fireworks display that we had not yet seen before, so I could get my fireworks fix. It was put on by the sheriff's department, and was at a local elementary school (ontop of a very large hill). There were a lot of families with children.


The show, itself, was okay. It wasn't spectacular, but not bad. They only set out a few fireworks at a time, so in a way it was a bit sparse, which IMO, doesn't make for quite the dramatic photographs. But, their budget was small in comparison to other shows, so I understand the constraints.


On the flip side, it was REALLY REALLY CLOSE. We were about 100 yards away from where they were launching them. There were a few times, I had to go really wide (24mm) in order to catch some shots. I'm glad I brought a wider angle lens.


Unfortunately, despite my sage advice about the remote shutter release, I did not have mine with me. After looking for it, I realized that it had gotten packed with my lighting gear for WesterCon66 and had been put on the truck as of Tuesday before the 4th. :-(


So, I used manual setting with F22 and a 3.2 second shutter speed and a self-timer delay. I tried to time it as best as possible, and luckily, with only a few launches at a time, it worked fairly well.


I hope to get more photos before the weekend goes out, and will post those as I can.

Wednesday, July 3, 2013

How To: Shooting Fireworks

Are you planning going out on the 4th of July to shoot fireworks? Here are some helpful hints to taking fireworks photos in your area.

(All photos below are taken at about 100mm @ ISO 100 F11 - F22 for 1-5 seconds. )

1. Get to your location EARLY and decide where to take photos 

You'll need to get to your location early so you can set up your photography gear quickly and time to do some test runs before the big show. You'll want to know where you are in relationship to the fireworks are being launched. You might want to:

  • consider taking photos with trees, buildings, or people in the foreground to show scale of the fireworks OR
  • simply taking photos of the fireworks in the sky. 
Whatever you choose, make sure to set up early. 

In the photo below, our fireworks were above the water, and there was a ship moored in the distance that I used to take photos.


I've been known to arrive 4-5 hours ahead of the fireworks display to set up "camp" in specific locations. DH & I will bring a picnic, blanket, food, and warm drinks. 

 2) Use a tripod 

A tripod is a MUST for shooting fireworks. You need to shoot your photos with a slow shutter speed, and a tripod is an absolute necessity for preventing out-of-focus images. Trust me, you're not going to be able to hold the camera still for the amount of time necessary to take a photo.

Also, make sure no one will accidentally bump into the tripod during shooting. I tend to hang my camera bag or a sandbag on the tripod to help weigh it down so it won't move. 


3) Set Your Camera Settings ahead of time

During a fireworks show, you're not going to have time to make a lot of adjustments to your camera. So, you want to set your camera ahead of time and just take photos (which is why you should arrive early). Here are three things you need to do:

a) Use slow shutter speed. 

You want to capture a good deal of the actual fireworks instead of a few scant moments. I tend to use extremely slow shutter speeds…as in SECONDS. I tend to shoot firework photographs anywhere from 1-5 seconds.

b) Use an increased F-stop (or Smaller aperture)
Use a smaller aperture (f11 - f22). Why these settings? Because if you are using a slow shutter speed, it means that you will let light in for a longer period of time. If you use a large aperture setting (such as F2.0, F4.0), all you're going to get is a white photograph.

c) Manually focus your lens before the show starts

Auto focus is not going to help you take good fire work photos. There isn't enough light or contrast to let auto focus work. The trick is to set up your camera early and take a few test shots. Use something in the distance to help focus your lens --- maybe there is a tree in the distance, maybe it's a plane, or a building. 

Use those to set up your focal length of your camera.


4) Use a remote shutter release 

Because you're using such slow shutter speeds, any movement or shaking in the camera will cause motion blur. Even pressing on the shutter can cause movement in your camera. 

Consequently, a good remote shutter release will help you take those photos. There are cabled versions that physically attached to the camera and wireless versions. I have a wireless version that I hold and count for X number of seconds. I tend to press the shutter release when I see the fireworks launch into the air, and count out the seconds, or whenever I hear 2-3 pops of the fireworks. 


5) Don't Stop Shooting.

Once you have set up your camera properly, all that is left for the fireworks display. There's a certain amount of luck trying to get good fireworks shot. You won't have time to look at your photos during the fireworks show, only afterwards. So keep your finger on that shutter release and keep shooting.


I hope that all of you have a safe and sane 4th of July weekend. I would love to see your photos!

Tuesday, July 2, 2013

TDF: Heat Wave

Here's the weather forecast for our area for this week.


And with 60-80% humidity. UGH.

I'm not wholly sure how much I'm going to get spun for Tour-de-Fleece with the heat being this bad. I'm having to wait until the house cools down enough in the evening to even contemplate holding wool.

We don't have air conditioning in the house, but relying on fans, cross-ventilation, and cool evening breezes.

However, I am persevering, albeit slowly.

Monday, July 1, 2013

TDF 2013: And they're off!

If you're a spinner, you're probably well aware that the Tour de Fleece started on Saturday.

If you're not a spinner AND haven't been following my blog, then you probably don't know WTH I'm talking about. But, basically, it boils down to this...

During the whole time of the Tour de France, spinners all over the world are getting on their spinning wheels (and drop spindles), and spinning while the bicyclists ride. Why spinning? Because spinning wheels have, well, wheels, and bikes have wells. Ergo, Tour De Fleece.

Each spinner picks a "goal" for the whole tour. It can be something as simple as spinning and watching the race, spinning 10 minutes a day, or maybe spin a pound of fiber. The tour de fleece is meant as a challenge.

This year, I'm spinning part of a hogget merino fleece into a nice 3-2 cabled yarn. My primary goal is to spin 6 ounces and get it plied. My secondary goal is to spin 12 ounces into singles.

   Odie

My plan? Spin 72 WPI singles, that will then be plied into a 36 WPI 2-ply, which then ply the 2ply into a 3-ply cabled yarn. (It's a lot of plying!)

The race started on Saturday, but on that weekend, we had a veritable heatwave. The kind were you find yourself "melting". Between the humidity and the heat, I was only able to spin about 1/2 ounce into fine singles. Having wool in your hands in this heat was not a good combination (esp. when I don't have air conditioning in the house!)


For those in the Tour-de-Fleece, good luck! Let me know how your spinning goes!