Tuesday, July 31, 2012

Slugs on the Brain

If you're a fan of the show, Futurama, I'm sure you're familiar with the brain slugs. As DH is a big fan of the show, he said he wanted one of these to wear for conventions or the ilk, when he didn't quite feel like wearing a costume.

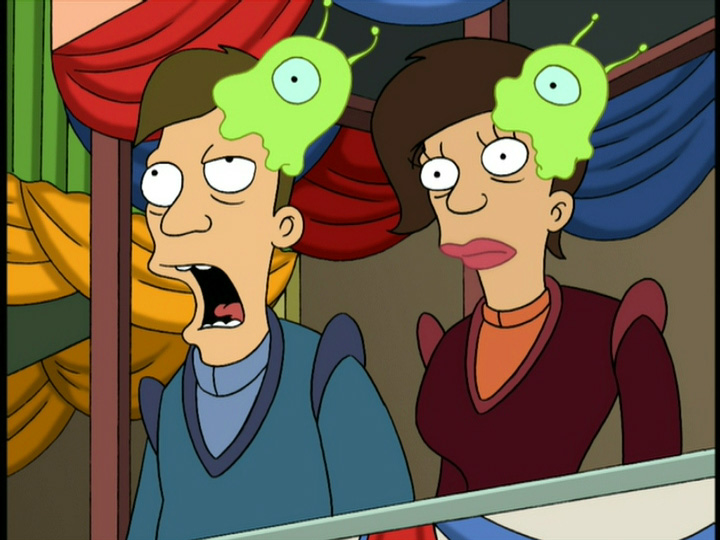
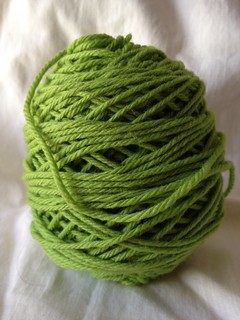
So, obviously, I had to make it for him. And what better way to do it than crochet amigurumi. First, however, it was getting the necessary colored yarn. I had thought to use just Lion Brand acrylic, because, it's a) cheap and b) I usually like making my toys out of acrylic yarn. 

However, they didn't have the right color, so I just went with Cascade 220 in Apple Green (which was approved by DH).
Picture 002 

I took a look through Ravelry at some of the patterns, but many of them seemed way too large or I didn't quite like how they looked, so it was time to improvise. I'm particularly fond of amigurumi and no stranger to creating such toys. This one was rather simple. But, first I made a small prototype to see if it'd work;


Prototype 

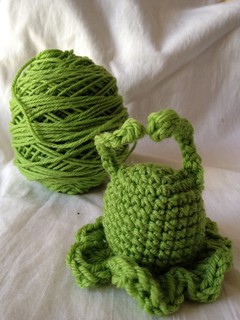
The initial prototype was a bit too small, and DH didn't like the ruffles, as he felt they were too doily-ish. This one fit my head a little bit better than DH's head (which is a big head in the literal sense). So I increased the size by about 20%, made the ruffling a little bit uneven, then sewed together a felt eye (using the tutorial I posted), which was then attached to the body with needle & thread.

Final Brain slug

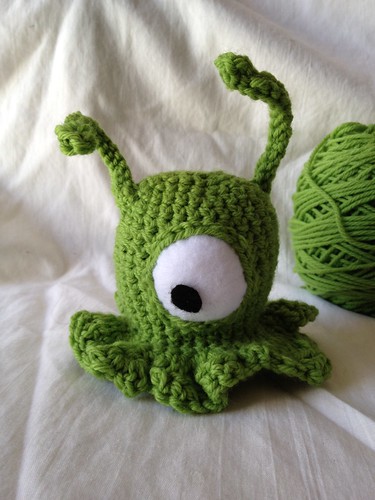
To provide a little "depth" to the eye. I crocheted a chain long enough to go around the eye, and sewed it down. Then, DH placed the iris, himself, and it was just a simple matter of glueing it down in the appropriate spot. It was then stuffed with some scrap yarn that I had recently cut off my loom.

It took an evening to create the prototype and then the final brain slug.

Monday, July 30, 2012

Leather and then Some

Sometimes, I want to do something a little different from the norm. In my opinion, it's good to have a wide range of skillsets ...especially when the zombie apocalypse should occur. And it's even useful to create things that you need on a daily basis.

In my case, I wanted a new belt to match my blood red shoes. Luckily, I had some leather and belt findings lying around.

Belt Blank


Leather Belt 1

After some quick use of my hand-dandy leather tools (all conveniently placed in a single toolbox) and using a favorite belt as a generally template, I had a brand new belt to use for tomorrow.

Finished Leather Belt


Leather Belt Finished

In addition, I still had some left over leather from another project, so I created a belt hanger for me to use at various Renaissance Faires. Simply put, a belt hanger hangs from your belt and can hold a variety of things, from small bags to tankards. At Ren Faires, I primarily hang my tankard. These things cost anywhere from $10 - $20.00 a pop. The left over leather cost me nothing, but the lovely Kells Dragon conch only cost me $3.00.

Belt Hanger

Belt Holder

Wednesday, July 18, 2012

Reverting to Paper Patterns

Despite all my work on the various UFOs that had been languishing in my knitting basket, I was jonesing for casting on a sweater. I don't know when I turned into a sweater knitter, as the year before, I was all about knitting socks.

But now, if you look at my finished Ravelry projects, I've finished four sweaters this year, which isn't too bad, all things considering.

And I just started a new sweater, involving cables and double moss stitch. I was dutiful and made a cabled gauge swatch. Normally, I knit loosely and have to go down 2 needle sizes from the recommended needle, but as this involved cables, I tried the recommended US 7. However, I didn't like the resulting fabric too much as I felt it was too dense, so I went up to a US 8 and got gauge.
  Raspberry Cardigan Gauge Swatch 

The swatches were washed & blocked, and I started knitting on the sweater. But I had to frog the beginnings of it once over, because I couldn't get the cabling correctly, because the front starts with a partial cable and as you increase stitches, you work the cable pattern. And my poor brain couldn't wrap itself around the concept, nor could I visually see how this was going to work.

I had re-written the pattern to work the sweater as a single piece (instead of having to seam panels), and my Excel spreadsheet was ACCURATE. However, it didn't take into account the visual aspects of the chart (although my iPad displays the chart easily enough.)

I had redid the cabling on both sides...frogged just the cabling...redid the cabling...then eventually frogged back to before the cabling started. sigh.

Then I hit on a simple solution: PAPER

My pattern is digital on my iPad, and my PDF reader has a nifty feature that allows me to highlight notes and some charts, but sometimes you need to have something in front of you that is visceral.

I printed out the cable chart and went through the pattern line-by-line with highlighter and pencil in hand, and marked out where increases happened and where it was the cable pattern for the Left Side. Then I repeated this exercise for the Right Side. Now I can clearly see how the cabling is going to look on the sweater.

Colored Charts
Hopefully, this trick will help me get this patterning right.

Oh, don't get me wrong. Using my iPad for reading patterns is awesome. I love it. And I will continue using my iPad. But sometimes, it helps to mark up a paper pattern just for notes. (I'll still be using my excel spreadsheet to refer to as I knit, however.)

Monday, July 16, 2012

ComiCon - a Love/Hate Thing....

Ah, Comic Con has come & gone. I have not yet gone to San Diego Comic Con, which some claim is the mecca of all geeky-ness. Although, I have attended similar, but smaller events, like San Francisco's Wonder Con.

I have many friends who go, but it is something I have yet to attend. In fact, I have a love / hate relationship with ComicCon.

Love:
  • a lot of geekyness can be had there.
  • Some of my favorite stars, authors, and show producers/directors attend
  • There are show previews and lots of swag
  • Stuff that you only see at ComiCon. (Not that I need stuff, but it'd be interesting to SEE)
Hates:
  • It's HUGE...50,000+ of your closest friends
  • Lines. You stand in line to get in line, for the line of the panel you want to attend.
  • You might only get to 1-2 panels the WHOLE weekend
  • It's turned very commercial
I WANT to go AND, simultaneously, I have no desire to go :-(

It's a conundrum, I tell you.

But, perhaps one day, we'll make the trek to go to Comic Con, then to just say we had.

Friday, July 13, 2012

FO: Blue Steel & Granite

Shortly after July 4th, I finished my UFO shawl-ette that I apparently had started in September 2010 (according to my Ravelry page)! I hadn't realized it had been that long.

I had put it down with only 3 inches left to finish. I have no idea why I put it down, but it feels good to finish it. And I really love how it looks striped. The yarn coloration worked out well.


IMG_1043

Thursday, July 5, 2012

Finished UFOs...

I've been on a UFO kick -- as in finishing up some unfinished objects. I had been feeling ennui on starting anything new, and I was cleaning up some of my knitting and came across some UFOs that I thought, "What the heck? Let me finish these up."

1) I started knitting on a UF shawl object (Age of Brass & Steel) that I started a while ago out of my handspun, Targhee.
Age of Brass & Steel Targhee 2ply


I have no idea why I put it down. I was about three inches from finishing. I'm currently working on finishing this project now.

2) I also managed to salvage a cardigan that I thought had to be frogged, but I procrastinated because it is knitted from pure alpaca and that is a royal pain to frog.

This particular sweater (started in '09) was the first cardigan I had attempted to knit, and had put down several times. I was nearly finished -- I had blocked the body pieces, seamed them together, and had added a hood. But the sleeves didn't work with the body, although I had followed the pattern exactly. I finally went back to Ravelry and read the comments --- a lot of people had issues with this pattern, esp. with things 'lining' up (heck, the body pieces didn't line up correctly and I had to do a lot of easing to make things work).

I had given up on the sweater and thrown it into the basket for a 'time out' because I was thoroughly frustrated with it. However, now that I had knitted several sweaters under my belt, I looked at the project with new eyes. I tried on the body and it did fit; it wasn't too badly off. The armscye was a little large, but a sleeve cap would help with that issue.

The sleeves were unusable w/o re-knitting them both. I could have picked up stitches around the armscye and knit 'after-thought' sleeves, but that would have been too much work and something I couldn't face doing considering how long this sweater had languished. So, I thought to myself:

"Self, why not turn this into a vest? You've done several already, and this would save your time".

And myself agreed. :-)

I picked up 87 stitches around each sleeve and knit several rounds of 8 roundseed stitch to form a sleeve cap (decreasing by 4 stitches total). Then I added a button & an i-cord button loop. About 1.5 hours later, I had a finished sweater vest, which pleased me mightily, as I really thought this project was a lost cause.
Salvadged Cardigan Salvaged Cardigan 3 Salvaged Cardigan 4
I still have a few UFOs still lazing about. We'll see if I get any more done after I finish the shawl. Although I have to say, it feels REALLY GOOD to get finish a languishing project.