Showing posts with label 2013. Show all posts

Thursday, January 9, 2014

Beading with Purpose

Every year, when we visit family for the Winter Holidays, my SIL and I bead jewelry. I bring up my beading supplies and many of the pendants, beads, etc., I've purchased throughout the year, and she lets me dive into her massive stash. We usually take over the dining room table a few hours on the dining room table, talk, and bead. It's a time that I greatly enjoy spending with her.

This year was no different.

When I make jewelry, I like to match beads on what I think of as the theme of the pendant.

I had two Chinese dragon pendants -- one bright bronze and another aged bronze.  I wanted pearls for the flaming pearl and jade (for the Chinese dragon. She also has some colored pearls the same tone as the either pendant
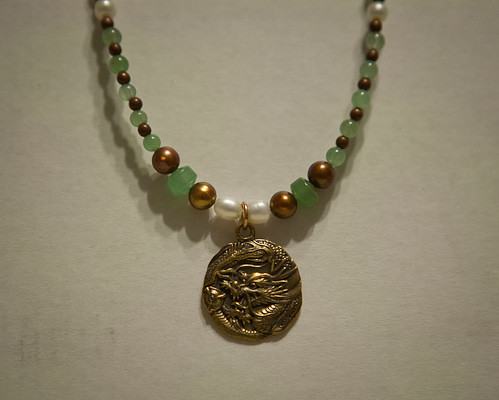
  Chinese DragonDragon

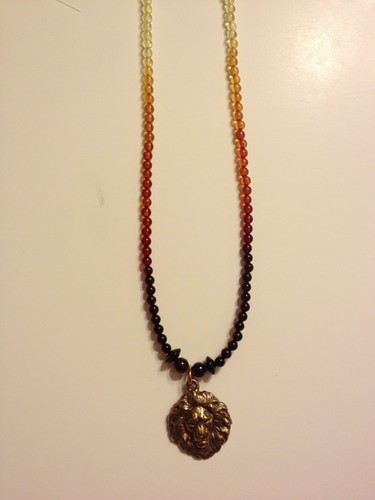
At a previous beading show, I had picked up amber beads in a wonderful color array of dark reds to light yellow. It reminded me of the different reds of the sun. So, naturally, I paired it with a bronze lion pendant. It's gorgeous in its simplicity.
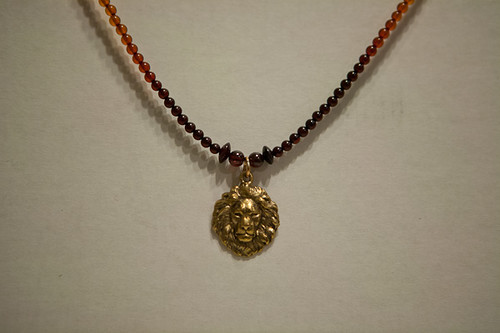
Lion

Here's another shot of it, taken under different circumstances.
Untitled

This ouroborous pendant matches some earrings that I had picked up the previous year. I decided that this one need garnet and amber beads.

Oborous Snake Pendant
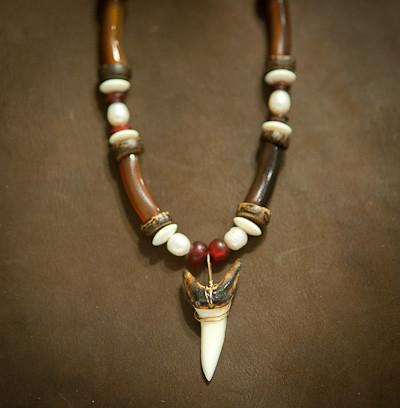
I've had this shark tooth since I was a kid when I visited Hawaii one year. It's wire-wrapped in gold and only used to be on a simple black cord. I tried several times to couple it with various things but with no success.  My SIL had some interesting beads so I decided to make something completely different than my normal jewelry creations. I like it.
Shark Tooth Necklace

I purchased this whale tale some time ago; I don't remember. But much like the shark tooth, I couldn't quite figure out how to use it. I knew I wanted some blue for the ocean and white pearls.

Some dark lapis served for the dark blue of deep waters and the lighter turquoise for shallow water. I also had some dark blue czech beads that I used for the main body of the necklace.
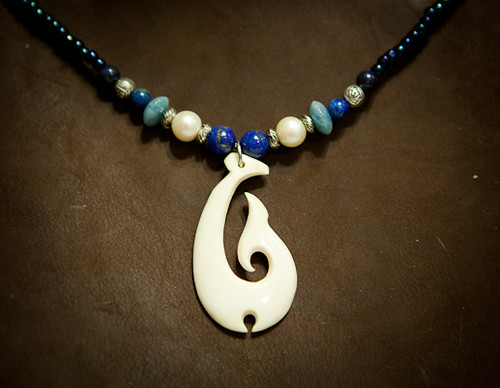
Whale Tale

I also made a necklace for the Viking so he can wear it to the various Faires we attend. I wanted something chunky that he could wear. I found a turtle pendant made out of cow-horn that I knew he would like.

I took apart a necklace that I had made previously (the ones with the shells) because I found I wasn't wearing it as much as I thought. I coupled it with some green jasper (for the color of sea turtles) and some lapis to signify the blue of the ocean.
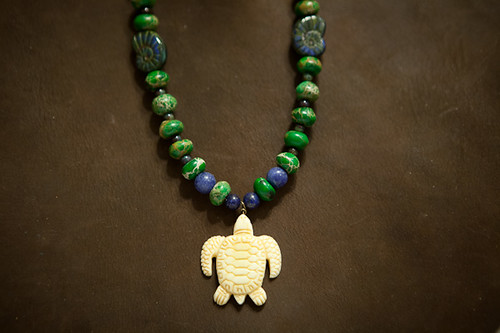
Turtle

Tuesday, December 31, 2013

Viking Helm for a Viking

It is very difficult to buy gifts for my Viking. This holiday season was no exception. Usually, I ask him flat out what he wanted. This year, he wanted a knitted Viking helm, complete with horns (even though he knows it's not quite historically accurate), but it is quite stereo typical.

We looked through Ravelry and he pointed out what he liked, what he didn't like, and what colors he wanted. I decided to use one Ravelry pattern as the base, making some modifications to it. I picked up some Cascade 220 in the approximate colors he wanted, and got to work.

My plan of attack was to a) knit up a beanie hat; b) knit the band separately; c) crochet the horns to make it denser than knitted fabric. So, here are my modifications to this pattern:

  1. Using SILVER GRAY YARN, do a provisional cast on for 96 stitches and knit the rivet band 
    • Moss stitch 4 rows
    • Knit 4 rows
    • *K7,  make bobble*  - repeat to end
    • Knit 4 rows
    • Moss stitch 4 rows
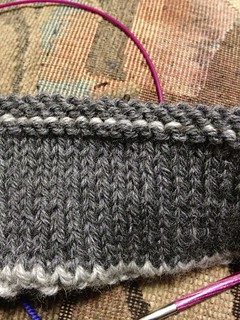
  2. Using DARK GRAY yarn, then knit until the same height as the band. Fold this band over to make a thick "head" band.
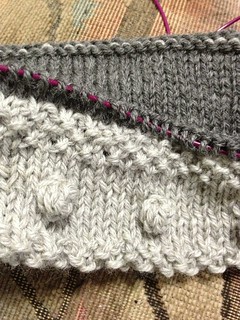
    Untitled
  3.  Slip 11 SG yarn onto waste yarn. 
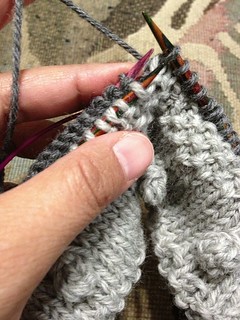
  4. Knit 1 DG + 1SG together to form one stitch for 37 stitches (96 - 22 = 74 / 2 = 37)  Viking Helm Band
  5. Place 11 silver gray stitches on waste yarn, and knit 1 DG + 1SG together for 37 stitches. You end up with something like this:
    Untitled
  6. Knit hat in dark gray for 5.5" from brim. Then start decreases. 
  7. Pick up the 11 front stitches and knit band separately until it is the length of the hat. 
    • Row 1: p1, k1, p1 k5, p1, k1, p1
    • Row 2: k1, p1, k1 k5, k1, p1, k1
    • Bobble Row: Every 9 rows, insert a bobble in the middle of the bobble band ---- (moss stitch) k2, mB, k2, (moss stitch)
  8. Kitchener stitch the band to the back 11 stitches. 
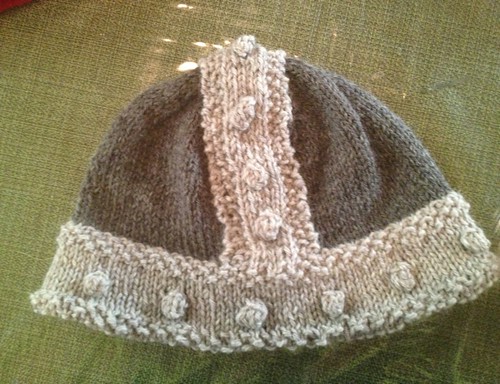
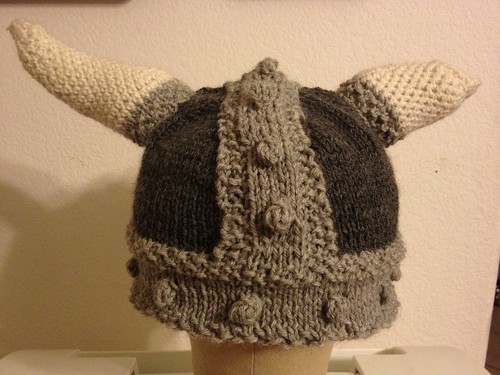
  9. Sew down the edges band as desired. You get the following looking beanie.

Untitled

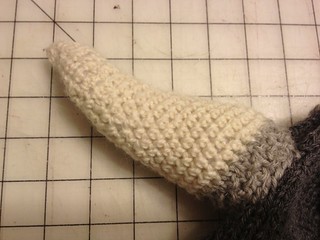
Once the hat was finished, I wanted to crochet the horns. I found a pattern on Ravelry, but it was poorly written, so after MUCH frustration, I decided to make my own (which I'll post later). I also knitted a moss-stitch grey band around the bottom of the horn, to simulate how it might be attached to the actual helmet.
Untitled
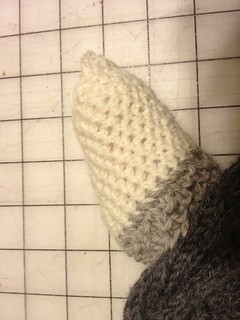
The Viking also wanted a "broken" horn, so I made that as well.
Untitled

Then it was a matter of sewing it onto the hat.
Untitled

Friday, December 27, 2013

Post Holiday Wrap-up...

Holiday wrap-up...get it? Presents? wrap? wrapping paper? Oh, nevermind, my puns are usually pretty bad, I blame it on DH.

I haven't been writing as much as of lately, because I was busily trying to get the last of the holiday gifts finished and wrapped. And our work schedule was pretty hectic so I found myself without a lot of time. Plus, I was trying to keep much of it as a surprise as some family members do read this blog.

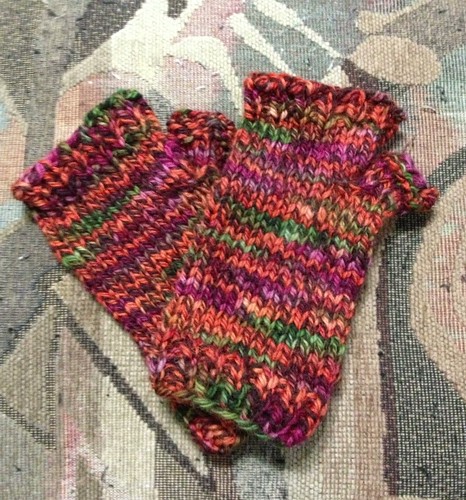
For my BIL, I made some fingerless gloves so he could wear them to events without freezing his hands.

Untitled

My eldest nephew specifically asked for new fingerless gloves. So I obliged. However, the weather was starting to actually turn warm where he lives, so I hope he gets some use out of them BEFORE he outgrows them.
Untitled

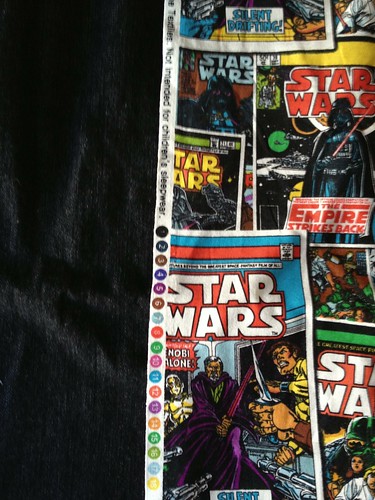
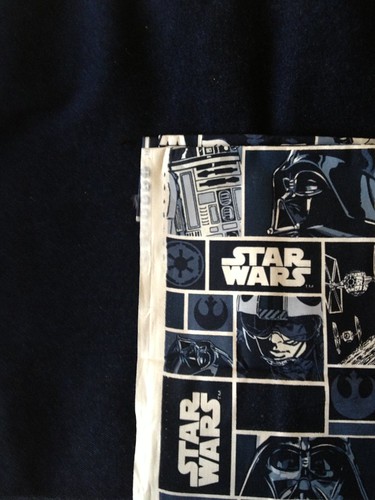
And for my youngest nephew, I made him a Star Wars book bag (similar to his brother) with different fabric and a slightly different patterning, but still using the pattern I had used before. (Apparently, I forgot to take finished photos of the bag before I wrapped it up as a gift.)
Untitled

All of the gifts I made, including the fleece blankets I made the previous month, were very well received. Both kids were wearing their fleece blankets wrapped around them for a good chunk of the holidays. All-in-all, a very good holiday. It makes me happy to make things for family who definitely appreciate the effort.

Monday, December 23, 2013

Star Wars Bookbag

I've been busy with the holidays, but wanted to get this particular post up as it had been sitting as a draft for some time. I had to wait until my nephew's birthday passed before I could post it. According to his mother, he really liked the bookbag I made for his sister, so I decided to make one for him.

As his birthday is very close to Christmas day, I really wanted to get this finished and mailed in time for his birthday. He's a big Star Wars fan, and I found a remnant of some licensed Star Wars fabric (along with a matching color denim) at JoAnn's. Luckily, the remnant was enough yardage (1.5 yards) to make a bookbag.

IMG_3525

Taking my pattern from my leather bag, I added one inch seam allowance for fabric and started sewing.

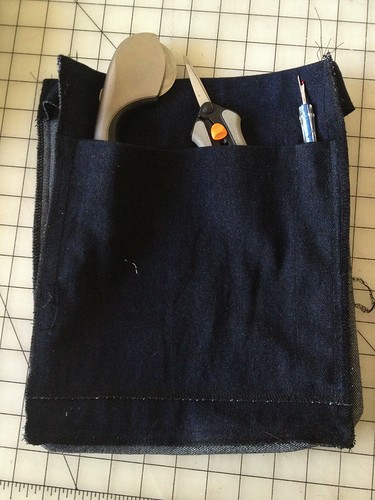
Inner pockets

I made inner pockets so he could keep other things besides books. The sizing for the bag is 8" x 10" and is large enough for a book or two.

Star Wars BookbagStar Wars Book bag

Wednesday, December 11, 2013

Making Gifts Makes Me Happy

I couldn't post about this knitting project until I could give it to the recipient, as I know she sometimes reads my blog. (It's the price of having a public blog!)

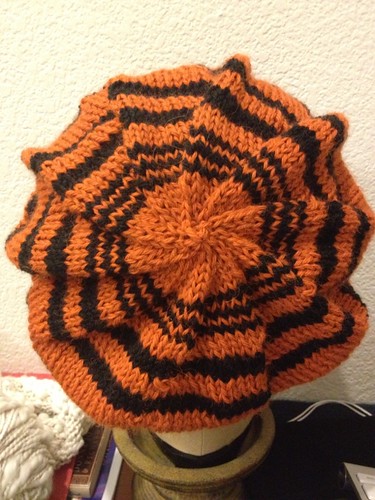
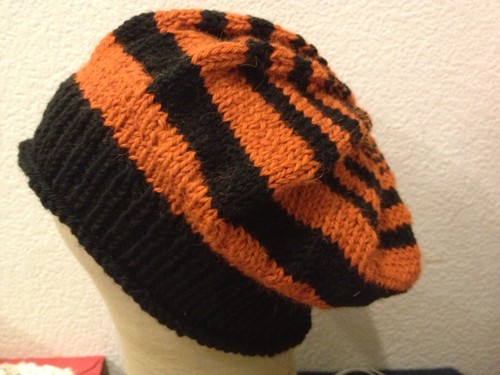
A dear friend is a big baseball fan and loves the San Francisco Giants. Earlier in the year, she mentioned wanting a hat in the team colors. (I had given her a red & black striped hat last year). I tried to look for a variegated orange/black combination but to absolutely no avail. So I opted to just create another striped hat instead.

I picked up some black Cascade 220 superwash and orange Cascade Pure Alpaca. It's a pretty warm and soft combination.
Untitled

The pattern is the Elizabeth Zimmerman "tam-o-shanter" hat with a few modifications. The stripes are made using a odd-number progression (7-5-3-3) and a jogless jog. (In this photo, it hasn't been blocked, but I love the star effect.)

  Untitled

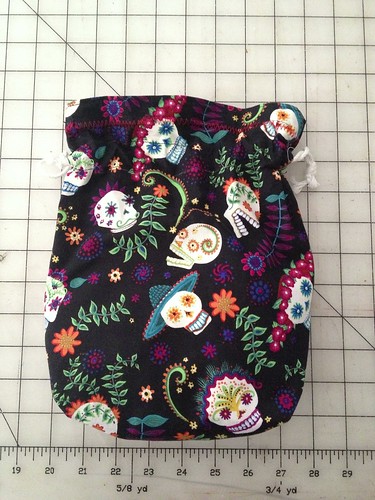
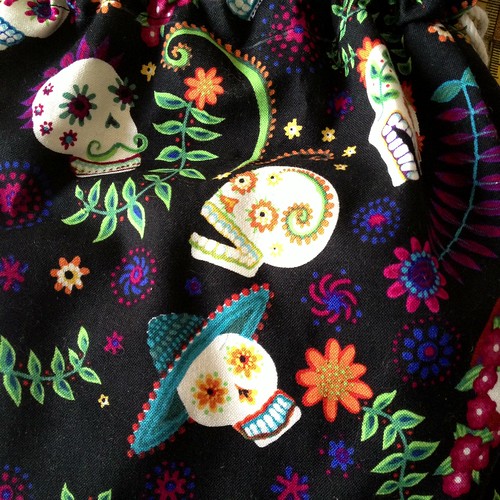
And to save a bit of wrapping (and to double as a re-useable gift bag or ditty bag), I also made this project bag for her. She loves sugar skulls and when I saw this fabric, I knew it was for her.
Untitled

When I gave it to her, she danced around the room, singing "I got my Giant's hat...I got my Giant's hat....." She also loved the bag and had plans for it.

It makes me happy when a gift is well received by someone who I know will get plenty of use out of the item.

Wednesday, December 4, 2013

Avengers Project Bag

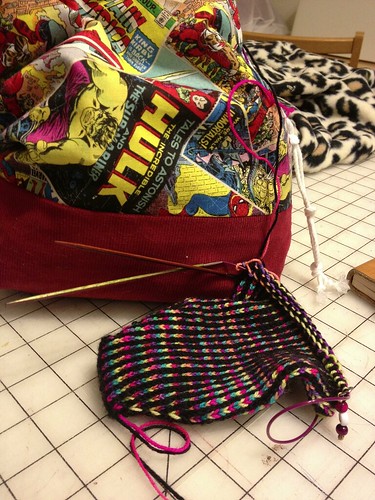
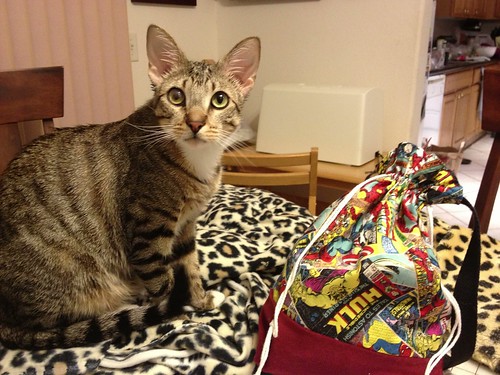
While I was perusing fabric for project bags, I found this fabric -- covers of various Marvel comic book. And it was predominately, the AVENGERS! I love the movie, so of course, I had to have it and turn it into a project bag. It's the perfect thing to take to various conventions where both geeks and crafters can appreciate it!

Luckily, it doesn't take much to actually make one of these bags, plus, I had some red cordoroy fabric that I used as a reinforced bottom.


And what better first project to put into my new Avenger's project bag than my colorwork sock?
Untitled

And of course, a pre-requisite photo of one of the cats along with the project bag!
Untitled

Friday, November 29, 2013

Swapetition: Project Bags -- One for Her. One for Me.

I've never participated in a "swap" before, so this experience is completely new to me. One of the things I decided to make for my swap recipient are project bags. Every knitter can always use more (or at least I can).  Plus one of her children knits as well, so I also thought to include a project bag for her and a little something else for her other child.

Because making project (or ditty) bags is fairly easy, I decided to make some for myself as well. The kittens have been extremely curious about my yarn and my WIPs, but not about the bags. After finding that they had dragged one of my waste yarn balls all over the house (and around the dining room table and chairs several times over) that anything fiber related needed to be in a project bag.

I dove through my fabric stash and found some suitable items, but nothing that really was my swap recipient. JoAnn's was having a 60% off sale on their printed fabics, and I managed to find something that seems to fit her.  Then I went somewhat "hog wild" and ended up making about a dozen (or more) project bags. I had a fat quarter of each fabric, which was enough to make 2-3 bags.

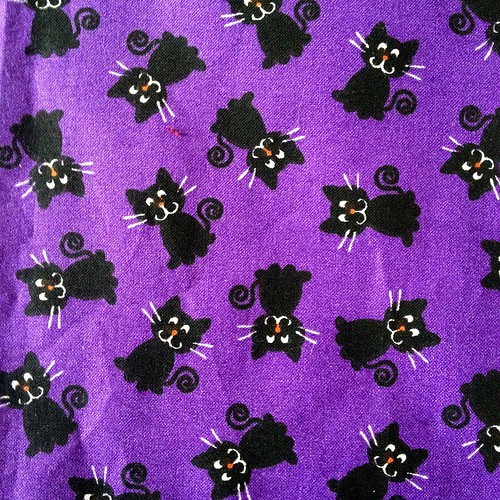
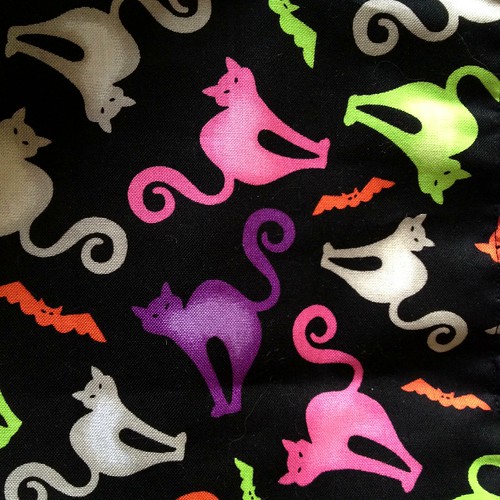
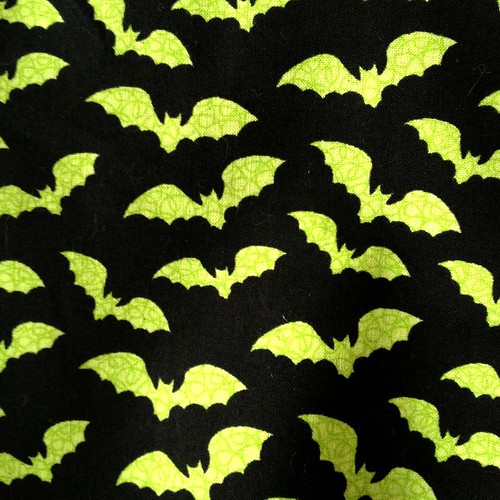
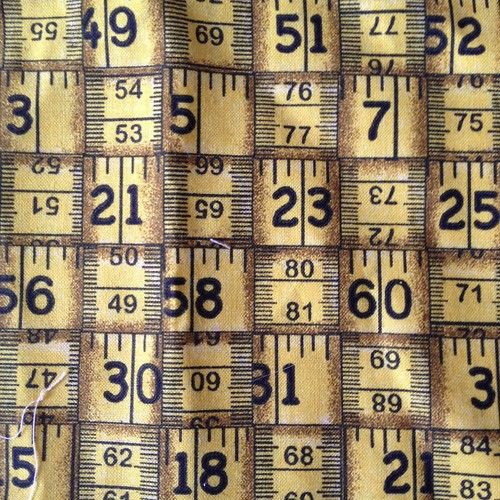
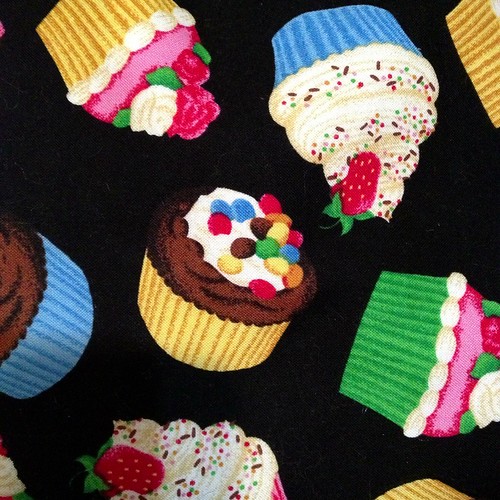
Without going into too many spoilers of what I made for my swap recipient, here are the fabrics I used to make the project bags.

Untitled Untitled Untitled Untitled Untitled Untitled

Here's one ditty bag that I made for a friend. I used it as the wrapping for her birthday gift. Untitled

Monday, November 25, 2013

Swapetition: Stitch Markers

This year, I'm taking part in the Savvy Girls' "Swapetition". A swap is like a Secret Santa gifting circle where all participants are given a name to whom they give a package of gifts (for under $30). The "competition" portion of "swapetition" means that there are prizes to those who give the best gifts. This involves a bit of stalking the other person via Ravelry, blogs, and other places to find out what best things to give to your recipient.

Because the Savvy Girls is (technically) a knitting podcast, one of the rules is that you must include a handmade gift that you made (of any given craft). Luckily, for my recipient, I'm somewhat proficient in several different types of crafts.

One of the things I have created for my swap recipient are some stitch markers. In my stalking of her, she mentions in one of her Ravelry posts that she always loses her stitch markers and wanted to get some pretty ones. So, using some of the beading stash (and bought some pretty glass on sale), I made her markers that I like using (that I learned from Cat Bordhi).

They include letters (i.e. A, B, C) in order to denote potential differences in lace or cable patterns. I hvae found them very useful in the past.

And of course, I took the time to make myself some stitch markers as well. :-)

Wednesday, November 20, 2013

Holiday Gifting for the Kids

Last year, I had made my eldest nephew a fleece blanket with a Star Wars theme. His siblings (especially his brother) also wanted blankets as well for this year after seeing their brother get a lot of use out of his.

So, I found some polar fleece that I thought they might like. Owls for her.

Robots for him.

The fleece kits were on sale at JoAnns, and came with a matching colored fleece for the underside. What's nice about polar fleece is that it doesn't fray. However, I don't like the "fringe" finishings that many kits suggest. Instead, I used a zig-zag stitch on my machine. I rounded all of the edges of the blanket and lengthened the stitch to over two inches and made it as wide as possible, then hemmed it completely around.

The cats found the fabric very warm and snuggly. I had to keep removing them from the table in order to cut and pin the large swaths of fabric. However, they were awfully cute.


If you want some helpful tips on sewing with fleece, Craftsy just came out with 12 helpful hints.

Monday, November 18, 2013

Sewing Flannel Night Shirts

In addition to the different cotton flannels that I picked up at JoAnn's, I also found these fabrics as well. These are pretty thick versions of cotton flannel -- much thicker than the ones I had bought for my pajama bottoms.
 

I remembered that I owned an old cotton flannel night shirt from Mervyns that I think I "borrowed" from my mom when I was a kid (and never gave back). I had worn the poor thing absolutely to the bare threads; it's how much I loved it. It was falling apart. I think one more washing would have ended it for good.

I wanted to recreate the general look and feel of it, but I didn't want to have the pockets or the buttons.

So, I traced out the relative dimension of it on my pattern paper. The garment was simple: Front, Back, Sleeves, and Facings. Everything is fairly "oversized" (four inches of ease) so I didn't have to worry about fitting the garment to my specific measurements. And even the sleeves had no easing. (I hate easing sleeves.)

It was a nice change of pace. Here's the night shirt laid out on the dining room table. I traced around each piece, then added a generous seam allowance. I used a V-neck opening to make things simple. This is probably the simplest pattern I've recreated.

I even had a helper who supervised my drawing and cutting out the pattern.

This time, I did make a mock-up of my pattern (as it was not tried and tested). And I made a few adjustments in different places. I marked locations for a "long" and "short" night shirt. I made two: one in read and the other in the plaid. I also did some stylistic variations between the two. It only took about 2.5 yards of the fabric with plenty of fabric left over.


Now, DH wants one too. I test drove the red one for a few days. And me tell you, these are really comfy! I need to make more.

Thursday, November 14, 2013

Sewing up a Pajama-jam!

With all the sewing I did for the Goblin Ball, you'd think I'd be done with sewing for a while, but apparently not!

Several weeks ago, I was looking for some fun pajama bottoms at various stores, and didn't find anything to my liking. But, when I was perusing JoAnn's looking for lining fabric for my ballgown, I discovered that they were having a 60% off sale on their cotton flannels. So with the coming of winter, I thought to make myself some flannel jammies.

It's not very often that I sew more utilitarian clothing, but I thought, "What the heck?!?" Plus, they were having their $0.99 sale on McCall's patterns and I found this pattern. (I opted to make the long pajama bottoms.)


Between their sale on flannel and their patterns, I felt the Universe was trying to tell me to go ahead and make pajamas. So, I picked up a traditional plaid.


But I wanted to have some FUN sewing. I found these nifty fabrics as well. They suit my taste. I can even forgive the pink in the skull & crossbones fabric.


(I really love the monsters one!)

I washed all of the fabric in hot water to help pre-shrink and pre-soften the fabric. (Cotton gets softer with washing. And flannel tends to shrink.) Then, I started sewing.

The pattern was fairly easy to follow, and took very little time to make. Once all of the fabric was cut, it only took an hour to assemble each pajama bottom. The only change I made to the patterns was to shorten the legs a bit to fit me. Otherwise, I used the pattern "as-is". Heck, I didn't even bother with a mockup! (I'm living on the edge...I know. LOL.)

However, I did serge all the edges of the cut fabric as flannel tends to fray quite a bit.


And comfy jammies are the result.

I probably spent more time shoo'ing the kittens off the fabric as they tried to "help" me cut the fabric or pinning things together. (Apparently, they love laying on flannel -- or any other fabric for that matter!)

I think I'm set for winter. (Not to mention the Pajama-Jam-Jam at Purlescence Yarns....)