Friday, March 29, 2013

How to Make a Handle for Your Project Bag

Making your own handle is easy. You can choose things like nylon webbing or belt webbing to make a sturdy handle (just make sure the straps don't stretch). However, sometimes, you can't get the color you want, or the strap is just plain UGLY. You can easily fix this by adding a fabric covering.

The following are instructions to add a handle to my  Ditty Bag Pattern.

1) Cut your strap however long you need it.

2) (Optional. You can skip this step if you don't care if your handle is different.)
    a) Cut a piece of fabric about 2.5 the width of your strap. Press the edges over by 1/4" and fold it over the strap, pinning it in place. 

    b) Stitch close. I added a simple zig zag stitch here, because I didn't care about it showing. You can opt to hand sew the strap. Just make sure that you tack the fashion fabric TO the strap in more than several places so it doesn't shift about.


3) Sandwich the handle between the lining and the fashion fabric AFTER Step 4 of the Ditty Bag Instructions, and make sure the ends extend beyond where you want your channel casing to exist. Pin in place. Then, when you sew your channel casing, you will sew your handle into the bag. Just make sure to backstitch several times where the handles are located for extra security. I also added some "decorative" zig zag stitching above the channel casing to provide more security for the handles.


4) When you add your cording in the casing, just make sure to be aware that you'll have straps near the openings and to adjust the cording as needed.

If you have any questions, please feel free to ask and I'll do my best to answer them or to clarify any confusion.

Thursday, March 28, 2013

A Barrel Full of Wool

See this thing?

Supposedly, it's from an antique shop and was a shipping barrel for wool. (Here's the original blog, if you care to read.) It's HUGE!

Why am I looking at this photo? Because a friend of mine was reading a book, where it calls for "5 barrels of wool for winter spinning." She wanted to know much wool a barrel could contain. And frankly, I got a bit curious.

Now, back in the "old days", wooden casks (or what we call barrels today) were used to ship everything from dry goods to liquid goods. Why? Because one man can roll a wooden casks on skids, versus carrying a box of equal weight without assistance.

(Warning, major geeking ahead). I did some searching on the Internet regarding how much a wooden casks actually weighed. It turns out there were several sizes of wooden casks and their measurements are more towards liquid versus the actual volume of measurement, but they were used to carry everything from liquids (beer, ale, rum, etc) to dry goods (nails, apple, tobacco, wool, etc). [1]


It turns out that each of these wooden casks was a specific type of measurement. A "barrel" was used as a unit of measure equal to 32 gallons. There were other wooden casks (a tun) that held up to 256 gallons of liquid weight! Now, the picture above looks more like a "tun" versus a "barrel", but lets assume "barrel" for now.

Obvoiusly, the dry weight of something is different from the liquid weight. For example, when a hogshead was full with tobacco, it weighed about 1000 lbs [2]. But luckily, the Internet is full of wonderful things, and I found a nifty calculator that converts volume to actual weight, and actually allows you to specify the type of material, including wool!

Now assuming that this calculator is correct AND assuming you can fill every single square inch of a barrel with wool, a barrel volume of 32 gallons is about equal to 350.91 lbs of wool.

Consequently, my friend's book mentions 5 barrels. So, if it truly meant a "barrel" (as in the unit of measurement), then 5 barrels is about 1754.55 pounds of wool. (350.91 lbs x 5 barrels)

And I'm not even about to discuss whether the wool contained in these barrels are processed wool or raw fleeces filled with lanolin...it's still a crapton of wool regardless.

However, lets go back to that photo above. If that wooden cask is the actual size of casks used to ship wool, it looks more like a "tun" versus a barrel. And, again, that handy dandy internet calculator tells us that 256 gallons of volume is equal to about 2,807.26 pounds

Now, multiply that by 5 casks = ~14,000 pounds = 7 tons.

Regardless of whether the aformentioned winter spinning is 1,755 pounds of wool or 7 tons of wool..... all I can say is...Damn, that's a ton of spinning to finish over a full winter.  (It takes me a long while to finish a sweater's worth of wool!)


Wednesday, March 27, 2013

Satisfying Your Inner Crafter -- Project Bags

One can never have too many bags, or at least that's what I tell myself. Project bags are useful for putting in all of those Start-itis projects (not that I know anything about THAT....). Once you get the hang of it, making project bags takes less than 20 minutes of your time, which provides any maker with that overwhelming sense of satisfaction of a completed project that produces a very useful product.

Plus, project bags are nifty gifts for my other crafty friends so I can make a slew of these to give away or to use as reusable gift bags.

So, with my half a yard fun sheep fabric (that made me very happy), I was only too glad to make more. Luckily, half a yard of fabric is enough to make two bags: one small (enough for a pair of socks) and a larger one (enough for a sweater).

Using my instructions to make a ditty bag, I made a small one -- enough for a pair of socks.


And then onto the bigger one. But for the bigger one, I wanted to add a handle. I didn't have any strap material, so I decided to make one, using some thick twill tape that I had in my sewing supplies. Because twill tape doesn't stretch, it's perfect for a handle. I sewed some of the sheep fabric over the twill tape to make it more decorative. (I'll post instructions on how to do make your own handle, later)

And viola! A ditty bag with a handle --- big enough to hold a sweater.


I love project bags. They're a nice quick way to use a small amount of fabric with very little waste.

Monday, March 25, 2013

Making the Yarn You Covet

Have you ever found a skein of yarn that was so luxurious and so amazing that you fell in love immediately? And it was either too expensive or maybe the wrong color for you?

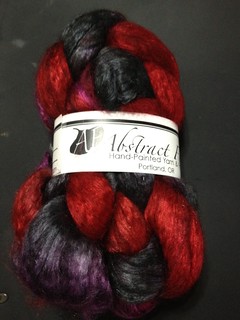
Well, here's a story of how I come to find myself spinning up this lovely 50-50 cashmere silk blend from Abstract Fibers in the Maleficent colorway because the yarn I coveted wasn't in *my* colors.

Back in 2009? 2010? at Stitches West, I discovered an amazing yarn, "Kitten" from Tess Yarns. It was an amazing blend of cashmere and silk, and about as soft as the down fur on a 5 week old kitten. The yarn was aptly named. But, it was late on Sunday, and they had sold out of most of their colors.

Although they didn't have the color I wanted, I still bought myself a skein of "Kitten" in variagated grey, and knit myself a wonderful cowl during (just before & after) surgery. To this day, it's my "go-to" cowl, as it's super soft, super cuddly, and just makes me happy. I love this cowl and I love this yarn.

I really wanted to knit another one, but this time in favorite color, red.

In 2012, I went to Stitches hoping to find a red colorway from Tess Yarn in Kitten, but unfortunately the reds they had were not my reds. I prefer a deep dark blood red; their red was more of a dusty rose. But, surely, I thought, someone AT Stitches had a 50-50 cashmere silk blend in my color that was like "Kitten"???

But I was wrong. Vendors didn't have the same blending combination OR they were in the wrong colorway. So, I thought maybe to spin myself my own yarn. After all, I had just learned how to spin, so I was a spinner, wasn't I?

I wandered into Abstract Fibers and inquired about a cashmere silk blend. And lo and behold, they DID have a Cashmere Silk blend, but...alas, not in my colorway. They assured me that they could dye it whatever colorway I wanted. (BTW, full disclosure -- I love Abstract Fibers and might have a "few" of their fiber colorways.....)

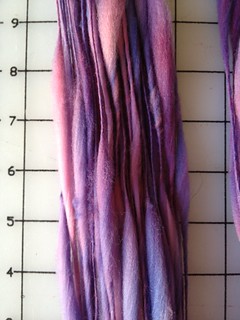
Previously, I had spun up their Targhee in the Maleficient colorway, and I really loved the colors. It was all dark redds, purple, and some blacks.

Malificent

I asked if they could create it for me, and they said YES, it would look magnificent in that colorway. But it would have to be after Stitches some time as they were backlogged. So, I went ahead and ordered/purchased 4 ounces of fiber from them. From previous experience spinning, I know that 4 oz is enough for me to make a cowl or hat or fingerless gloves, so I felt comfortable just ordering this amount.

About a month later, two bumps of 2 ounces arrived at my door. SQUEE! I mean...
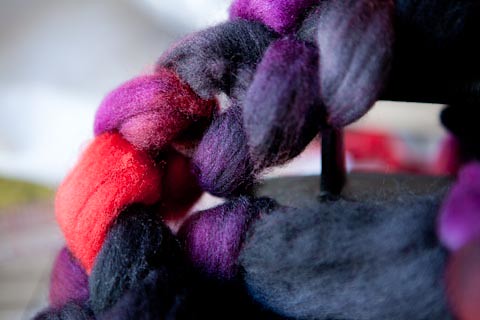
LOOK AT THIS COLOR!

Cashmerino silk

It was as soft as a kitten and just absolutely a pleasure to just sit and pet! So, I opted to name this yarn my "Stray Kitten", for it magically appeared on my doorstep and was reminiscent of the "Kitten" in the window of Tess Yarns. (Okay, not really, but go with me here....)

Of course, I didn't spin it right away. I was still a bit unsure about spinning such gorgeous fiber and ruining it. I've never spun cashmere (although I did practice with some yak fibers). At that point, my LYS had started taking registrations for SpinU, so I thought I'd wait until afterwards to spin it this luscious fiber.

As part of the SpinU class, wepun a variety of different ways and yarns, including some more luxury blends. I spun some of Ashland Bay's cashmere silk blend for a sample skein to get more practice for my Stray Kitten. I made a skein of 2 ply sport weight yarn. I was pretty happy with how it came out, and thought to do this for my Stray Kitten.

IMG_1320 

Tess Yarn's Kitten is a sport weight yarn. From examining the yarn on my cowl, I determined that it was about a 3-ply yarn with some drape so that meant a lower twist angle. Now, I had about 4 oz, and wasn't quite sure how to evenly break up 4 oz into a 3plied yarn without wasting some of the fiber (which I did NOT want to do).

So, I decided a compromise was in order. I still wanted a sport weight yarn, but with 4 oz, I surmised that a 2ply yarn would use all of the yarn up in the most economical way.  So, some spinning math was in order:
  • Sport weight yarn is about approximately 15-18 WPI (according to my Nancy Knick Knack's reference chart).
  • Consequently, a two-ply sport weight yarn requires singles of 30-36 WPI ......
    • 15WPI * 2 singles = 30 WPI
    • 18 WPI * 2 singles = 36 WPI
I played with the ratio on my Sidekick until I got the desired singles (7.25:1 ratio) to be about 32 WPI, and I started spinning.

I spun 2 ounces of singles per bobbin, then plied them together. (This breaks my normal 1oz per bobbin rule, but I wanted a continuous run of yarn and there was only 4 oz and I wanted a 2 ply yarn.)

Afterwards, I plied said singles.


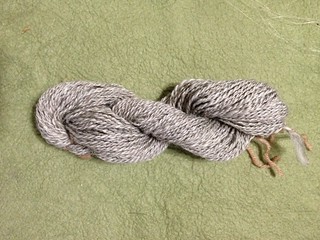
And I got a beautiful 2 ply yarn. I LOVE how the colors play themselves out! It's not a 100% match to Tess Yarn's Kitten, but it's the same weight and the same blend, and lusciously soft. AND it's exactly the color I wanted.


There's 214 yards of yarn....enough for a cowl.

My beautiful Stray Kitten! Now, I have to find a suitable pattern! I can't wait!

But, that's how I made the yarn I coveted.

Thursday, March 21, 2013

How to NOT Take Charge of Your Passions

Hey, wait a second. Shouldn't the title of this post be "How TO Take Charge of Your Passions?" Well, yes, except we're doing this "The Onion" style! There's nothing like a satirical and sarcastic point-of-view to drive home what is supposed to be obvious, and "The Onion" --- an online "news" journal does this thing very, very well.

I often get asked by friends and colleagues, "Why do you do X? How do you have TIME to do Y?" And I have often responded about being passionate about my geekery, my crafting, my Whatever, and finding a sense of joy and accomplishment from these tasks. But sometimes, this message doesn't quite sink in the message.

But, the following article with its sarcastic/satirical tone gives a more succinct and (IMO) compelling argument of all. (Here's a snippet....)


I can’t stress this enough: Do what you love…in between work commitments, and family commitments, and commitments that tend to pop up and take immediate precedence over doing the thing you love. Because the bottom line is that life is short, and you owe it to yourself to spend the majority of it giving yourself wholly and completely to something you absolutely hate, and 20 minutes here and there doing what you feel you were put on this earth to do.


Drives the point home, doesn't it?

I hope you guys enjoy the article.

Link to the article: http://www.theonion.com/articles/find-the-thing-youre-most-passionate-about-then-do,31742/

Wednesday, March 20, 2013

How to Determine How Much Fiber to Spin for Your Project


(I suggest reading the previous article, "3 Tools to Make Your Spinning Better", before reading this one.....)

I've often heard spinners ask the question: how much fiber do I need to make X item? And the answer to that question is done by determining the GRIST of your completed yarn.

Grist is essentially, the mass of your fiber times the length of said fiber.

Grist = Length per Weight = L / W

In order to determine how much fiber you need for a given project, you need to create a finished sample skein in the yarn weight you want to achieve. (Unfortunately, there's no other way to determine how much fiber you need., so you need to spin up a sample skein.)

Once you have your sample skein, you can either use the equation above to determine the grist or you can use a McMorran Yarn Balance (which essentially determines grist). You can also use grist to determine how much yarn you have in an unknown /unmarked skein/cone of yarn.

Real World Example:

From my previous blog post on Spinning Tools, I wanted to knit an Old Shale Stole using the following fiber.

IMG_1327

The pattern calls for 1200-1400 yards in a DK weight. So, I created a small sample skein of DK weigh 2-ply yarn.
  • Weight of my sample skein = .75 ounces
  • Yardage of my sample skein = 63 yards
So, my Grist= L/W  = 63 yards / .75 ounces = 84 yards / ounce.
There are 16 ounces per pound, so my grist is 1344 yards per pound.


I need a yardage of 1200-1400 for the Old Shale Stole. Consequently, I would need a minimum of:

(1200 yards) / (84 yards/ounce) = ~14 ounces of fiber.

Unfortunately, I only bought 12 ounces of the fiber, which gives me:
(84  yards / oz) x 12 oz=  1008 yards

I'd be short ~200 yards for the minimum needed yardage. I would need to purchase  more of each fiber type. But at this point, I KNOW what I'm getting into.

Combined with the spinning tools as mentioned in the previous post, I can easily calculate my way into having enough fiber for the yarn that I want to create. And not be surprised after all my hard work that I've fallen short of my needed yardage.

Monday, March 18, 2013

3 Tools to Make Your Spinning Better

In addition to your spinning wheel, there are many tools out there for spinners to help you spin better and consistent yarn, and to reproduce those results repeatedly without guesswork.

There are three tools that I find useful and have made my spinning so much better.
  1. a WPI tool
  2. a Spinner's Control Card
  3. a Twist card
(For ease of use, there are various smartphone apps out there that provide you some of these tools.)

The WPI Tool:

The Wraps-Per-Inch (WPI) tool basically tells you how much yarn wraps around an inch. The following is an image of a WPI tool from Nancy's Knick Knacks. The picture shows greater than an inch, but you get the idea. This comes with a handy-dandy reference card that tells you how your WPI corresponds to yarn weights. For example: laceweight = 35+ WPI; worsted = 9-11 WPI; bulky = 6 or less WPI.
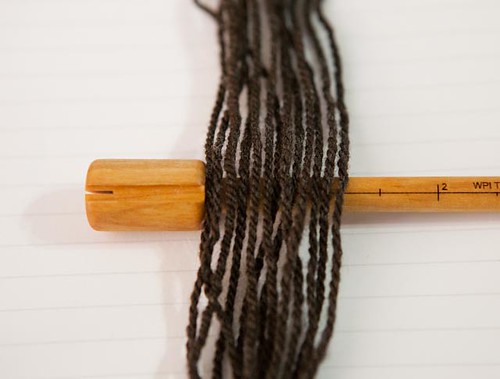
 
Frank as 3ply
I used this to determine my WPI for Frank.

Generally, I tend to use it determine the final WPI for my handspun yarn. But, you can also use the following tool....

Spinner's Control Card

The Spinner's Control Card shows the various widths of yarn and their corresponding Wraps Per Inch (WPI). It allows you to measure your singles WHILE you spin to ensure that you're spinning your singles evenly to the WPI you want to achieve.


You can use either the Spinner's Control Card or the WPI Tool  to determine the WPI of any yarn (and thus the yarn weight), whether it is handspun or some unknown commercial yarn. I tend to use the Spinner's Control Card while I'm spinning.

Twist Angle

This handy tool can easily be made with the aid of a protractor. It tells you how much twist you have in your single. The greater the twist, the more tightly spun your yarn. The smaller the twist, then the more lightly spun your yarn.

To use it, you do a ply-back test as you are spinning, and then measure the angle of your bumps against this card. (You can only do this test when the yarn is "fresh" (i.e. within milliseconds of being put on your bobbin. If you wait 5+ minutes to measure, then the plyback test isn't as accurate.)


If you want a tight twist (like for socks), you want a something greater than 30% twist. For something long wearing, like rugs, you probably want something greater than 60% twist.

Using these Tools & Why You Use Them

So, how does all these work together? Well, these tools allow you to spin the yarn you want without having to second-guess what you're doing.

The WPI tool and Spinner's Control Card helps you determine the weight of your yarn. I usually use the WPI tool with the finished plied yarn. And I use the Spinner's Control Card to measure my singles while I'm spinning. But this is not a hard and fast rule.

With a little bit of math along with these tools, you can easily determine the weight of your finished and/or plied handspun.  For example,  if you know that you always create frog-hair singles (i.e. 40 WPI or more), then you're going to need a lot of singles to make a bigger yarn.

For example: You regularly spin 40 WPI singles (this is your comfort zone), and you want:
  • a fingering weight yarn (19-22 WPI), then 2 plies will give you a fingering weight. 
    • 40 WPI single ply / 2 plies = 20 WPI
  • a worsted weight yarn (9-11 WPI), then you'll need about 4 singles.
    • 40 WPI ply / 4 plies = 10 WPI
  • a bulky weight yarn (6 or lower WPI), then, you need about 7 singles 
    • 40 WPI ply / 7 plies = 5.7  WPI
But, WAIT! 7 plies for a bulky yarn?!!? That's a little hard to manage isn't it? Yes, but if you want a bulky weight yarn, and you only spin 40WPI singles, this is what you need to do...or you can get more fingers or build some form of custom tool to help you ply 7 singles....

OR, you can change your singles instead, by changing the ratio on your wheel to a lower ratio and using the Spinner's Control Card to check your WPI gauge to something thicker. You can continue to tweak your ratio until you get the WPI gauge you want to achieve.  (Of course, you'll still need to spin up a sample of your yarn and knit a test swatch to see if that works for you.).

By changing the WPI of your singles, you change what type of yarn you can produce, and more accurately reproduce the yarn you want instead of second-guessing what you're doing.  For example:
  • If you wanted a 3-ply worsted weight yarn (9-11 WPI), then in order to get a 3ply, you need
    • 10 WPI x 3 plies = 30 WPI singles
  • If you wanted a 4-ply bulky yarn (6 or lower WPI), then  you need:
    • 6 WPI  x 4 plies = 24 WPI
Personally, I think a 4-ply bulky weigh @ 24 WPI singles t is much easier to manage than trying to do a 7 ply bulky weight @ 40 WPI singles, don't you think?

The Spinner's Control Card can help you spin consistent singles of various WPI. It allows you to measure the singles while you're spinning so that you can ensure that you're spinning the correct weight.  It takes a little bit of practice to get bigger singles if you normally spin super fine frog-hair yarn, but the end result is worth it.

So, where does twist come into play? Well, as mentioned before, if you want hard-wearing yarn, like for socks, then you need a higher twist. If you measure your yarn twist while you're spinning, you won't be surprised if the finished product doesn't have enough twist for socks. You'll know WHILE you're spinning it.

(I highly suggest that you refer to the The Knitter's Book of Yarn: The Ultimate Guide to Choosing, Using, and Enjoying Yarn to get an idea of how different plies, twist angle, etc, can really help determine what is best for a given project.)

Using these tools does require a bit of practice, but practice makes perfect (as the saying goes), and by practicing spinning, we get better at it.

So, in conclusion, using these tools allows you to:
  1. Spin the type of yarn you want to spin without guesswork
  2. Reproduce the type of yarn you want at any time. 
  3. And by knowing how to spin the yarn YOU want, you can deconstruct commercial yarn that you like and replicate it on your wheel!
I think that's reason enough to try out these simple tools to make your spinning better.

Real World Example 

One of the things that I'm spinning for is an Old Shale Stole. It's a lovely pattern that lets you use sport or DK weight yarn. The pattern calls for the following yardage:
  • 1675 = sport weight 
  • 1200-1400 = DK weight 
I opted to use DK, and decided to spin for it. I'm opting for a 2-ply yarn because the "oval" shape of a 2ply will help show off  the lace work. A rounder yarn (3+ plies) will work, but it's not optimal for lace work. Plus, I wanted one single of each of these fibers to make the DK weight. (Ashland Bay Merino & Ashland Bay Silk Merino).

IMG_1327

Step 1: I did a some math: Now, I know that a DK weight yarn is about 12-14 WPI. So, this means that I need my singles to be about 24-28 WPI ---> 12 WPI * 2 plies = 24 WPI

Step 2: I started spinning a sample and adjusted the ratio on my Kiwi until I got about what I needed (using the 7.25:1 whorl). And I check periodically using the Spinner's Control Card to ensure that I'm on the right track.

Step 3: My yarn twist is about 20 degrees. This number is fine since I don't want to make too hard of yarn with a lot of twist. I want something close to balance (err'ing on the side of slightly too much twist).

Here's the sample skein (1/2 oz) that I spun up as well as 2 quills of singles that I spun later after finishing my sample skein.


After I spun up my sample skein, I was pretty much exact in the type of yarn I wanted to create. I'm not sure if you can tell, but the resulting yarn is 12 WPI. This is EXACTLY the yarn I wanted.


And I made it without second guessing what my WPI or how many singles I need to make the yarn that I want to make. The math worked out, and the tools helped me get the exact yarn I wanted.

But, you might say, If you KNEW how to that you were going to get the yarn you wanted, why even bother with a sample skein? The math worked out!

You are correct. The math worked out and I created the yarn I wanted, but now, I need to determine how much fiber I need to actually get the yardage I want. And I can't do that without making a sample skein.

But, that's the topic of another post. :-)

Friday, March 15, 2013

Bouclé anyone?

It turns out that I have a few quills of leftover yarn from SpinU. But, what to do with them? I have a mixture of wool (such as merino, superwash merino, BFL) and silk -- 8 quills total,


I decided to attempt my hand at making bouclĂ© again. I used some very tightly single spun silk single (#8 quill). It had curlyQs as it was spun so tight. I needed a very tightly spun yarn, or I could have used a nylon thread, as I needed the core yarn to stay stable throughout the spinning.  And I used some loosely spun wool singles (#6 quill), and started spinning on my Ashford Kiwi.

In spinning this type of yarn, one hand (my left) holds the core yarn (the silk) steady, while the other hand (my right) adds the secondary yarn at a 90-ish degree angle to the core yarn.

Spinning bouclé requires a "loose" hand, so to speak. You're literally, "throwing" the secondary yarn over the core yarn, then pushing the yarn up a bit to form loops.


I seriously forgot how much fun it was to make this type of yarn. Unfortunately, I forgot to put my sliding hook flyer on my Kiwi, and the little bouclé loops get catching on the regular hooks so I had to stop frequently and unhook them, as well as adjust my take-up on the drive band.


I ended up with a small sample skein. I ran out of the secondary yarn faster than the core yarn, because you're using more secondary yarn in order to form loops.

Isn't it cute?


I'm still not quite sure what I'll do with it, as I don't tend to knit with bouclĂ© at all. I am told that it makes a great weft yarn to weave with, but I have not done that as of yet, nor spun enough for a weft. But it's a fun spin nonethelesss.

Thursday, March 14, 2013

Progress!!

I've made progress on my Knit Swirl coat. See that? That's 3 INCHES, baby! Okay, in fairness the welts, kinda scrunch up. If I stretch out the welts, it's more like 6 inches.

I'm currently on the 8th welt right now. (And, yes, that's my Knitmore measuring tape. :-P)


Compare the progress to earlier this month. And at one point, I had to frog nearly an entire welt because I forgot to decrease --- that was painful.

And, in fairness, I did take a sock break, and finished one out of a pair of socks....

Oy, this is gonna take forever!

Wednesday, March 13, 2013

SpinU: Wrap Up

Since I have spinning on the brain, I realized that I never did a post about the final weeks of SpinU. (Plus I was taking inventory of my handspun, when I came across all of the sample skeins I created.)

For Weeks 11-12, we worked a bit more on Art Yarns, as well as working with luxury yarns, such as bison and cashmere.

It was a class where I really learned a lot and improved on my spinning skillset. It was a LOT of work (with a lot of homework that guaranteed that I was spinning every single night). Often times, there was plenty of spinning just singles so we could ply in class. or maybe some plying as homework for use in other projects. Despite all of the work, it was also a lot of fun. Our instructor, Sandy, was an excellent teacher. My classmates were clever and funny, and we supported each other through every assignment. (Plus, you got to see how other people did --- their frustrations and successes.)

I might take SpinU again in the future to refresh some of what I learned -- because I know I didn't grok some of what Sandy was explaining to us at that time. There was just SO much information that required processing.

If you have a LYS near you that offers something like SpinU, I highly suggest it. For the price, it was a great deal of learning and improving skillsets! (And for those of you in the SF Bay Area, Purlescence Yarns, offers this class (and a "beginners" SpinU) regularly.


Photo Summary of SpinU

Here is photo synposis of the yarns that I spun. Some of these yarns, I've already knitted into garments and am showing the previous photos (and I'm pretty sure I'm missing 1-3 skeins that I spun up for the class!)

Plant Fibers:

From left to right:
  • Cotton Woolen - 2ply
  • Cotton Worsted - 2ply
  • Hemp, - 1ply
  • Flax (wet spun) - single ply
  • Bamboo Bast - 2-ply
And, for the record, I'm not a fan of spinning plant fiber.

Art Yarn Spun:

From left to right:
  1. Beehives - black nylon yarn used as a base with tightly plied 2-ply silk to make the beehives.
  2. Encasement Art Yarn - nylon yarn with a motley of feathers, eyelash yarn, etc, used.
  3. Boucle - nylon base yarn with some generic wool singles
  4. Frosted Yarn - using a 2-ply silk yarn (I spun earlier) and some red fiber


When I brought home the "Encasement Art Yarn", DH thought it looked like Muppet Intestines. LOL . This yarn was a LOT of fun to create, but not something that I would use on a regular basis. But, creating this yarn is really the culmination of every technique that we learned in class.

More Art Yarn: Thick & Thins

Thick & Thin single using a slightly felted top -- I had overdyed some top and it came out every so slightly, which is perfect for this type of art yarn. (I gave this yarn away to one of my classmates.)

Thick Thin after washing2

(L2R)
  1. Thick & Thin Single - Using a batt
  2. Thick & Thin 2ply. Using some of the 1st skein, I made a second thick & thin out of contrasting yarn and plied them together. 


I found that I actually enjoyed making thick & thin yarn from a batt versu the felted top. Sandy suggested maybe weaving with it, so that's what I'm going to do with this one.

Luxury Fibers:

I loved spinning these luxury fibers! I must spin more! Although, admittedly, I wasn't too happy spinning 100% silk. A few strands got into my eye and it was PAINFUL! (One of the hazards of spinning with silk.)

 From left to right:
  • Cashmere/Silk - 52 yards - (1/2 oz) - 30% twist. 16-17 WPI. Ratio 12.5:1
  • Bison (Woolen), 15 yards. -2ply 1/2 oz - Ratio 6.75:1
  • Bison (Worsted) - 20 yards - 2 ply - Ratio: 13.75:1
  • Not shown - 1 and 2-ply silk.


Spinning & Plying

One of the things we learned was how to spin the appropriate size of single for the resulting plied yarn that you wanted. So, if I wanted a 2-ply bulky (~6WPI), I knew exactly what size single I had to spin in order to achieve that bulky yarn. I'd never have to guess what type of singles I needed in order to make the yarn I wanted.

The following skeins were all spun with BFL or Cormo
From Left to right:
  • Woolen 4ply (2oz) - singles with 28-33WPI @ 20% twist,
  • 120 yards 2 ply, singles - 40 WPI @ 30% twist
  •  Worsted 3 ply,  > 30% twist angle


The following were spun with some of Purlescence's "Spin Up & Dye" fiber. What's nifty about using a dyed fiber is that you get to see how the color plays out in different weights & plies.

(L2R): 3Ply worsted; 2 ply bulky
Spin U - Week 5 Splying2-ply Bulky


There was also learning how to make stable singles that could be used for knitting and wouldn't fall apart on you.

(L2R)
  • Brown Merino/Cormo cross - Woolen spun single, 28-32 WPI @ 20 % twist
  • White: 2-ply lace yarn - 115 yards. I "think" this is superwash merino


Specialty Plying:

In addition to regular-old plying, we practiced for specific plying, such as plying with a very tight twist (for socks and such) to navajo to cable plying

(L2R)
  • Red: 3-2 cable ply -worsted  -- akin to Greenland yarn
  • Brown: Very tight twist 3 ply .
Sometimes, having a "balanced" yarn isn't what you want. Socks require extra twist in order to last long, so when they come off the niddy noddy, it might appear to be a mess of curls, but it's crucial to having sock yarn. So, it's good to know when you need tighter twist in your yarn, versus having a "balanced" yarn.


I hope you guys liked the photo summary of SpinU. Again, I highly recommend taking a class such as this to improve your skillset!

Tuesday, March 12, 2013

Quest for a Drive Band

I've been on a quest with my Ashford Traditional to find a good break band. Originally, I had been using the simple cotton that originally came with the Traddy from Ashford.

I tried candle wicking and hemp, but both proved too sticky for me.  I moved to using Crochet Cotton # 10 (in red). However, after a while, I found that it was stretching way too much if left alone for any period of time and I kept having to replace it (which is a right pain-in-the-arse). Plus, I was fighting with it in order to spin woolen.

When I asked my SpinU instructor, Sandy, about it, she said that the Crochet Cotton was too slippery, even if it didn't feel slippery, so when it rotated the pullies, I was probably getting some slippage that made spinning woolen more difficult than it should be.

She had me try a resin drive band. I tried doing some plying with it, which was okay until the bobbin got too full, and then it was too strong to treadle. :-(


So, I'm back to just simple twine (which is where I started). Sometimes, you have to try a whole bunch of things before realizing what you started with is the best thing out there.

I recently finished spinning two bobbins of cormo (each bobbin was one ounce), using a woolen draw technique.  (I'm still practicing woolen on my Traddy).


I plied it into a 124 yards of 2-ply yarn at about 10 WPI (worsted weight). It's very light and VERY fluffy. I'm rather pleased with it.


For now, I think I shall stick with the cotton twine.


Monday, March 11, 2013

Sock Break

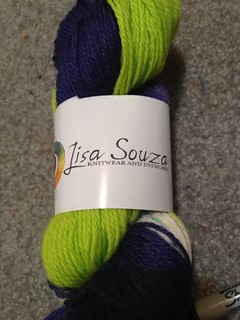
I'm taking a short break from working on my Knit Swirl coat, and opting to make a pair of socks out of Lisa Souza's yarn, Sock!, called Lime & Violet.


Untitled

I love the colors and it's working up beautifully. The pattern, Faceted Rib, from the book, The Little Box of Socks, works really well on preventing pooling.


Because, I really, really needed a break from just knits & purl welts....

Friday, March 8, 2013

Fiber Expiration Date

Did you know that fiber has an expiration date? Well, no not really, but when you leave them on a quill or bobbin for an extended period of time, they tend to set ON the bobbin.

Whilst I was cleaning up my Stash Storage after Stitches West, I happened to run across SIX quills of cormo that had been sitting there for about a year (or more) along with 2 one ounce bumps that I hadn't been spun yet. Oops.

I don't recall why I set it aside; probably some new and interesting fiber or knitting project caught my eye.

So, like any good spinner (set at trying to clean her Stash room), I set about making a 3 ply yarn out of these poor neglected singles, and the resulting yarn is  254 yards of a sport weight yarn. BUT, the plied yarn looks sad and splitty...and oh very extremely balanced coming off the niddy noddy. Essentially, there was no "life" in the resulting yarn.

I consulted with my former SpinU instructor Sandy on the poor state of my yarn. After she "tsked" me for leaving the singles for such a long time, she recommended that I really full the  the resuling yarn (which is a very slight form of "felting" the yarn) and that no one should see the difference.

I did as instructed and Sandy was correct. Plus, when water hit the yarn, it regained much of its life again, and came back very "springy".  But, it still looked splitty, so I did a very thorough and abusive fulling of the yarn, which made it puff up a bit, so all is good.

I probably will end up dye'ing the yarn at one point in time, but here it is.


I still have two ounces of cormo left over, which I'll probably spin woolen. Sandy recommended that I try it and see what comes up, so try it I shall. I need to practice woolen spinning on my Ashford Traditional anyways.

Plus, I need to do something besides just sew project bags..... :-)

Thursday, March 7, 2013

Measuring Up

On the weekend, I found myself with some extra time on my hands, so I opted to make a different type of bag. (And, I realized that I hadn't blogged about it, so here goes!)

I found some nifty ruler fabric at Joanns that was 50% off with a coupon. I bought half a yard. They also had a Simplicity pattern that I wanted to try. (It was $1.99).  In particular, I wanted to try their sundry bag pattern (lower right hand patterns-  C&D on the pattern)


I used an iron-on interfacing to make the fabric stiffer.


And cut out the lining using the smaller version of the pattern

The pattern instructions itself were decent. However, sewing those weird cut-outs proved fiddly. But, after everything was said and done, the store bought pattern is simply my Ditty bag tutorial -- with two bag ends and a zipper in the middle (instead of a drawstring).

The weird wedge square pattern piece were essentially the "sewn triangles" (Step 3 of the  Ditty Bag tutorial) except they were already cut out. It would have been easier to just sew the triangles and cut them off later, than try to sew those wedges together.

The smaller size is about that of a pencil case.


I think I'll forgo the pattern next time and just use my tutorial with modifications. However, as the pattern was only $1.99, I didn't waste much. However, for those who want to work with patterns, this isn't a bad one. I just happen to think my way is easier.