Wednesday, February 27, 2013

Keeping My Eye on the Prize

This past Sunday, I started in one of the Knit, Swirl patterns, by Sandra McIvers, specifically, the Coat of Many Colors. Luckily, I "know" that for worsted weight yarn, I will get gauge at US 6. But I made a gauge swatch anyways, and I was pretty darn close to both row & stitch gauge.

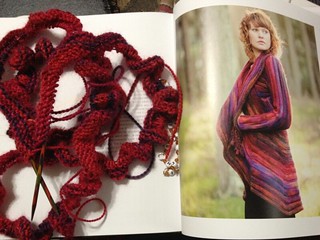
Before I started, I read through the first few chapters of the book that goes over sizing, gauge, construction, etc, THEN read through all of the helpful notes on Ravelry and hit up the Knit, Swirl website, where Sandra actually more helpful techniques and tricks. With such a big project, it's good to have all of the information before even starting!

And, I did something I tend not to do on most patterns --- I read and re-read the cast on and section on the body...then re-read them again to ensure I understood what was happening. Usually, I tend to just jump right in and only look for those key words "AT THE SAME TIME" whenever possible. But this time around, this required a bit more forethought than normal.

I cast on the needed 500+ stitches (yes, 500+ stitches), and oh, boy was that painful. Sandra breaks the stitch counts down to manageable chunks as there are "sections" for this pattern. So it was easy to cast on the required number of stitches per section, double & triple count, and know that I had the right number at the end.

The joining in the round was another tricky bit -- trying to ensure you're not twisting it as you join is hard enough on hat or cuff-down-sock, but for 500+ stitches?! Oofda. (And here, luckily, Sandra gives you some tips to get through it.)

Coat of many colors


So, far, so good, but this project is going to take a LONG time to finish. It's been 4 days thus far since I started, and I'm in the middle of Welt # 3, which translates to about 14 roundst thus far. It takes me 40 minutes to get through almost 2 rounds (if I'm lucky). And I believe that there are about 50+ Welts?

Hoh...Boy.

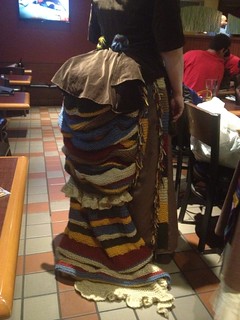
However, I'm keeping my eye on the prize --- the final coat. Because after trying it on, I was really hooked on the styling, fit, and flair. And Sandra said that the hard part is at the beginning with so many stitches, but as you go forward, you end up decreasing so it gets easier and easier.

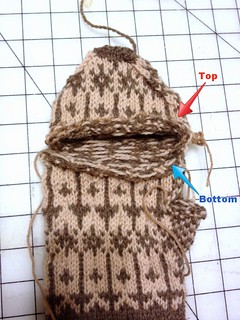
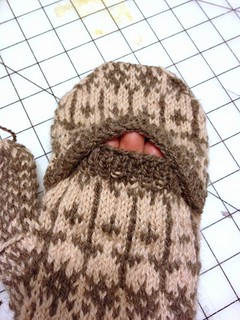
Right now, I'm holding that idea close, because it's getting a bit tedious to go through all rounds  (and all of those stitches) of just purling or just knitting each welt. However, on the flip side, this type of knitting allows me to catch up on some of my podcasts that I had been missing because I was working on those fair isle Dire Wolf mittens and thus couldn't pay attention except to the charts.

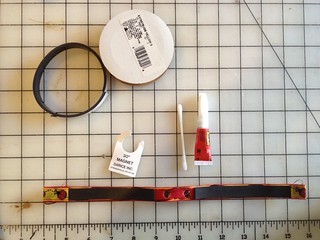
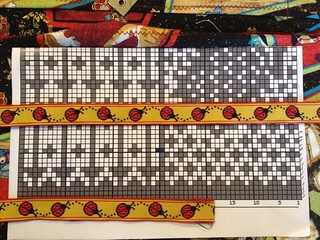
Some Ravelers mentioned that they snuck in small projects while working on this jacket. I just might have to do the same.

However, I'm committed to doing this!

Tuesday, February 26, 2013

Swift Bag

I am very much determined to use up all of the cat fabric that my friend, D, gave me some time ago. The other day as I was winding ALL of the 9 skeins into cakes for the "Coat of Many Colors", by Sandra Ivers, I decided that I needed to make a bag for my swift.

I kinda had a bag for it, but it was way too large and belonged to something else so I could easily identify it in one glance. I looked through the cat fabric and I still had enough of the Medieval Cat fabric to make a bag for my swift.  I did not enough of the green fabric for the lining, so used a simple plain muslin instead.

Project bag 1

Using the general guidelines  of my  Ditty Bag instructions, I cut out a very long piece of fabric that could easily fit the swift along with the seam allowance, and allow for a draw string top. I cut out an extra piece of fabric so I could have an outside pocket and pattern matched it the outside of the bag. (You can kinda see it in the photo below.)

It took about 20 minutes to make, and I had a very pretty swift carrier...and I've decreased the Fabric Stash!

Swift bag

Untitled

Now, I just have to work at decreasing the Yarn Stash!

Monday, February 25, 2013

Stitches 2013 Recap

Stitches West was pretty awesome as always. I didn't take any classes, but I did go for two days to hit the marketplace and see some of the MarketPlace sessions. I ran into a bunch of knitters & spinners that I know there, and it was great being pointed to specific vendors that I missed in the vast ocean of the marketplace, as well as compare & contrast purchases and things seen there.

There were the usual crafty goodness roaming about, ranging from knitted to crochet to woven items being worn, but there were some pretty geeky stuff roaming about, including one Dr. Who Scarf, and this sign from Miss Bab's booth, which says "Bigger than the inside" and features the Dr. Who Tardis.


On Friday, I wore my Lucy Hat
Blue's Hat

and got a TON of compliments on it, which left me feeling pretty good. Many loved the flowers that I added and the color combination.

I was primarily there for targeted purchases. My goal? Buy sweater quantities of yarn for items in my queue (at great deals), and get 1-2 skeins of sock yarn and pick up one skein of luxury yarn (cashmere/silk) if at all possible.

Webs Yarn gave me a great deal on some closeout yarns (Cash Vero DK weight and a bulky tweed in a gorgeous red brick color), so my primary goal was met. Lisa Sousa's booth gave me the sock yarn AND the cashmere. And I could not resist Miss Bab's Wowsa skein of yarn.


Untitled Miss Babs Untitled Untitled

In addition to the shopping, I got to talk to a bunch of designers. I especially liked the designers, like Coco Knits & Sandra Ivers who have examples of their work ready for you to look at and potentially try on right then and there! It makes a difference to see what works for your particular body type versus just photos & measurements.

Sandra Ivers wrote the book, "Knit Swirl", which I picked up at Stitches and had her sign. (She  LOVED my hat, so squee moment for me there!) I got to try out her lovely jackets and talk to her about fit and construction.  For you  ladies, these jackets are fabulous and work for so many different body types! They were so fabulous that I ended up buying the book AND a kit from Carolina Homespun....oh, and making a gauge swatch and casting on.....


Coat of many colors

After getting Sandy to try one of the Knit Swirl coats (in one of the different styles) on Saturday, she was hooked too.

Overall, a most excellent Stitches. Next year, I might even take classes.....

Thursday, February 21, 2013

Zippered Pouch Completed

After getting back from Gallifrey, I wanted to finish up my zippered pouch, so I went to JoAnn's and picked up a 7" zipper, and got to work. I had recently found a Zippered Pouch tutorial and used it as a general guidelines. It's a pretty good tutorial, so I suggest you read it, if you want to make your own.

I cut the pieces for both the lining & fashion fabric

Lining and fabric

And added the zipper to the woven fabric.

  Zipped

And sewed up the sides and added the lining. And viola! 20 minutes later, I had a nifty zippered pouch.

 Finished Pouch

Wednesday, February 20, 2013

Hand Woven Wallet

For whatever reason, I'm into a bag/wallet making kick. This time around, I wanted to use my very own fabric to make a wallet. I was inspired by a certain Etsy seller, after seeing her fabulous creations on Ravelry.com.

So, I brought out my loom, and warped a very small amount, as I wanted to use some of my handspun. I had already paired my silk/merino handspun with some matching Venezia sport weight to be woven into "something". I really didn't have much of my handspun, so I thought to just weave a sample and make a simple small wallet out of it.

Wallet project

I even had an appropriate linen lining for it...a dark blue linen (that completely looks washed out in the photo)
: Lining and fabric

I finished weaving the fabric, and then washed & fulled it. Unfortunately, I still have to find a constrasting zipper for it, and make a simple mockup (to ensure I have the correct sizing) before I can cut up this beautiful fabric to make a zippered pouch.

Tuesday, February 19, 2013

24 Hours of Gallifrey

This past President's Day Weekend (for those of you in the U.S), which is Feb. 15-18, I attended a Dr. Who convention down in Los Angeles, called Gallifrey One.

Now, Gallifrey One is probably one of THE largest Dr. Who conventions on the West Coast. They manage to get an amazing array of actors, writers, costume designers, producers, etc, who have worked on Dr. Who. It's a Dr. Who Geek Paradise.

And, it's the one SF/F convention where I have seen the largest gathering of fiber artists attending. At many other conventions, there are your typical  costumers and prop makers, and Gallifrey is no exception. The costumers are pretty diverse. Every year there are numerous doctors, ranging from #1 - #11, as well as their respective companions. In addition, there are the other characters from the show and the adjunct t.v. shows, including Captain Jack Harkness, Silurians, and, obviously, the Master.

This year, there were a ton tardis dresses, a ton of 10s & 11s, Amy Ponds, and River Song. I spotted this littlest doctor with his Tardis. (You can see more Gallifrey One costumes here.)

The smallest doctor 

But, in addition to the number of customers, there is an extremely large number of extremely creative fiber artists who attend Gallifrey. The most knitted item is (obviously), the infamous Dr. Who scarf, but there were a variety of Tardis & Dalek hats.

In every panel that I attended, there was always at least two knitter in various panels, knitting away on DPNs or circulars. In the Dealer's Room, there was one enterprising knitter selling her hats & knitted scarves for the attendees.

But, a lot of knitters took their fiber creations to completely different levels, incorporating many of the iconic elements in completely different ways. This costumer did an amazing femme Dr. Who costume, incorporating the scarf into her bustle!

 Dr. Who Bustle
  Dr Who bustle
If you're a fiber artist and a Dr. Who fan, you might want to consider coming to Gallifrey. You'll feel right at home with all of the knitting & crocheted items wandering the halls!

Tuesday, February 12, 2013

Pattern: Project or Ditty Bag

This past weekend, I needed something small to make, and one cannot have enough ditty bags for knitting projects and whatnought. So, I made up two knitting project (or ditty) bags using some fabric that I had been given by a friend:
  1. medieval cats
  2. cats & sushi (from my pattern holder)

Project bag 1Untitled

Luckily, ditty bags are easy to make as it's a bunch of rectangles sewn together to form a bag. It takes less than an hour to make a ditty bag if you use a sewing machine, but it's just as easy to handsew a bag like this. If you've sewn something as simple as a pillowcase, you can sew a ditty bag.

These particular ditty bags have a flat bottom, so will stand (more or less) when you put them down onto a table.

Project bag 1 finished Untitled

Instructions on How to Make Your Own Ditty Bag


Materials You Need:

  • Fashion Fabric
  • Lining fabric (preferably cotton)
  • Cording (for the closure) 
  • Sewing machine or needle/thread

FIRST: Cut out your rectangles as shown in the illustration
  • Cut 2 fashion fabric
  • Cut 1 of the lining fabric
You can make them to any size. (In the schematic, I make a suggested size that should be big enough for a socks project.) However, the diagrams should work for any size -- just cut to your desired lengths.


SECOND: Sew the seams as shown in the diagram with 1/2" seam allowance.
  • Fashion fabric: Sew both side edges and the bottom edge
  • Lining Fabric: Fold your fabric over and only sew one edge and the bottom.
Make sure to press your seams open, as that will help in the next step.

THIRD: Sew "triangles" along the bottom of the bag, which makes a flat-bottomed bag. (In the diagram, the dotted lines are the actual sewn seams.) The triangle is 2" from the tip. You can cut these triangles off later when you are happy with how it looks.


When you turn the bags right-side out, the flat bottom should look like this:

Untitled

FOURTH: Insert the lining into your bag WRONG SIDES together (DO NOT SEW...yet). Pin the lining to the fashion fabric together so it does not move. (I find that it is easy to line up the outside side seams and start pinning from there.)

FIFTH: Finish the top edges of your bag in whatever manner you choose. You can use bias tape (or french bind) the top OR fold in the edges and topstitch, serge the edges, or any motley of finishing techniques. (Note: You can also choose to do this as the last step.)

SIXTH: Sew the casing  about 2" from the top of the bag (or to your liking). You need to sew two lines that are about .75" - 1" apart, depending on the size of your cording.
IMPORTANT: Make sure you REINFORCE the area where the outside seams are located by backstitching.


SEVENTH: Carefully seam rip the outside seams between the casing lines of the FASHION FABRIC ONLY. Do not seam rip the lining. You can do this on one or both sides, depending on how you want your bag to close. (Personally, I prefer two sided).

This gives you the casing for the drawstring closure.

EIGHT: Thread your cord through the channel casing left-to-right. Repeat going right to left. (See the illustration).  Attach a safety pin to one end and pull through the channel. (you can also choose to do this only on one side (but it doesn't close as well).

Here are pictures of two bags with one sided or two-sided closures.(You can see that the one sided draw string doesn't close 100%).

Project bag 1 finished Untitled


There are other variations you can choose to do with this type of bag, from fabric choices to making a reinforced bottom (like my cats&sushi bag -- I used black denim as a reinforced bottom).

Untitled

But, I hope you like the pattern. Please let me know what you make from these instructions!

Thursday, February 7, 2013

Flipping Mittens

I almost finished knitting the pair of Dire Wolf Mittens as a birthday gift. I actually DID finish the 2nd mitten, then discovered that I made a beautiful mistake in it. You'll see how I made the mistake when I detail my modifications.

I wanted to make these Dire Wolf Mittens as "flip top" mittens (where someone can stick out their fingers w/o needing to take them off), because the recipient uses his hands quite a bit and needs the dexterity of the fingers.
  1. Around line 40, I placed the 30 palm stitches onto waste yarn
  2. Knit the last 30 stitches
  3. Cast on another 30 stitches using a provisional cast on with a crochet hook
  4. Completed the mittens per pattern.
  5. Flip Top Mittens

  6. Put the bottom stitches on the smaller needles (US3/ 3.25mm) and knit ribbing upwards (and sewed the edges to the mitten
  7. Put the top stitches on the bigger needles (US 6 / 4.0) and knit the pattern DOWNWARD (lines 39, 38, 37, 36, 35), then.
  8. Swapped to 3.0mm beacuse I wanted something a LITTLE tighter so the gap wouldn't gape....and knit 1x1 ribbing for a few rows and attached them to the edges of the mittens.

Untitled 

When I was finished, I had 3 sets of needles lying on my desk. I immediately cast on for the 2nd pair of mittens. I grabbed the US 3s to start the ribbing. When I was finished with the ribbing, I grabbed the other set of needles and started knitting the main body

Guess which ones I grabbed? Ayup...the other set of US 3s.... I noticed that I was a tad bit tighter in my knitting, but I attributed that to the tension of the yarn and made a conscious effort to be loose...never considering my needles.

Oy. When everything was done and I finished weaving in all the ends, the actual stitches/inch gauge wasn't that far off...but the row count was...by almost 0.5 inches. Such a wonderfully beautiful mistake. *sigh*

I looked at the needles lying on my desk, and saw that the US 6s were on very short cables, which wasn't the ones I was using when I was knitting the body. I feel wonderfully "pretty".

A friend suggested that I knit another 2 mittens to match both sizes. I'm not sure I'm up for that, but I do have to knit a CORRECT mate to the first mitten that I knit. Luckily, the recipient's bday isn't for another month so I have time.

Oy...

Wednesday, February 6, 2013

Undivided Attention


Listening to podcasts while trying to knit fair isle can be hazardous. I can either pay attention to the podcast (and mess up my fair isle) or pay attention to my fair isle and miss what's being said.

Listening to music is a much better choice in the matter.

But, at least one of the mittens is done.

Untitled

Tuesday, February 5, 2013

DIY Magnetic Bookmarks for Charts

The chart holder that I had purchased came with some magnets that would
  1. hold the chart 
  2. mark where I am in the chart.
But, they were plain old, boring magnets. I had a magnetic bookmark that someone had given me (sans the board) that were glued onto some pretty ribbon, and thought it'd be pretty easy to replicate. I looked around online and found some --- a set of 3 for $12.00. Umm. No thank you. I love DIY, and this is really the simplest form of DIY.

I headed down to Joann's Fabrics and picked up the following:
  • 30" strip of magnetic tape with an adhesive backing ($0.79)
  • a spool of 5/8" ribbon ($3.50)
I picked up something bright that would heavily contrast with the Cats & Sushi fabric, plus it had to be about the width of the magnet strip. I settled on ladybugs.

Chart magnets

I took the ribbon and cut out two lengths:
  • 20" long (to fit across an 8.5" letter-sized paper)
  • 13" long (to fit across half a chart)
Why this long? So that the bookmark wraps around the chart holder, so you want it to be a bit long.
(NOTE: These magnetic bookmarks are made to fit my chart holder. Your sizing might vary.)

Assembling the whole thing is pretty easy.
  1. Cut out 2 magnets  (one magnet on each side of the board) in the following lengths: 
    • 5" for a half-chart marker
    • 8.5"  for a full chart marker
  2. Placed the magnets on the ribbon, leaving a 2" space in between the magnets so it could fold around the board. 
  3. Glue down the edges with a bit of superglue and wipe away the excess. (You only need to glue down only about 1/2" of fabric. Don't glue down too much....cut off the excess ribbon as needed, otherwise your magnets won't stick to the metal).


Untitled 


Viola! Magnetic bookmarks:


Untitled


Overall, it took about 15 minutes to assemble the magnets. It took longer to pick out the ribbon!

Monday, February 4, 2013

DIY Pattern Holder

The one thing I've discovered that while doing fair isle is that I actually need paper charts in order to see where I am in the pattern. My iPad isn't necessarily the best thing for me to read charts, because they haven't made the PDF readers able to handle charts very well. So, paper it is.

When I was down at my LYS, I checked out their chart holders, but they were BORING black holders. They were decent and a fair enough price (under $11 for the most basic holder), but they were BORING. I didn't want black. Then I discovered they had these:

Untitled

It was $4.95 and very simple. It's a board with magnets. So..hmm..I thought I could just make one for myself. I mean, yes, it'd be cheaper in time just to spend the $11.00 for the basic one or $15.00 for the folding one, but then I'd have to settle for boring, and who wants to just settle?

I took some fabric that I had lying about that I thought to use as a trial run for it (cost $0.00). A friend of mine had given me a whole bunch of cat print fabrics, and I had plenty of this lying around. Besides, what's not to like about cats eating sushi?

Untitled

I measured out the magnetic board. The board was about 10" wide, so I cut a 11" x 15" rectangular piece and played around with it. Unfortunately, after serging and french seaming this piece, I discovered that I had made the rectangular piece a bit too narrow (or used too big of a seam allowance with french seams and the ilk), so I recut another piece of fabric out to 12" x 15", which gave me plenty of extra seam allowance.

I took the top half of the holder (sans board) and used a very stiff iron-on interfacing so that I could stand it up when folded. I also used a piece of quilted fabric to pad the top half of the chart holder.

Quilted Fabric & Iron-On Interfacing 

(Cost: Negligible. These were scrap fabrics from other projects that just happened to be the right size. You can get very stiff iron-on interfacing for $3-$4 / yard. As this is only about 6" x 10", this piece is less than $1.00)

I made a pocket that fit the board very snuggly, then it was a matter of making the rest of it, including an extra pocket for a pencil. The whole process is reminiscent of making those text book covers out of a paper bag, like when I was in high school / college.

Untitled

And here's the resulting chart holder with pockets, and with it folded and standing
Chart HolderUntitledChart Holder

There are things I need to do to make it better, like making the pocket a wee bit bigger, and adding a closure, but it's done, and very serviceable. If I find a different fabric that I like better, I can make another.

I looked on Etsy to see how much these pattern holders cost. From my perusal, it's about $40 USD to purchase. This took me an hour to create (including the first miscut fabric).

So, overall, this cost about $6.00 and about an hour's worth of time.

Next, I'll post about how to make the magnetic bookmarks that hold the charts in place.

Friday, February 1, 2013

Making of a Carpet Bag: Part III - Final

(Here are the previous posts for the carpet bag....) After I attached all of the leather hardware into the bag, then I could actually line the bag with what I had created.

Why did I do it in this order? So that the lining would hide all of the grommets used to attach the leather straps (not to mention the stiffeners I used for the bags).

Hiding grommets

Bag lining the carpet bag requires that the lining be precisely measured, which is something I didn't wholly do (the lining ended up being a "teensy" too big), but I made do, by tacking down lining where it needed to be.

Here's the inside of the bag. That's my wallet purse and my iPad. There's still plenty of room below the ipad....and there's side pockets to the left, right, top & bottom of the photo.

Untitled

And here's the 90% finished bag. I still need to add more belt holes and a few other minor things, but it's usable!