Tuesday, September 29, 2015

Cosplaying Hawkingbird: Mockingbird's Mask

I started working on Kate's mask quite a while ago, and it's proving a little bit more difficult than anticipated, only because of the materials that I decided to use. I've made masks before, usually out of fabric. So my first attempt was to make this out of the same fabric as the dress.

However, I realized that masks I make out of fabric are often very much embellished with trim, which can hid a lot of the sewing seams. This did not work with the very simple Mockingbird mask. So, I had to try a different type of material instead.

Making the template is easy enough. I had my Viking take measurements of my face --
  • the distance between my eyes
  • the distance from my eye to my ear.
  • the length of my nose as well as my eyes
I measured out the distances on paper, and then sketched out an approximate look for my mask. It looks strange because the mask wraps around the face and appears elongated on a 2D surface. Because my face was relatively symmetrical, I completed the pattern on one side only.


Then traced out half of the pattern on drafting paper, because they are symmetrical and I was going to be cutting out fabric.

I cut out my first attempt on millinery fabric called buckram.

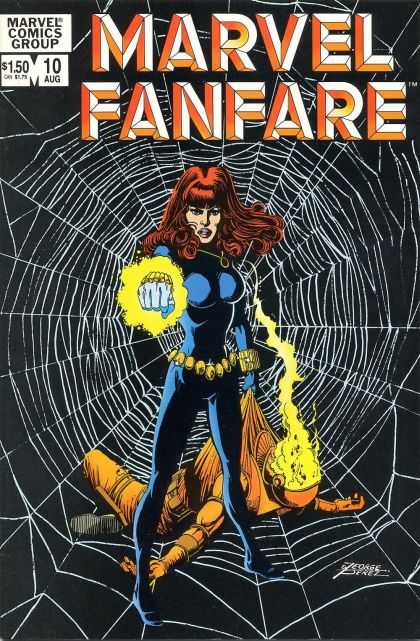
I took a look at Kate's mask on the comic book again, as well various renditions of Mockingbird's Mask, and noticed that there was a notch at the edge that isn't apparent in some frames of the comic book.


So I re-did my mask template. And started cutting out the fabric, which I attached to fusible interfacing so that it would be stiffer.

First, I tried to glue the fabric onto the buckram, which didn't look great, so I opted to sew instead, which is a pain to do, especially around the eyes. Sewing proved to be tedious and completely time consuming.


I made several prototypes trying different techniques, and most of them proved to be failures...or not quite the look I wanted. The finished masks were too fiddly to create and didn't have the stiffness that I wanted.

I abandoned the idea of using fabric, and went back to use the worbla instead. I traced out my paper template onto the worbla and cut it out. I shaped the mask to my face.

I cut out a bit more worbla for the top edge using another template


I had learned my lesson with worbla making the belt buckle, and researched techniques that other cosplayers used. I opted to use a heavy duty gesso. I taped off sections and started working on it.

The "V" portion of the mask got 5 layers of gesso, interspersed with sprayable shellac. Then the main body of the mask got 3 layers of gesso, interspersed with sprayable shellac. There was much sanding in-between layers. I also used a lot of blue painters tape.

Then it was a matter of painting the body of the mask using purple spray paint after covering the V part with the blue tape.
(Sam looking to see if he could steal Q-tips...)


Then I painted the "V" with a heavy duty acrylic paint. Then used a darker purple and black to paint the edges of the eyeholes as well as a shadow-effect between the V and main body of the mask.


After I was satisfied with my work, it was just a matter of final coat of a glossy finish. I still need to attach elastic bands to the mask...and maybe a piece of fabric (felt) to the underside), but that's fairly simple to do. Overall, the mask is done....


Overall, the mask took probably the longest time to make, just because I was trying to figure out how best to attack the problem, as you can make a mask in many different ways. Each way had its own advantages / disadvantages, and both ways (sewing vs. worbla) took a lot of time and effort to do well. 

In making the mask, I learned a great deal about what would be the best material for what type of application. For super hero masks that require more rigidity and sharp angles, I will stick with the worbla or paper maiche. For masks with softer contours, I'll probably stick with fabric.
The Making of....

Monday, September 28, 2015

Cosplaying Hawkingbird: Black Widow's Belt


Preface:  Convolution 2015 is about a week away, and I'm pretty much done with my outfit, save for a few minor bits & bobs. I've also finished writing up most of the project notes for this cosplay, which I'll be releasing over the next few days leading up to Convolution.

For those following at home:

The Making of....

The next part of Hawkingbird's outfit was Black Widow's belt that she nabbed from a locker in the Avenger's Mansion. Well, according to the Marvel Wikipedia entry, the belt belongs to Black Widow although after doing some cross-references, it doesn't even appear to resemble her belt at all.

Example of Black widow with belt


Kate's belt.

Okay, I'm not going to sweat the details, but they don't look anything alike. I just went with the Kate Bishop version.

I didn't want to make the belt from scratch, but did notice that it had a passing resemblance to a few "stretch plate" belts from the 80s. I scoured my local thrift store and found this one for a few dollars. It didn't quite match, but it was close, and with a few modifications, it would work.


First, I had to paint the whole thing silver. I used Testor's paint and painted each "scale" individually.

Next up, I had to re-do the belt buckle to be more of a larger dome shaped. Worbla to the rescue. Using a compass, I made a couple of paper cut-outs of what would be an appropriate size dome. Then, I cut the worbla. It ended up being about 4 inches in diameter. I cut out two pieces. One for the dome and one for the backside of the dome where I could attach the rest of the belt.


Then using a heat gun and a ceramic bowl, I molded it into a "dome" like shape.

Because I needed to attach a flat piece of worbla to the back, I put in support structures on the inside so that the worbla wouldn't collapse onto itself. (As a note, do not put warm worbla on a paper towel. It will stick....)


Here's the finished worbla piece. I smooshed the two pieces together then used a leather edging wheel to smoothen out the edges of the dome.

I forgot to take more "in-progress" photos, but basically, my Viking helped me add bondo to worbla to smooth-en it, then we sanded, then sanded some more....then added bondo...then sanded some more, before adding primer and a gold metallic paint and a glossy finish.

It's not perfect, but it ain't bad. With the belt stretched out, it's nearly the perfect size. I might have to remake this at a later date.

Friday, September 11, 2015

Cosplaying Hawkingbird: 3D Printing Battle staves

While I was working on Hawkingbird's dress, I started working on her weapons. First, I started with Mockingbird's battlestaves that she finds in the Avenger's Mansion.


I looked at reference photos of Mockingbird's battle staves for clarification. They are segmented pieces of a steel-alloy that can extend up to 4 feet. In addition, they can be screwed together to form a longer staff of about 8 feet.


Using some online software, I fashioned cylindrical pieces that could be made pieced together individually, then used the 3D printer at work to bring those pieces into reality. I made multiple "middle" pieces so I could make the staves as long as I needed to fit me.

The individual pieces. 

Although Mockingbird's staves are pretty long, they don't appear that long for Kate. Also as Kate wears them on her thigh (with a single elastic strap), mine needed to actually fit my body regardless of how long they are actually "supposed" to be in the comic book.


When assembled complete, each staves were about 13 inches long. I even made a connector piece that would allow me to connect the two staves into a larger staff.


I had some one inch elastic & velcro, and made a thigh holster. In the comic book, she is shown with one holster (as shown above), as well as dual holster in some frames. As more frames show the one holster, I opted to go with the one holster setup.


Mockingbird's battle staves are supposed to be a steel-alloy, and appear to be a white silvery color. I kinda liked the 3D material I used, so I am not going to paint them just yet and might keep them this color.

The Making of....

Wednesday, September 9, 2015

Cosplaying Hawkingbird: Kate Bishop's Purple Dress

As I mentioned in a previous post, I am cosplaying Kate Bishop from the Young Avengers.  Kate Bishop's main outfit for her "Hawkingbird" is an outfit that she wore to a wedding as one of the maid of honors when she encounters the Young Evengers.


Because I was going to be "ripping" the dress for this cosplay, I opted to make my own dress instead of buying a used one and making modifications. Joann's Fabric has wedding type fabric, and I found the correct color purple satin.  In addition, I had Simplicity 5561 in my pattern Stash


I made a couple of mockups and finally got one that fit well.

The fabric was pretty nice

Even Sammy thought the fabric was nice and helped me cut out fabric.

My dress dummy, Esme, was a nice stand-in for me and helped me fit the dress, especially since this is a strapless dress -- no malfunctions can occur.
(The skirt isn't hemmed, so is still pretty long in the photo.) 

With the belt added, it's a pretty close approximation.  Instead of "ripping" the dress, I opted to make a very long side slit instead so I could control how much it went up the leg.

With the dress completed, I could finish up the rest of her outfit.

The Making of....

Wednesday, August 19, 2015

Dr. Who Bandana

This past Saturday was the Rosie the Riveter Rally in Oakland, CA. I wasn't sure that I was going to be able to make it, between coming back from vacation at Crater Lake (more about that later....), catching up with work, and an archery tournament on Sunday.

A friend of mine sent me a Rosie the Riveter bandana, but it was a tad too small for me to wear that day (in support). However, I decided to make my own, but with a twist. I took out my Van Gough Tardis fabric and made myself a 24 x 24 inch bandana with narrow hems.


If you've never done a narrow hem before, this website gives you some good techniques for achieving a nice narrow hem: http://foursquarewalls.blogspot.com/2014/05/narrow-hem-three-ways.html

After putting up my hair in pin curls & messy bun, I tied the bandana around my head.


This is the first time I did my hair in the fashion. I followed a YouTube Tutorial on it, which worked out well for me. I plan on probably doing this again.


And I think I'll be making more Geek-related hair bandanas for myself in the near future. It's a nice way to show off a bit of geek, and use some fabric that I wouldn't otherwise use.

Monday, August 17, 2015

Archery Geekery

I have to say, archery has had a learning curve, but it's a blast. Plus, it caters to my inner competitive nature; not to mention my inner comic book geek with Huntress, Green Arrow, and Hawkeye (from both the Avengers and Young Avengers series).

Plus, it turns out that the competitions also have a bit of a fun geek element to them. A few weeks ago, I went to the "Million BC Shoot", where we shot 3D dinosaur targets.


I mean, who doesn't want a chance to shoot down a pteradon or a veolciraptor?

Not so Clever Girl.......


Oh, and mammoths....

Viewed from 110 yards...

Oh, and there was even a Zombie BootCamp & Training, where we shot at paper target zombies.


Where I earned my certificate for completion...

And my International Zombie Hunting Permit and dog tags....


What's not to love about archery?

Wednesday, July 22, 2015

Cutting off a Few Heads -- Finished Objects

I finally got a few heads off my Hydra Project cut-off, in terms of finished objects.
First up! The Viking Hat that I had promised for a dear friend.

Then I finished up the tabi socks that had been languishing in my project basket.


It feels good to get things finished. Now, onto the rest of the heads!

Monday, July 20, 2015

Knitting Attacks!

The other day, I went to my local archery range to help volunteer for a tournament event being held along our woodland trail. I was manning a first aid / refreshment stand half way through the course. It was a beautiful day in the woods. I got to meet a lot of archers as well as get some knitting done during the down times. I brought along my Doctor Who cowl as it's easy enough stockinette that's easily put down without issue whenever archers arrived at the half-way point.

When the tournament was winding down, I started hiking back to the beginning. I was walking along the trail for about 100 yards when I realized that my knitting dropped from my bag...or at least the knitting portion. The ball of yarn was still in my bag. The trailing yarn was wrapped along various twigs, plants, and rocks. I grabbed the ball of yarn (still in my bag) and started winding back when a very nice person started coming towards me with my unfinished cowl in his hand and yarn trailing behind him. OY!

Oh, only if he had left it where he found it, but he was being a good Samaritan. Alas, now the yarn was a tangled mess. I picked a random spot and started winding another ball from there. I managed to get most of it under control, then stuffed the whole thing in my bag to figure out how best to untangle it at home.

I was seriously hoping that I wouldn't have to break the yarn, but I knew it was a pipe dream. I just wanted to save as much of the yarn as possible.

When I got home, I started the de-tangling process. Here's about as far as I got before I decided that the tangled mess was too tangled and small enough to just ditch. I was picking out bits of leaves, twigs, and other forest debris from the yarn.


I did break the yarn at one point and re-attached the good ball back. I'm definitely going to need to soak this after I'm done.

Friday, July 10, 2015

Start of Tour de Fleece 2015

Tour de Fleece started on July 4th this year, and my goals for it are modest --- finish up some Spinning WIPS (SWIPS?) that have been languishing on bobbins.

For starters, I had 4oz lovely Alpaca Silk from Abstract Fibers. I had spun up a single ounce on my Ashford Kiwi, but never got back to it.

 Abstract Fibers - Dark Chocolate

I spun up all four ounces -- one per storage bobbin. I spun the singles as worsted weight at about 24 WPI.
Then made a lovely 4 ply that measures a heavy worsted weight.

Now, I need to dive back into my Fiber Stash and see what next project needs to be spun!