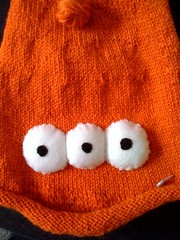
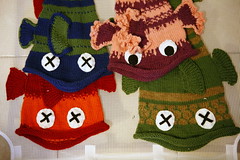
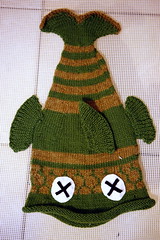
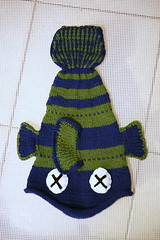
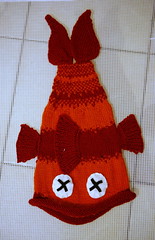
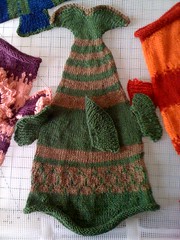
After making the dead fish hat for my Youngest Nephew and being requested by the rest of his family to ALSO make them fish.....
DH also asked if he could have a fish. And after watching me peruse Ravelry, he exclaimed, "I WANT THAT!!!!"
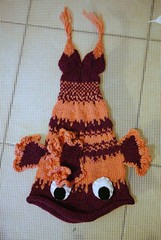
....which just happened to be Blinky, the 3-eyed fish from the t.v. show, The Simpsons.
So, his yarn was ordered alongside the rest of the family to make fish hats. Of course, by the time I had finished making 4 more fish hats (even with variations), I was more than done with this particular pattern. BUT, DH really wanted his hat, so I obliged.
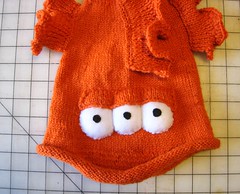
And, although parts of it were very very boring, I did have to figure out how best to make the eyes for Blinky, which ended up being felt and not knitted. I didn't quite like how other Ravelry projects looked with knitted bulging eyes, nor did I want it to be merely flat 2-dimensional eyes.
In addition, I added a bit more depth to the bulging felt eyes by adding an "eyelid"
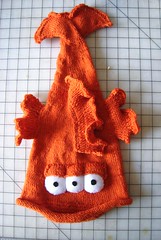
The eyelid is nothing more than a piece of knitted fabric that is knit to the length of the 3 eyes, then containing matching decreases on both sides. A little bit of stuffing is added to make them "puff" up a bit. The whole piece is then sewed/grafted onto to fish body.
After that, the dorsal and pectoral fins are added. The "curvy" bits of the fins are added using a scallop crochet stitch using a combination of double & triple crochet stitches as I saw fit.
The resulting fish is quite handsome. And quite fetching on DH's head
Monday, December 27, 2010
Sunday, December 26, 2010
Felt Eyes for Blinky
The following is a brief guideline on how to make the eyes for Blinky.
Items needed:
Making the template for the eyes:
The size of your felt eyes depends on exactly how big your fish is and how big you want your eyes. The items I used were:
a) (for the large template) the small end of one of my spinning bobbins.
b) (for the small template) the tape measure I carry around in my knitting kit -- it's one of those plastic tape measures that are rather commonplace at locales like JoAnns
I would have used a compass, if I had one in the house, but you can use anything, really.
Instructions:
1) Cut out the pieces for the white eyeball using your template. You need 1 pair of a small & large circle. (For Blinky, I cut out 3 large & 3 small)
2) Pair up one small & one large circle and pin them together in the center of both circles
3) Take your needle and thread and sew 90% of the edges together. (Obviously, one is bigger than the other so the big circle will fold over "slightly".) You're creating a dome-like shape using these two pieces of felt.
4) Stuff little dome
5) Sew shut.
6) Repeat steps 1-5.
7) Put two eyeballs together along one "edge" and sew those two pieces together
8) Repeat step 7 for the 3rd eyeball.
9) Cut out your black felt irises and sew them onto the white felt. (I did this last because I wasn't sure how the three eyeballs would look after being attached and didn't want Blinky looking cross-eyed.)
Items needed:
- white & black felt
- needle & thread
- stuffing of some sort
- 2 circle cardboard templates (one large, one small)
- a pin
Making the template for the eyes:
The size of your felt eyes depends on exactly how big your fish is and how big you want your eyes. The items I used were:
a) (for the large template) the small end of one of my spinning bobbins.
b) (for the small template) the tape measure I carry around in my knitting kit -- it's one of those plastic tape measures that are rather commonplace at locales like JoAnns
I would have used a compass, if I had one in the house, but you can use anything, really.
Instructions:
1) Cut out the pieces for the white eyeball using your template. You need 1 pair of a small & large circle. (For Blinky, I cut out 3 large & 3 small)
2) Pair up one small & one large circle and pin them together in the center of both circles
3) Take your needle and thread and sew 90% of the edges together. (Obviously, one is bigger than the other so the big circle will fold over "slightly".) You're creating a dome-like shape using these two pieces of felt.
4) Stuff little dome
5) Sew shut.
6) Repeat steps 1-5.
7) Put two eyeballs together along one "edge" and sew those two pieces together
8) Repeat step 7 for the 3rd eyeball.
9) Cut out your black felt irises and sew them onto the white felt. (I did this last because I wasn't sure how the three eyeballs would look after being attached and didn't want Blinky looking cross-eyed.)
Wednesday, December 22, 2010
Matching Alpaca
Due to today's weather, I am wearing:
a) an alpaca pullover
b) an alpaca scarf
c) alpaca mitts
They're all different colors, but since it's all alpaca wool, it must match, right? :-)
a) an alpaca pullover
b) an alpaca scarf
c) alpaca mitts
They're all different colors, but since it's all alpaca wool, it must match, right? :-)
Tuesday, December 21, 2010
Black Pit of Knitting
I am finding that knitting an item that is a single solid color (no heathering, no varigation, no color work...nada)....is *boring*, ESPECIALLY when its all stockinette stitch.
I distinctly recall having this problem with my Ribby Cardigan -- as the sleeves were a solid gray and the body was also a solid blue, but it wasn't so bad, as it had ribbing to at least keep things somewhat interesting
Right now I'm in the orange pit of knitting with DH's Blinky hat -- All orange stockinette punctuated by a decrease round every few inches. (All of the other dead fish hats were also made out of solid color yarns, but there were rounds of color work or the switching of color.)
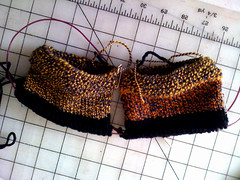
However, while it's boring, it's rather tolerable in a way because of the bright OSHA orange color. Unfortunately, my Color Palette cardigan (which is a handspun/commercial sweater) -- the cuffs & yoke are in handspun and the rest is commercial Cascade 220 in ...black.
Knitting up the handspun was a delight. Now, I'm in the black pit of knitting....literally....as I knit rounds and rounds stockinette of black yarn for the sleeves. I feel the light being sucked out of me as I knit. I have yet to even begin the body, which will even be a bigger blacker pit (black hole) of knitting.
So, I'm alternating between the orange pit of knitting and the black pit of knitting until I can't stand it anymore then switch to the other pit. Once I get Blinky done, I shall have to either finish up another colorful project or start a new pair of socks in a variegated color, just to save my sanity.
Monday, December 20, 2010
Basket of Warm Happiness
The weather in the area has been a bit cold (for us in the California area -- mid 50s-low 60s during the day, dipping into the 30s at night); and some days it's overcast with chances of rain. I know there are many who live in much colder climates that would scoff at our "cold" weather, but, to you I say...phhtttbbbttthhh :-P
I admit it. When it comes to actual "real" weather, California are weenies. If I want "cold weather", I'll drive to it, and come prepared with snow gear. LOL.
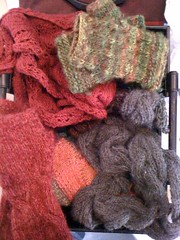
Never have I been so happy to actually be knitter. I have scarves, handwarmers, and sweaters to wear, as knitted garments are so amazingly warm and snuggly. I have a basket where I place all of the scarves & handwarmers so I can easily grab them whenever I leave the house.
I also have a few cloth scarves in there as well. The other day, I made the mistake of grabbing a cloth scarf (just for a change, I thought) and wore it to work. I felt every single cold wind blowing and felt so much colder. BRRRR.
The very next day? I grabbed my entrelac wool/silk Noro garden scarf; MUCH much better and FAR FAR warmer than those cloth scarves. I think I shall put those thinner cloth scarves away for Spring or Fall months. For this winter, it shall be knitted wool or alpaca scarves.
I've never been a big "scarf" knitter; having only made a handful, but they are wonderful things. :-)
Friday, December 17, 2010
Never Say Never
Yesterday, I got a few minutes to put the eyes on my School of Mostly Dead Fish. I had picked up some felt, cut out the whites, then black felt for the dead irises. Everyone except Eldest Niece wanted 'dead' eyes. She's such a girly-girl, but absolutely adorable.
I really thought I was done with this pattern (after all, I'd already made 5 of these at this point), except then DH asked about HIS fish (which I did promise to make)....*facepalm*
On the flip side, it's is going to be a Most Awesome Fish, because it will be this fish.
So, I cast that on yesterday, and since I really don't have an official deadline, it'll be made in good time. However, I think I shall try and finish it before Xmas so we can take photos of everyone in their hats.
Wednesday, December 15, 2010
One Step Closer to FO
Yesterday, I finished my BIL's hat for the holidays.
It's part of a bigger school of fish that I'm making for holiday gift giving for SIL, BIL, and the 2 other kids.
I still need to add the eyes, and then I can officially say I'm DONE with holiday knitting.
It's part of a bigger school of fish that I'm making for holiday gift giving for SIL, BIL, and the 2 other kids.
I still need to add the eyes, and then I can officially say I'm DONE with holiday knitting.
Monday, December 13, 2010
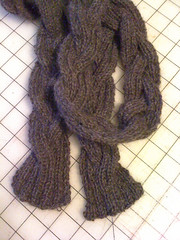
FO: Reversible Plaited Scarf
Normally, most scarf knitting bores me as it's a continuous seemingly never-ending line of knits / purls. Even Elizabeth Zimmerman mentions in her book, "Knitting without Tears", that to make a scarf you continue until, "you can't stand it anymore".
I found this pattern, Reversible Plaited Scarf, on Ravelry that promised to be a relatively quick knit and was interesting. I wanted a "skinny" scarf that was warm enough for our cold weather but that I could wear indoors w/o looking like I was bundled up for the snow. (Our office A/C is sometimes over-aggressive.)
This project became my "extra" in-between-project for whenever I couldn't work on my primary project (for whatever reason) when I was on-the-road. Consequently, it lived in my purse and took a bit longer to complete than if I was actually working on it on a consistent basis, BUT it proved to be a relatively quick knit, even with worsted weight yarn.
It's made out of Cascade Eco Alpaca (undyed baby alpaca), and only took 1-skein to complete. Plus since it's alpaca, I'm sure it'll stretch out a little bit longer.
And it's one step towards solving my scarf-dilemma.
Friday, December 10, 2010
Scarves & Cold Weather
I've never really been a 'scarf' type knitter. I made my first scarves when I first began knitting; both to learn techniques -- how to knit & purl, double knit, cables, entrelac, etc. I know plenty of knitters who love knitting scarves. I'm just not one of them.
I moved on to other knitted garments for wrapping around one's neck: small triangular shawls, cowls, etc., and haven't gotten back to scarves because, well, I find them boring. I've only made a total of maybe 4 scarves.
But now that the weather has turned colder, I'm reaching for all of those neck coverings, especially the knitted scarves I've made; and loving them as they are warm and cozy! I'm especially reaching for my entrelac scarf as it's a bright splash of color that goes with almost any jacket I own.
With the cold weather, I'm seriously reconsidering my aversion to knitting scarves.
Monday, December 6, 2010
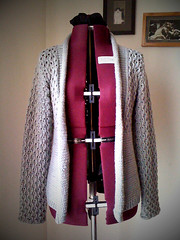
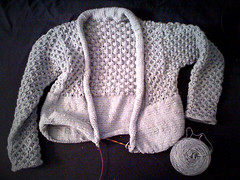
Cerisara: Completed
I had a change of plans last Thursday (12/2) that left me a good chunk of uninterrupted time to actually finish Cerisara. So, I turned on Hulu.com and worked through my queue of various anime shows and some of my sci-fi shows, while knitting the last few inches.
I had a total of 5 inches left. It toook about 3 minutes to do a single row. And it's about 8 rows to the inch.
So, mathwise (because knitting involves math....)
(8 rows/inch) * (3min/row) = 24 minutes / inch
(24 minutes / inch) * 5 inches = 120 minutes = 2 hours
It took a bit longer than that as there were breaks for food, stretching, and cat interruptions. So, I made dinner, turned on my shows, and knit for a while.
Then I washed and blocked it. It's a bit cold in our area, so it didn't dry for a bit. And, like I expected (from doing the swatch), the knitted fabric "grew", which made it a LOT drapy-er. So I maniupulated the sleeves and length to about what I wanted and that worked out very very well.
However, it felt GOOD to get those off of my needles, as I was getting a bit annoyed at how many things I've started but not yet finished.
BUT, YES! I finished it, and am very happy.
Friday, December 3, 2010
The Little Monsters that Please....
Monsters aren't all bad creatures. Some are downright adorable and helpful. You just have to look beyond their initial visage.
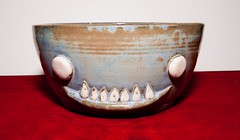
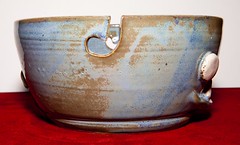
I was wandering the Renegade Craft Fair (last year) when I spotted a potter with some wonderful quirky creations, called Skeletal Dropkick. What attracted me to her table were all the pieces that had skeletons, demons, and monsters faces that were just absolutely adorable. They were quite a change from the 'normal' (translate "boring") pottery that I saw on other tables.
When I took a closer look at her wares, I saw that she had a yarn bowl that was lovely but way to small for my needs; it only fit a single ball of yarn. So I commissioned a bigger one from her, and asked her to put two yarn hooks for them.
She obliged.
Since then I've also purchased a monster mug and a French demon butter bell from her...all surprisingly affordable AND amazingly cute. Plus, she was local artist in my area, which was great, since I try to buy local. So not only do I get products that please me, but I also get to support a local independent artist (a win-win-win situation in my book).
I pretty much use my yarn bowl for holding yarns for my project whenever I work at my desk. This is one of those things that bring a little smile to my face whenever I see them.
Thursday, December 2, 2010
Designing My Own Sweater
I like the idea of "designing" my own sweater/cardigan. However, doing this from scratch, scares the beejeezus out of me. I don't know why. I design my own costumes that I sew. Designing my own knitted garments shouldn't be that difficult.
After all, it's taking drawing, figuring out the measurements, multiplying measurements by your gauge...then making it fit. That's not so hard right?! (yeah, right...)
I've already quasi-designed my friend's wrist-warmers as winged the pattern for my Top Down No Gauge Stocking cap. That's designing, right? So, how much more difficult to do that for a sweater? The logical part of my brain, says, it can be done. The knitting part of my brain? Not so much.
And I really would like to use my handspun and use it for something unique that's to me. I don't have enough for a full cardigan, but I have enough to make nice colorful accents. (I've often seen this question a few dozen times on Ravelry --"what do I do what the small amount of handspun I've made?")
So, what I've been doing is looking at various patterns of cardigans that I like for inspiration. I'm looking at design elements and what would work with a limited amount of handspun.
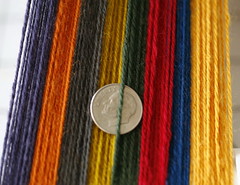
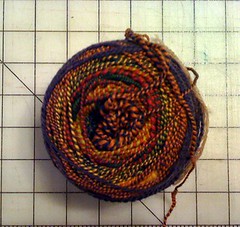
I have about 475 yards of rainbow handspun that I did for Tour-de-Fleece that was both Navajo-plied and barberpoled. And I have some black Cascade 220 that should go well with the colors.
At this point, I'm looking at creating:
I started the sleeves this week. I cast on about 48 stitches for each sleeve and am knitting in the round.
I'll continue knitting these until it reaches the desired length, then start in on the body. Right now, it almost seems a bit "too" big, because currently all the sweaters/cardigans I have been wearing are very fitted. But it has the correct amount of ease I want, and is similar to a number of "outer wear" sweaters that I have. Luckily, if it's slightly too big, washing the Cascade will make it shrink about 10% (from previous experience)
After all, it's taking drawing, figuring out the measurements, multiplying measurements by your gauge...then making it fit. That's not so hard right?! (yeah, right...)
I've already quasi-designed my friend's wrist-warmers as winged the pattern for my Top Down No Gauge Stocking cap. That's designing, right? So, how much more difficult to do that for a sweater? The logical part of my brain, says, it can be done. The knitting part of my brain? Not so much.
And I really would like to use my handspun and use it for something unique that's to me. I don't have enough for a full cardigan, but I have enough to make nice colorful accents. (I've often seen this question a few dozen times on Ravelry --"what do I do what the small amount of handspun I've made?")
So, what I've been doing is looking at various patterns of cardigans that I like for inspiration. I'm looking at design elements and what would work with a limited amount of handspun.
I have about 475 yards of rainbow handspun that I did for Tour-de-Fleece that was both Navajo-plied and barberpoled. And I have some black Cascade 220 that should go well with the colors.
At this point, I'm looking at creating:
- a yoke cardigan using EZ Fair Isle Yoke cardigan (which is all percentages and not really a pattern) as a basis for my own design cardigan
- about 2" of ease (to fit over other clothes).
- For the yoke, I'm planning on alternating between the Navajo-plied and the barber pole.
I started the sleeves this week. I cast on about 48 stitches for each sleeve and am knitting in the round.
I'll continue knitting these until it reaches the desired length, then start in on the body. Right now, it almost seems a bit "too" big, because currently all the sweaters/cardigans I have been wearing are very fitted. But it has the correct amount of ease I want, and is similar to a number of "outer wear" sweaters that I have. Luckily, if it's slightly too big, washing the Cascade will make it shrink about 10% (from previous experience)
Wednesday, December 1, 2010
Cerisara: Progress
I'm currently about 5 inches away from finishing Cerisara.
She's lovely, and fits really well, and I CAN'T WAIT to wear her. But never has reverse stockinette stitch seem so tedious, as I'm knitting flat. The hard part (the lace) is done. Well, it wasn't really hard, but I did have to pay attention.
In complete boredom of doing reverse stockinette (which seems to take FOREVER on this cardigan), I started two new projects. LOL
1) my BIL's Dead Fish Hat
2) the sleeves for a new yoke sweater involving my handspun.
But, I am determined to FINISH this project. I've currently got it in my bag and shall be working at it at lunchtime today to get a few inches finished.
Subscribe to:
Comments (Atom)

