Wednesday, August 19, 2015

Dr. Who Bandana

This past Saturday was the Rosie the Riveter Rally in Oakland, CA. I wasn't sure that I was going to be able to make it, between coming back from vacation at Crater Lake (more about that later....), catching up with work, and an archery tournament on Sunday.

A friend of mine sent me a Rosie the Riveter bandana, but it was a tad too small for me to wear that day (in support). However, I decided to make my own, but with a twist. I took out my Van Gough Tardis fabric and made myself a 24 x 24 inch bandana with narrow hems.


If you've never done a narrow hem before, this website gives you some good techniques for achieving a nice narrow hem: http://foursquarewalls.blogspot.com/2014/05/narrow-hem-three-ways.html

After putting up my hair in pin curls & messy bun, I tied the bandana around my head.


This is the first time I did my hair in the fashion. I followed a YouTube Tutorial on it, which worked out well for me. I plan on probably doing this again.


And I think I'll be making more Geek-related hair bandanas for myself in the near future. It's a nice way to show off a bit of geek, and use some fabric that I wouldn't otherwise use.

Monday, August 17, 2015

Archery Geekery

I have to say, archery has had a learning curve, but it's a blast. Plus, it caters to my inner competitive nature; not to mention my inner comic book geek with Huntress, Green Arrow, and Hawkeye (from both the Avengers and Young Avengers series).

Plus, it turns out that the competitions also have a bit of a fun geek element to them. A few weeks ago, I went to the "Million BC Shoot", where we shot 3D dinosaur targets.


I mean, who doesn't want a chance to shoot down a pteradon or a veolciraptor?

Not so Clever Girl.......


Oh, and mammoths....

Viewed from 110 yards...

Oh, and there was even a Zombie BootCamp & Training, where we shot at paper target zombies.


Where I earned my certificate for completion...

And my International Zombie Hunting Permit and dog tags....


What's not to love about archery?

Wednesday, July 22, 2015

Cutting off a Few Heads -- Finished Objects

I finally got a few heads off my Hydra Project cut-off, in terms of finished objects.
First up! The Viking Hat that I had promised for a dear friend.

Then I finished up the tabi socks that had been languishing in my project basket.


It feels good to get things finished. Now, onto the rest of the heads!

Monday, July 20, 2015

Knitting Attacks!

The other day, I went to my local archery range to help volunteer for a tournament event being held along our woodland trail. I was manning a first aid / refreshment stand half way through the course. It was a beautiful day in the woods. I got to meet a lot of archers as well as get some knitting done during the down times. I brought along my Doctor Who cowl as it's easy enough stockinette that's easily put down without issue whenever archers arrived at the half-way point.

When the tournament was winding down, I started hiking back to the beginning. I was walking along the trail for about 100 yards when I realized that my knitting dropped from my bag...or at least the knitting portion. The ball of yarn was still in my bag. The trailing yarn was wrapped along various twigs, plants, and rocks. I grabbed the ball of yarn (still in my bag) and started winding back when a very nice person started coming towards me with my unfinished cowl in his hand and yarn trailing behind him. OY!

Oh, only if he had left it where he found it, but he was being a good Samaritan. Alas, now the yarn was a tangled mess. I picked a random spot and started winding another ball from there. I managed to get most of it under control, then stuffed the whole thing in my bag to figure out how best to untangle it at home.

I was seriously hoping that I wouldn't have to break the yarn, but I knew it was a pipe dream. I just wanted to save as much of the yarn as possible.

When I got home, I started the de-tangling process. Here's about as far as I got before I decided that the tangled mess was too tangled and small enough to just ditch. I was picking out bits of leaves, twigs, and other forest debris from the yarn.


I did break the yarn at one point and re-attached the good ball back. I'm definitely going to need to soak this after I'm done.

Friday, July 10, 2015

Start of Tour de Fleece 2015

Tour de Fleece started on July 4th this year, and my goals for it are modest --- finish up some Spinning WIPS (SWIPS?) that have been languishing on bobbins.

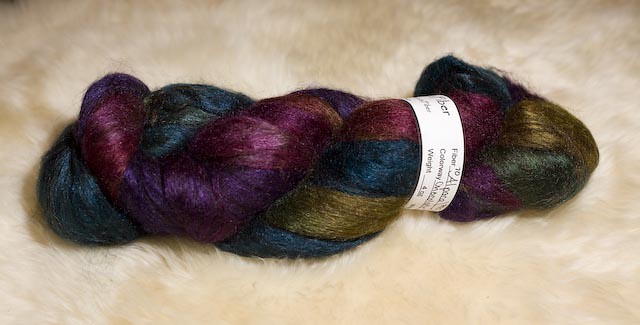
For starters, I had 4oz lovely Alpaca Silk from Abstract Fibers. I had spun up a single ounce on my Ashford Kiwi, but never got back to it.

 Abstract Fibers - Dark Chocolate

I spun up all four ounces -- one per storage bobbin. I spun the singles as worsted weight at about 24 WPI.
Then made a lovely 4 ply that measures a heavy worsted weight.

Now, I need to dive back into my Fiber Stash and see what next project needs to be spun!

Tuesday, June 16, 2015

Project Hydra - A Bad Case of Start-itis

Lately, I've had a bad case of start-itis. I was finishing my many knitted projects fairly quickly, so was starting two projects for every one that I finished. It was a form of Project Hydra -- cut off one head and more grow in its place.


As you might imagine, this propensity was going to lead me into a lot of trouble. At first, this system worked because I was knitting quick small projects, like hats.


Then, I started projects that were bigger in scope, like Louisa from CocoKnits. (I'm 16 inches into the sweater.)


And Leftie, by Martina Behm, which is an easy shawl but grows quickly. I love these colors!


I still had to knit up horns for a friend's Viking hat that I had promised for his birthday.


AND....I still had a few other things on the needles, like Dragons, Dragons, Dragons by Mary Scott Huff, which is a complicated fair isle pattern cowl. 

(I'm much farther along than this photo suggests)

My Doctor Who cowl for the Who Knits CAL on the podcast. And I'm not even counting the socks I have on the needles. Needless to say, the practical knitter in me started channeling Elizabeth Zimmerman. 

What was I doing?!? 

I couldn't be expected to finish any given project in a reasonable amount of time if I was splitting my time in between multiple large projects!  I mean, I know that I like having different projects for different occasions --- simple stockinette for when I have to pay attention; complicated projects for when I can sit down and really concentrate; etc....but this was getting out of hand.

At heart, I'm more of a project knitter -- I love making projects that I can use, which is problematic if I'm not actually able to finish an object TO use.

I think it's time to cut off all the Hydra heads at once.....

Thursday, June 4, 2015

Cosplaying Hawkingbird (aka Kate Bishop's Hawkeye)

I'm going to try and be better about some of my cosplay / costuming diaries. For the upcoming con, I decided to go as Kate Bishop from the Young Avengers comic book series (2005-2006)


She has several outfits, but I plan on making her very first outfit that she kludged together. She was attending a wedding (presumably as a maid of honor) before joining with the other Young Avengers to help defeat Kang. In order to join the fight, Kate puts on gear that she finds in the Avenger's mansion, including:
  • Mockingbird's Battle Staves and mask
  • Swordsman's Sword
  • Black Widow's utility belt
  • Hawkeye's bow and arrows.
The other Sidekicks nickname her "Hawkingbird" when she appears as in the above frame.  (Later, Captain America gives her Hawkeye's bow and calls her "Hawkeye", thus dubbing her the "new Hawkeye" ---- that is until Clint Baront seemingly comes back from being "dead". After that, there are two Hawkeyes, which does cause some confusion.)

I intend on making nearly all of her costumes, starting with her very first one --- the "Hawkingbird" version. I want to make this for Convolution 2015 as my friend, Baronlaw, will be the Clint Barton version of Hawkeye.

Now, in this particular costume, she carries a LOT. She grabs whatever she can find to go into battle. She straps the battle staves to her leg, but I'm not wholly sure how she carries both the sword and the bow effectively. In the actual comic book, she is conveniently shown using one or the other but not necessarily carrying both. And at one point, she does lose the sword during a fight. So, for my purposes, the sword is a lower priority for the outfit. (Also, I think she'll be recognizable without the sword and it'll be easier to wander the convention halls without it.)

I have a plan of attack for her outfit and have already started construction on some pieces of it. Everything is pretty straight forward and "easy". My biggest concern is finding or making that belt. It looks vaguely from the 80s. It's supposed to be Black Widow's utility belt, but it doesn't quite look it.

 
Or this one

I'll definitely be making it "screen accurate" to the comic book, but I'm not convinced that it is Black Widow's belt. I'll be posting in-progress photos of her costume as I work on it.

The Making of....


Tuesday, June 2, 2015

Using a 3D Printer for Props

One of the perks that I get at work is the use of a 3D printer (a Makerbot Replicator 2x). An entire group of employees chipped in to purchase the printer and our company was gracious enough to donate some funds for it.

I've been wanting a 3D printer ever since I saw one at Maker Faire all those many years ago. Each year that we attend (like this year), there are more printers out there at various prices and qualities. It's getting to the point where they are very affordable. This year at Maker Faire (2015), there was an very large tent dedicated to just 3D printers and CNC machines. I counted at least 15 different 3D printer vendors with some very reasonable prices.


But since I have one at work, I haven't felt quite the need (yet) to have one in my own house. So, I've been making copious use of the 3D printer at work to create props for my cosplays.  I've already written about one of the props that I made -- San's dagger from Princess Mononoke -- which has already gotten a lot of "likes" and people adding it to their own collections.


For this prop, I modified someone's existing design (under a Creative Commons - Attribution Share Alike license) to make the dagger. For anyone who wants to make it, I uploaded the files to Thingiverse.com so that you can print out one for yourself. (Princess Mononoke - San's Dagger)


I've also been printing out other props for other cosplays. There's actually a large number of makers who have created costume props from various movies, t.v. shows, and comic books. And the files are free, so I'm making use of their generous creativity.

Printing, printing, printing...

Here's the final object. I won't tell you what it's for....just yet...until I get the other pieces printed.


Let's just say that I've been having fun with many of the existing files on Thingiverse and Youmagine. Plus, since I can print things at work, I start the files and come back some time later to a finished print since it takes anywhere from 1-7 hours for a print, depending on the size.

Here's another set of props. Can you guess what it is?

And, I'm also at the point of making my own very simple props using TinkerCad, which I'll write about later once I get the prints finalized. 

But needless to say, I've been having fun using the 3D printer. It's also changing how I think about certain prop pieces. Once prices have come down a lot further, I'll seriously consider adding one to our home. Now, I just need to hone my painting skills somewhat.


Friday, May 29, 2015

Cosplaying Gogo Tomago

For Fanime 2015, I decided to do a last minute hall costume of Gogo Tomago from Big Hero 6, because she's a kick-ass character, who is super smart, athletic and tough-as-nails. In essence, she is wicked cool.

Her street outfit was pretty straight forward, and it was comfortable for running around the convention. It took me about a day to purchase all of the clothes & materials, then a few hours to make what needed to be made.

I went to my local thrift shop, clothing store, pharmacy, and Joanns for the "raw" materials. I also pulled stuff from my own closet, which helped cut down on some costs. The only thing I had to order online was the wig.

I love thrifting for costumes, because it usually means I have minimal modifications that need to be done, which means I can spend more time sewing other costumes.

Stuff I had to make:
For Gogo, the only thing I had to make from scratch were her bike reflector bands. I found purple waistband elastic (1.5 inches) and white fold over elastic (5/8 inches) that were slightly reflective. I sewed them together. They pretty much came out perfectly. Overall cost for both of these items: $5.00


From the Thrift Store:
Here's what I managed to thrift:
  • Used black leather jacket from my local thrift store  - $8.00
  • Black running shorts - $2.00
The black leather jacket wasn't a perfect match since hers is more of a half-jacket, but it would work in a pinch.


The black running shorts had to be modified slightly to add the red stripes down the side as well as the small "V". These shorts were popular in the 1980s, but good luck finding them now! I added red satin ribbon down the sides and made a "V" by seam ripping the bottom portion of the shorts then restitching.


From Kohls and my local costume shop:
I was going to have buy leggings and purple tights for Gogo's outfit and do some modifications.  I found cheap dark grey capri leggings from Kohl's and some opaque purple tights from Leg Avenue from my local costume shop.

In order to get her look, I put on both tights and leggings. My Viking carefully pinned the tights to the leggings while I was wearing them so that both were stretched appropriately. Afterwards, I cut off the feet of the purple tights and sewed them together around the bottom of the legs. Then it was a matter of adding "artistic" holes.


Overall cost for both of these items: $20.00

From my closet:
For the rest of the outfit, I had a few things, including her white tank top, shoes, and bicycle gloves (that you can probably buy at any bike shop or on Amazon.) And bonus, there's a "G" for Gogo. :-)


I love it when I can re-use stuff for cosplay!

For the Wig:
The wig was the biggest cost for the outfit. I found the right wig from Arda Wigs (Magnum short at $30.00). I also ordered some purple wefts that I sewed into the wig. Luckily, Arda wigs has some pretty good tutorials for wig modification.

The wig was the biggest expense for the outfit, plus, it took a few days to arrive. The hardest part of this costume was sewing the purple wefts into the wig so that they would look correctly when worn.


From the Pharamacy:

I also did have to purchase special makeup for Gogo, as she wears purple eye shadow and pink blush, which are not in my normal makeup kit. (Cost: $10.00). Also, there are some excellent makeup tutorials for Gogo on YouTube. I practiced putting on this makeup for a few days, wearing it to work.


And my absolute last purchase for the costume was the bubble gum. (Cost: $1.50)


Because, well, it's Gogo and you need the bubble gum!


Time to Woman UP!

Thursday, May 28, 2015

Making the Princess Mononoke Cosplay Accessories: Part 2

For every costume, accessories must usually be made to complete the outfit. Luckily, the accessories for the Princess Mononoke cosplay were few and fairly simplistic to make.


She had:
1) Headband & arm bands
2) Earrings
3) Claw necklace, which acts as a counterweight to the cloack
4) A dagger (or spear)
5) Her masks.

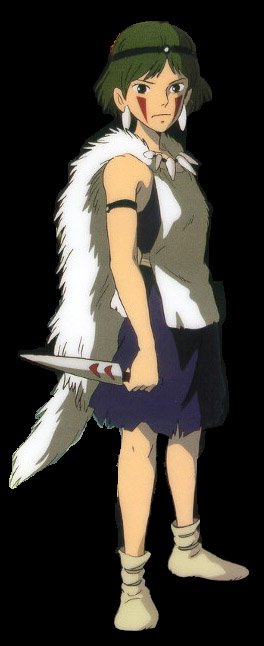
For Fanime 2015, I ran out of time to make her masks, but I managed to pull enough together to go as depicted in the above image. Since she is seen in the movie without her masks, I felt I could get away with not having it, especially as I was going to be working at Fanime.

The complete dress diary is here, including the costume creation.

Headbands & Armbands
At Joann's, I found thick round shell beads and black elastic. I simply sewed the shells into black elastic from Dritz.


I made 3 versions that could be easily tied onto my head and arms.


Earrings
The same trip to Joann's landed me these shell pendants (also on sale). They were the right shape and lightness. I picked up some cheap nail polish (White French tips for $0.99) and painted them.


Then I added earring findings.

Necklace
For the necklace, I wanted something 'heavy' to act as a counterbalance to the weight of the cloak. I bought 3 packages of white Sculpy and 2 packages of black.

Then sat around for an hour trying to get the shapes correct, especially for the claws. I added holes before baking the lot in the oven, per the directions.


Then I took leather and strung up the beads. The loops are for where I would hook them into the cloak via very large buttons.


Dagger

I could have made the dagger out of Sculpty as well. And I've also seen cosplayers make it out of cardboard. However, I have a 3D printer at work, so I thought to use that instead.

I modified an existing 3D project on Thingiverse to create the dagger for San. (The dagger files can be downloaded here, and are under a Creative Commons - Attribution Share Alike license. You can also find the original files that I modified.) 

The knife was printed in 7 different pieces. Six pieces made up two halves of the blade, then I created a new handle for it. Unfortunately, I forgot to take photos of the print job.

I've glued each half with an acetone/ABS glue that I made (using scraps of orange ABS). Hence, why you see orange on the handles.

After glueing the whole thing together, I sanded and painted it. 


Then it was a matter of putting on the final touches. I made a template of the "V"s on the dagger.

Then I wrapped the handle in leather to make it easier to hold.

As I mentioned before, I didn't have time to finish her mask, but I think I'll go ahead and finish up the entire outfit for next year again.