Whenever I go on a trip, I have to plan out whatever knitting I need to bring. We were driving for this particular trip so I didn't have to worry about bulky or packing effectively, but I did want portability and ease of knit, because there were going to be plenty of younger kids (4-7) around for the holidays, not to mention conversations with the adults. So I needed something(s) that was going to be easy to memorize and the ability to knit while talking...or to stop if necessary due to child antics.
Two projects came to mind:
--> a pair of vanilla socks -- two at a time; toe-up; on two circulars. The pattern was a SideStream master sock from New Pathways for Sock Knitters: Book One by Cat Bordhi.
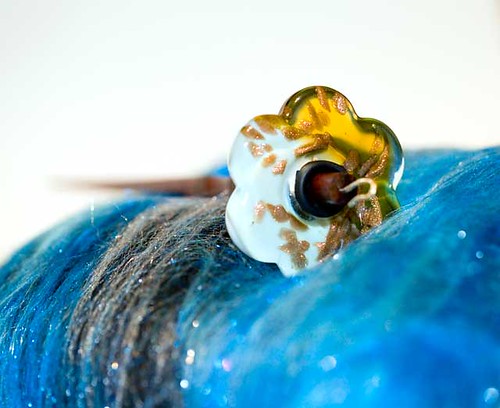
--> Night Sky Karius shawl -- an easy 8 row pattern with increases in specific areas. Plus, I could use my hand-dyed / handspun yarn (Nightsky handspun)
I started both projects (because I hate casting on in a moving car) and got both to a point where it'd been easy to just pick it up again. I also decided that I would bring two spindle spinning projects as well.
So, I loaded up my Nantucket Knitting Bag (I picked up used on Ravelry) with my 4 projects.
I found myself knitting on the parts of the trip where I didn't need to drive, and during the family get-togethers.
Unfortunately, I had left my generic sock pattern at home (OH NOES!) but some very nice people on Ravelry were able to give me the rest of my Master Numbers (I had my gauge, RPI, and foot sizes, but didn't know the rest) and I was able to finish the sock (sans cuffs) on Thanksgiving Day.
I'm also about 40% done with my Nightsky, knitting most of it during the drive up and down, as it's a relatively easy pattern to memorize. I also managed to get some knitting done while sitting on couches and talking to friends at LosCon. My Nightsky Karius easily fit into my little travel purse so I could leave the large Nantucket behind.
Unfortunately, I didn't touch either of my spinning projects the entirety, but of course, if I had left them at home, I would have desparately wanted them.
Monday, November 30, 2009
Wednesday, November 25, 2009
Steeking!
My little dishcloth project has been bound off then steeked. Yaay. It was actually really easy, once I bothered to fully read and comprehend the instructions from Eunny Knits.
Luckily, I used a contrasting purple yarn to crochet the steek stitches up both sides so I could see WTH I was doing.
Then I double checked to make sure I had the little ladder as shown in the instructions from Eunny. I had to undo my stitches at least once because I caught the wrong front loops at one point.
Then it was cutting that ladder!
Resulting in a steeked dischloth! So, now I'm relatively confident I can steek a bigger project with minimal fuss.
The two things I learned in this project:
1) the chart I designed does actually work. I have to tweak certain parts of it, but I feel relatively confident that I can put it on the intended project and have it work well.
2) steeking is relatively easy once you get past the "OMG, I'M GOING TO CUT MY STITCHES" phase of it.
Friday, November 20, 2009
Mending on the Go
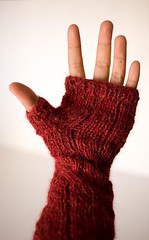
This morning while getting off the train, I found that my replacement Dashing handwarmer had started laddering! Oh Noes! Apparently, during a cable twist, I must have dropped and stitch and never noticed.
I had been wearing the glove for about a week now, and never noticed the slow progression of the dropped stitch. So, I grabbed my crochet hook out of my bag (it permanently lives in one of the built in pen pouches), and started to bring the ladder back up. But, then what? I didn't have any of the same yarn to catch it, then weave in the ends, so I opted for the next best thing.
Once I got to the top of the ladder, I relooped the last stitch through the previous row several times to give it a nice firm knot. Then used a bit of spit to felt the knot between my fingers. From the right side, you can't even tell there's anything wrong.
Two Color on the Train
Currently, one of my projects is a sample two-color version of Swirling Gauntletts. I've done two color work before on a double-sided knitted project when I first started, but this is the first time of two colors on a single row. I only usually work on this while on the train, which affords me a good 30 minutes of just working the simple cabling pattern without interruption.
So far, so good, and I've learned a lot.
For example, when too tight is too tight. A tip that I read (after I was half-way through this glove) was that you can't pull the yarn too tight or you get puckering. Well, couple pulling the yarn too tight WITH cables (which pulls the yarn even tighter) and you get a LOT of puckering & decrease in size. The middle of the project is a lot smaller than the beginning of the project. So, for the last few rows I've relaxed my death grip on the yarn, and it's starting to even out a bit, which is good.
I've finally figured out how to hold both strands of yarn: the knit stitch in the right hand, and the purl stitch in the left hand (as this is a 2x2 rib). It's a bit slower than my normal knitting speed, but it works. English-style knitting is very weird, but for this project it works.
I may or may not make the matching set of gloves for this one. This was really meant to be a sample test with some extra yardage I had left over from my Hexagon Blanket. Plus, it's way too small to fit anyone (except maybe my neices & nephews who are still in the single-digit age bracket).
Of course, this means that I'm going to try my hand at a small Fair Isle project next. :-)
Thursday, November 19, 2009
Project Updates
On the Spinning Front
--> I spun up my first two-ply on the wheel, which went surpisingly fast. Normally I was plying on my drop spindle, which takes *forever*. However, my plys on my drop spindle look a heckuva lot better than on my wheel. Of course, this could be because I was plying two totally different thicknesses of yarns......
But I am going to need to practice a lot more on plying, because I seriously see the wheel as a much easier way to ply.
--> I have picked up the Shetland I have currently on my Kundert. I've been ignoring it while I practice on the wheel.
On the Needles
I have three things on the needles still in progress:
1) a dishcloth done in the round that I'm going to steek; it's located next to the computer
2) still slogging my way through the cardigan; for when I need something mindless,
3) a small 2-colorwork glove; for the train ride to work
#1 & #3 are learning projects: steeking & colorwork. I may or may not make the 2nd glove of #3 -- it'll most likely fit my niece or nephew, but it's a nice litle exercise in color work.
Insofar as the dishcloth, I actually charted a simple pattern for it, so it's also the test ground to see if the chart is even do-able or if I need to scale it up in size to make it more obvious. So, in this project, I'm learning two things at once. :-)
In regards to the cardigan, I will most likely NEVER work another cardigan or sweater FLAT again. It will be *in the round* because I am hating all the miles and miles of purls required (as this is a simple stockinette stitch). This is the reason why this darn thing is taking too long.
Wednesday, November 18, 2009
The Smell of Sheep: Making Connections
As I noted previously, I purchased about 1/2 lb of dark BFL wool to spin up. As I was tearing apart the long roving into sizeable chunks, I noticed the smell.
It was a slight smell, but a smell nonetheless. It was the smell of sheep; albeit it was the smell of clean sheep. (Much like a freshly washed dog smells of clean dog, versus smelly dog).
It was a nice scent, and one that most of my other rovings and tops I had purchased previously did not have..or at least that I noticed. Maybe it was because this was 8 oz of wool versus 2 oz of sample fibers? Maybe because this wool was bagged at the mill versus being separated then bagged at a fiber supply shop.
I met a spinner who once told me that he was able to tell what wool he was spinning by the smell. I don't know if that's true or not, and it would certainly be difficult for me to 'test' at this moment, as I normally buy prepared fiber, versus raw fleeces.
However, I found that I LIKE the smell of the BFL. Admittedly, I sniffed the wool vigorously and have taken quick sniffs whenever I spin it (also keeping it tightly closed in a container, lest the cats decide they like the smell of sheep!)
It reminded me that this fiber came from a living, breathing animal that has frolicked (do sheep frolick?) on some pasture somewhere. I find myself connecting with the wool (and thus, to the animal(s) that provided it) and enjoying the process of spinning that much more.
I think in our modern-every-day life, we are so far removed from the land and the origins of so many of our daily products (food, clothing, etc), that we take for granted what we have. Our lack of 'connection' with our daily wares makes us more of a disposable culture - throwing things away because we have no connection with it.
If we ruin a meal, then it's no problem to go buy the ingredients again. But what about the plants or animals that were harvested or killed to make that food?
I read an article where two chefs went through the process of making goat tacos by picking out the goats from a ranch then watched the butchering process, and taking home the still warm meat. They wrote how they were so much more extra careful in their preparation, because of the process they had gone through and how they felt a connection to that animal. The warm meat on the counter strongly reminded them that this came from a living breathing animal.
Much like the smell of sheep reminds me that this wool comes from a living breathing animal. I mean, I *knew* it did before -- wool comes from sheep after all. But the smell make me seriously GROK that fact. I know that once I finish spinning this wool, then going through the process of making it into a sweater, that it'll mean more than just the time & effort required to spin & knit the sweater; I'll feel that connection to that dark BFL sheep that provided its fleece for my wool.
I think we all need to be reminded that our *things* must come from somewhere; be it a tree that was felled to make our spinning wheels, or a sheep that was sheared for wool....or even a sheep killed to provide a meal. Children should be taken to a farm to show them where our food comes from, or to a mill to show how cloth is made for our clothing.
We need to connect with what we have, to know where things originate from, so that we can truly appreciate what we've been given.
Tuesday, November 17, 2009
Learning Projects
Since I'm a relatively new knitter, there's a lot of things I don't know how to do yet. What I've found that if I make something that teaches me a new technique, I get a finished product AND learn a new skill at the same time.
This is the reason that I am partial to dishcloths. They are relatively simple, require a relatively cheap form of yarn (cotton), and dischcloths are knit up quickly with minimal effort.
Currently, I am learning to do two different things on my dishcloth:
1) I am "testing" a chart of a design I created. I think it'll work, but it might need a bit of tweaking..
2) Steeking. I've heard a lot about it, and I *like* doing things in the round (I detest miles of purling as I have learned as I am currently knitting a cardigan "flat" and it seems to be taking forever!)
I originally learned of it, by listening to the Stitch It! Podcast when I first starting to knit. I was curious about it, but felt that I should probably learn the basics first. Now, it's time. :-)
So, I cast on the dishcloth in the round with a 3-border stitch using some generic cotton yarn I picked up at Joann's with a coupon. I'm about halfway through the discloth -- which is my sitting at the computer knitting because it's pretty brainless -- and I'm looking forward to steeking it!
I've found a good website on steeking, which I'll be making use of later: Eunny Knits on Steeking.
Oh, and after doing a bunch of Google searches, including a browse through Ravelry's Stitch It Podcast forums, the website is the one most often referred to when it comes to steeking.
Monday, November 16, 2009
A Tongue Twister; Knotty Knitty
A friend of mine, Amy, inspired a bit of a Tongue Twister. (As I loved Tongue Twisters as a kid, this only seems fitting....)
Knitting is knotting, just not only knotting.
Crocheting is knotting, but it isn't knitting.
So it's fitting that knitting could also be called knotting,
although if crocheting is knotting
then shouldn't it be knitting?
Knitting is knotting, just not only knotting.
Crocheting is knotting, but it isn't knitting.
So it's fitting that knitting could also be called knotting,
although if crocheting is knotting
then shouldn't it be knitting?
Recreate & Replace
The one nice thing about knitting is that you can fix or recreate something you've done before, or make something you want, but can't find anywhere.
In this case, I had to replace one of my fingerless gloves / handwarmer (Dashing from Knitty.com) that I lost last Thursday while on the train. I had been wearing them getting onto the train, but it probably dropped out of my pocket while in my seat.
I could have called the train's Lost & Found, but I wasn't too hopeful. On Friday, my hands were *frozen* in the morning, so I just decided to re-make the one I had lost.
Luckily, I still had two skeins of the same yarn already cake'd, as well as the pattern (with notes on my modifications for it. So on Friday night, I cast-on, then finished about 80% of it on Saturday (as we had a two hour drive for an event).
Sunday evening, I worked on it while some friends were over, then bound off as well. Unfortunately, the new glove is ever-so-slightly larger than the original. I didn't write down one of my modifications to the pattern, and was only following the pattern and not looking at the original. But this is a minor nit, and since I am an "organic" knitter, I am not going to worry too much about it.
I also didn't wash & block the new replacement, mostly because I wanted it to wear to work on Monday morning.
But now I have one finished product, and my hands were nice and warm on today's work commute.
Friday, November 13, 2009
A Backlog of Fiber
I have a backlog of fiber that I need to spin. I had bought a bunch of different 2oz samplers from Spunk Eclectic some time ago, and I've managed to get through only have of the different wool types I purchased!
I'm currently working on each one diligently (on the drop spindle) and taking notes on each one. I also bought a Phat Fiber Box sampler one month, as it was all *non* sheep wool fibers, and discovered that I don't actually like spinning pure silk, pure bamboo, seasilk, mulberry, or any of the "slick" fibers. (At least not yet).
AND, there's the spindle and fiber club from Butterfly Girl Designs, and I just got this lovely blend of fiber & spindle for the November club.
AND I just recently acquired 8 oz (1/2 lb) of dark Blue Faced Leiscter, which is just so YUMMY which is getting spun on the Kiwi. I'd *like* to be able to have enough yarn to make a sweater, but in reality, I probably wont...but I'm hoping.
This doesn't count the Japanese Maple I'm still spinning on my Butterfly Girl resin spindle, OR the Shetland roving on my Kundert.
Have I mentioned that I knit too? and have several projects on the needles? OOF!
Thursday, November 12, 2009
Spinning Books on my "To-Get List"
So far, there have been really good reviews on Ravelry regarding:
Respect the Spindle: Spin Infinite Yarns with One Amazing Tool
Spin Control: Techniques for Spinning the Yarns You Want
The Intentional Spinner: A Holistic Approach to Making Yarn
And it's not like I have enough books. ;-)
Respect the Spindle: Spin Infinite Yarns with One Amazing Tool
Spin Control: Techniques for Spinning the Yarns You Want
The Intentional Spinner: A Holistic Approach to Making Yarn
And it's not like I have enough books. ;-)
Wednesday, November 11, 2009
The In-Between Projects
Ever have those really big projects that you know are going to take a lot of time, or projects that have miles and miles of boring stitches? In my case, I'm working on my very first sweater, the Slouchy Cardigan by Helene Roux from the book, Greetings from the Knit Cafe, and it's taking "forever".
At this particular moment, I'm on miles and miles of stockinette stitch, row-by-row, in making the hood. It's not very exciting knitting and really should be done in the presence of other knitters because I can talk and knit without thinking. I didn't even have the foresight to knit the hood in-the-round so I wouldn't have to purl.
But, I really want this cardigan. So, I'm doing small "in-between projects". If I finish XX inches, then I can do a small quick project before doing another YY inches. It's my "reward" for working on something so "boring". LOL
Consequently, I'm looking at a small project, maybe handwarmers or a pair of socks, that I can churn out quickly before going back to the drudgery of miles and miles of stockinette stitch.
I *did* start a small experimental dishtowel (subject of another post, methinks), but that's my in-between project for my "home" knitting -- the Hemlock Ring Blanket by Jared Flood -- because it means looking at a chart.
My cardigan is my "train" knitting because I can get a lot done on my 2-hour commute (one hour each way). Now, I just need that in-between project for my train knitting.
Tuesday, November 10, 2009
Spinner's Study: Shetland
As a mini-break from the Japanese Maple spinning, I opted to start spinning the lovely brown Shetland I had gotten from Spunky Eclectic
I had always thought that Shetland was a somewhat scratchy yarn with a high micron count, and I was expecting it to be about the same as the Icelandic wool that I had spun up, but OMG, this stuff is so much softer than Icelandic...almost as soft as merino....not quite, but it's a LOT softer than I was expecting.
I took a quick look online, and according to the Wild Fibres Website
Icelandic's micron count: 22-28 for the inner coat 55-65 outer.
Merino's micron count: 18-24
Shetland's micron count: 20-33
So, Shetland *can* be as soft as a decent merino. And the stuff I have is definitely falls in that range. (The merino I am comparing it too is definitely 'softer', but it's pretty darn close.)
As I am still in the "Spinner Study" phase, I have no idea what this will make as of yet. I'm wondering if I should ply it with the merino or lighter brown alpaca that I have. So many decisions!
Monday, November 9, 2009
Micron Count System
As a relatively new spinner, I had to do a bit of research on this concept of ‘microns’ as it relates to wool softness. I’ve seen how some on Ravelry use micron as a determining factor for their fleeces, wools, etc. So, I did a bit of research on the subject.
In general, the Micron system uses the measurement of a micron (1 millionth of a meter or 1/25,000 of an inch) to determine how the type of wool (either ‘fine’ or ‘coarse’). However, the “micron” count does not necessarily mean is of good quality. The micron count of a lot or fleece of wool uses the “average micron count”. But, apparently, this count can be deceptive.
For example, if you have a lot of wool, where
• 50% of the fiber = 35 microns
• 50% of the wool = 15 microns,
• the average micron count for that LOT is 25 microns.
• So, you’d have a lot that’s a mixture of both “coarse” and “fine” wool.
Consequently, the additional measurement of the amount of variation in fiber diameter (the Standard Deviation Column) can give you a better insight to the quality of wool. So a fleece or lot of wool with its individual fibers closer in diameter could be considered a more “quality” wool [1]
There are no hard-and-fast rules on how different types wools should be used, but there is a general guideline: [2]
• 16-19 Fine worseted & intimate wear
• 19-23 Apparel, outerwear, quilt batting / felts
• 23-28 Sweaters, light upholstery coatings, fiberfill
• 28-32 Upholstery, tapestries, some carpets
• 32-38+ Carpets, industrial use.
Of course, from reading various articles, going micron mad is probably not the best way to raise animals or determine the best wool needed. There’s the role of “crimp” in determining uniformity or density in wool, and is a factor in selecting a fleece. But that’s another topic for another time.
So conclusion? Micron count should be used as a guidelines for merely determining “softness” of a given wool or as a consideration when selecting a fleece or wool. It shouldn’t be the end-all-be-all of the decision process.
[1] http://msuextension.org/publications/AgandNaturalResources/MT198380AG.pdf
[2] From the Navajo Sheep Project: http://navajosheepproject.com/images/pdf/wool/woolgrading.pdf
In general, the Micron system uses the measurement of a micron (1 millionth of a meter or 1/25,000 of an inch) to determine how the type of wool (either ‘fine’ or ‘coarse’). However, the “micron” count does not necessarily mean is of good quality. The micron count of a lot or fleece of wool uses the “average micron count”. But, apparently, this count can be deceptive.
For example, if you have a lot of wool, where
• 50% of the fiber = 35 microns
• 50% of the wool = 15 microns,
• the average micron count for that LOT is 25 microns.
• So, you’d have a lot that’s a mixture of both “coarse” and “fine” wool.
Consequently, the additional measurement of the amount of variation in fiber diameter (the Standard Deviation Column) can give you a better insight to the quality of wool. So a fleece or lot of wool with its individual fibers closer in diameter could be considered a more “quality” wool [1]
Type of Wool | Micron System | Maximum Standard deviation (microns) |
Fine | Under 17.70 | 3.59 |
Fine | 17.70 - 19.14 | 4.09 |
Fine | 19.15 - 20.59 | 4.59 |
Fine | 20.60 - 22.04 | 5.19 |
Medium | 22.05 - 23.49 | 5.89 |
Medium | 23.50 - 24.94 | 6.49 |
Medium | 24.95 - 26.39 | 7.09 |
Medium | 26.40 - 27.84 | 7.59 |
Medium | 27.85 - 29.29 | 8.19 |
Medium | 29.30 - 30.99 | 8.69 |
Coarse | 31.00 - 32.69 | 9.09 |
Coarse | 32.70 - 34.39 | 9.59 |
Coarse | 34.00 - 36.19 | 10.09 |
Very Coarse | 36.20 - 38.09 | 10.69 |
Very Coarse | 38.10 - 40.20 | 11.19 |
Very Coarse | Over 40.20 |
|
There are no hard-and-fast rules on how different types wools should be used, but there is a general guideline: [2]
• 16-19 Fine worseted & intimate wear
• 19-23 Apparel, outerwear, quilt batting / felts
• 23-28 Sweaters, light upholstery coatings, fiberfill
• 28-32 Upholstery, tapestries, some carpets
• 32-38+ Carpets, industrial use.
Of course, from reading various articles, going micron mad is probably not the best way to raise animals or determine the best wool needed. There’s the role of “crimp” in determining uniformity or density in wool, and is a factor in selecting a fleece. But that’s another topic for another time.
So conclusion? Micron count should be used as a guidelines for merely determining “softness” of a given wool or as a consideration when selecting a fleece or wool. It shouldn’t be the end-all-be-all of the decision process.
[1] http://msuextension.org/publications/AgandNaturalResources/MT198380AG.pdf
[2] From the Navajo Sheep Project: http://navajosheepproject.com/images/pdf/wool/woolgrading.pdf
Sunday, November 8, 2009
Japanese Maple
I'm still plugging away on spinning the Japanese Maple colorway from Butterfly Girl Designs on the lovely resin spindle she had sent me.
However, since the spindle is less than an ounce, it gets very wobbly quickly, so I have to wind off onto a bobbin so I can spin more (as I had gotten about 3.1 ounces). Consequently, I have about 2 full bobbins of the Japanese maple.
And I still have a lot left to go through. I figure I might be able to get another 1.5 bobbins out of the 3.1 oz of fiber. I'm still not sure if I'm going to keep this as a single or ply it.
I definitely want to make a shawl out of it -- probably a "flame" pattern shawl, because the colors of the fiber remind me a firey autumn.
Thursday, November 5, 2009
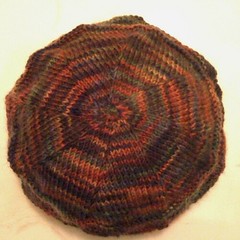
My Very First Hat
Just before Halloween, I cast on my very first hat using left over sock yarn (Socks that Rock Heavyweight). I know a lot of people like to knit hats as they are very easy and very quick to knit, but I hadn't yet. Plus, I seriously needed to get away from the endless rows of stockinette stitch of my cardigan and do something "quick" that would satisfy my 'finished project' need.
So, a quick look on Ravelry found the no swatch, Lifestyle Top Down Hats (link to Ravelry. The actual website is here. Of course, I'm a sucker for not having to swatch for a given project, so this was perfect.
I carefully measured my head, and started knitting in the round. When I got to my actual head size, I stopped the increases, and started down the sides of the hat. Then I tried it on, and realized that it was just a *tad* to big.
Being somewhat of an organic knitter, this didn't bother me "too" much, so I opted to create a "pillbox" style hat. During one point, I asked a friend who regularly does hats, and she told me that she normally takes off 20% off a head measurement to account for yarn stretch. Well, I'll keep that in mind for the next time.
The top portion of the hat is follows the pattern, then I did a basket weave stitch pattern along the straight portion of the hat. I then ended with a rolled brim.
My own version of the pattern is thusly:
1. Start the hat per the instructions, and knit until it's your head size.
2. Purl one round.
3. Count the number of stitches between two markers (They should all be the same number). Call this number Z
4. Divide that number by 2. This is your new stitch count.
* If Z is even, you have one new stitch count. Call it X.
(X * 2 = Z stitches)
*If Z is odd, then you'll have TWO new stitch counts. X1, X2.
(X1+ X2 should = Z stitches)
5. Knit as follows for either odd or even.
For EVEN Z --> *Knit X stitches, then purl X stitches.* Repeat * for the entire round.
For ODD Z ---> *Knit X1 stitches, then purl X2 stitches*.
(X1 + X2 = Z) Repeat * for the entire round.
6. Knit in the round
For EVEN Z: Knit X rounds.
For ODD Z: Knit whatever number of rounds is bigger. Either for X1 and X2 rounds. You want a "square" shape for each weave.
7. After X rounds, switch purls & knits.
For EVEN Z --> *Purl X stitches, then knit X stitches.* Repeat * for the entire round.
For ODD Z ---> *Purl X1 stitches, then knit X2 stitches*.
(X1 + X2 = Z). Repeat * for the entire round.
So you basically have something that looks like:
(x = knits, 0 = purls)
X X X X 0 0 0 0
X X X X 0 0 0 0
X X X X 0 0 0 0
X X X X 0 0 0 0
0 0 0 0 X X X X
0 0 0 0 X X X X
0 0 0 0 X X X X
0 0 0 0 X X X X
8. Continue knitting Steps 5 - 7 for however many rounds you want. Stop when you're X rounds from where you want to end.
9. Change to knitting in the round for X rounds. (You're trying to keep the symmetry)
10. Bind off.
Wednesday, November 4, 2009
Wheel versus Spindle
I have a tendency to spend a lot of time on the computer. We don't really watch t.v. so this is our substitute. However, usually, computer time involves some form of either work or play.
I've taken to keeping my drop spindle right by my computer. Anytime anything takes a bit of time to do (i.e. waiting for something to load up, or if I'm just reading an article online), I use the drop spindle. I have a knitting project usually by my computer, but the problem is that if there is a pattern of some sort, I have to pay attention to the knitting rather than what I'm doing on the computer. Sometimes this is not a good combination. However, I can put down my spinning at any given time and not have to worry about remembering where I left off.
This also means I get in a lot of little bits of time spinning in between projects. Now that I own a wheel, I realize that if I only had the wheel, I wouldn't get as much done. Don't get me wrong -- I *LIKE* the wheel. And, I'm getting a bunch of spinning practice done on it -- about 10-15 minutes a day. But, it sits in the living room isolated from most of the bustle of the household, which is nice when I want to get some alone time. It's a nice quiet form of meditation.
However, when I'm with DH or on the computer or on the go, it'll be the drop spindle I reach for the most -- it's very portable. And I know that plying will be more of a "breeze" on the wheel than on the spindle.
The wheel is going to get a lot of use; but I think the drop spindles are going to get much more used just because of my lifestyle.
Monday, November 2, 2009
An Unexpected Twist
This lovely thing is an Ashford Kiwi.
I was trying out wheels at Purlescence Yarns because they were having a sale on the Louet Victoria. However, it didn't 'work' for me at all. So, the Purl Girls had me try out several different wheels, and only two of them 'worked' for me.
-->A very large Ashford "Fairy Tale" wheel -- which was HUGE and is what most people imagine when they think spinning wheel. Honestly, this wheel was a dream to spin, and worked the "best" for me overall.
-->The Ashford Kiwi which worked also really well for me, as a double treadle.(with the Schacht Ladybug a close second after that).
I opted for the Kiwi because its footprint is considerably smaller than the Fairy Tale wheel, and cost a LOT LESS than I ever expected a spinning wheel to cost. Plus, it was the best fit for me (I really wanted to love the Schacht Ladybug, but the Kiwi felt so much better!)
So, it came home with me. I sanded it down, stained red (of course), then stenciled in gold paint, which, although a LOT of work (mostly waiting for things to dry), was a *lot* of fun.
The drop spindling really helped me pick things quick on the wheel. And I'm still reaching for my drop spindles a lot more, as they are more portable, but I can seriously see this helping me ply, because plying on the drop spindle can be rather difficult as things get very very heavy.
They say that I should probably pick out a 'name' for it...although honestly, I don't name my drop spindles individually, but I'm debating on Cassandra or Arachne.
Subscribe to:
Posts (Atom)