I love photography, even if I don't have enough time to do my photography for myself nowadays. It seems that I only get to do personal shooting whenever I'm taking photos for Ravelry! (Of course, there's taking photos for other people too, but that involves money and I don't consider it personal photography.)
I realize that many makers and crafters have gotten into photography; partly to take better photographs of their projects. So I figured that I might help you take better pictures by telling you a bit of photography and combine it with product photographs.
Depth of Field & Yarn
When taking photos of my yarn, I like to play with the depth of field. Depth of field (or DOF) is the distance between the nearest and farthest objects in a scene that is sharp in an given image.Personally, I like playing with low or shallow DOF in my images. What's that Depth of Field, you might ask?
Depth of field is the range of distance that appears acceptably sharp in your photograph.
- A shallow depth of field is when a select amount is in focus and everything else is blurry
- A wide depth of field is when everything (or nearly everything) is in focus.
Personally, I like a shallow depth of field in most of my photographs. It's a matter of personal taste. In this example, only the area around Cascade Label is sharp and everything else is blurry.
This photo has a shallow DOF.

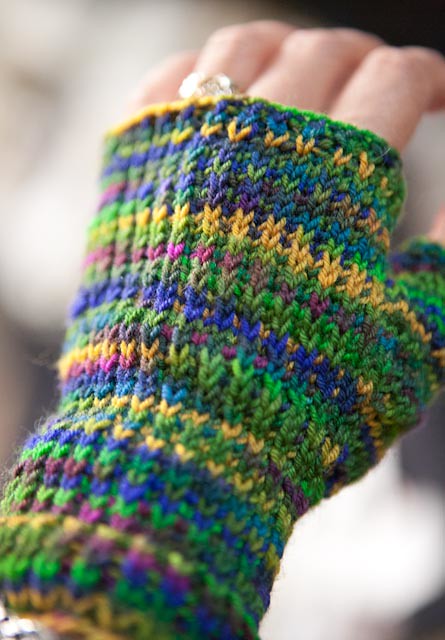
In another example, the background is artistically out-of-focus, but most of the handwarmer is IN focus. (However, notice that the part of the wrist closest to you is also blurry.) The DOF is somewhere around the middle of the photo. (This photo also has a shallow depth of field)
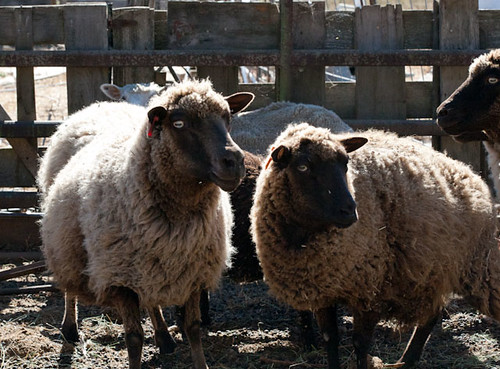
Whereas if you look at this photo, everything is more (or less) in focus from the foreground to the background (the only thing fuzzy is the Shetland sheep). This photo has a wide DOF.
How do you get different depths of field?
Depth of field is controlled by a variety of factors.
- Camera apertures (which corresponds to F-stop number, like F1.8, F2.0, F4.0, 5.6, 8, 11 etc)
- The size of your lens -- If you have different size lenses for your camera or have a zoom lens, then a longer lens length helps produce a shallow depth of field. If you don't have different lens sizes, then you can still control DoF by #1 and #3.
- The distance between you & your subject --- this is easy. The closer you are to your subject, the shallower your depth of field
Now, #1 requires a bit of explanation. The apeture controls how much light hits your film. Think of the apeture like the "iris" of your eye. When it's a bright sunny day, your iris gets smaller, and if it's darker, then the iris gets bigger to let more light. Much like the iris of your eye, the apeture can get be very small or very wide and let in a set amount of light.
The size of the apeture is known as the "F-stop". And a smaller apeture (like F2.0) means a BIGGER hole. (Just remember: Small number = BIGGER apeture hole. Big number = smaller apeture hole)
- If you want a shallow depth of field (not everything is in focus), then use a large apeture, which is a small Fstop (F1.8, 2.0, 4.0, 5.6, etc), which gives you a bigger hole.
- For a wider depth of field (everything is in focus), then use smaller apetures, which have a larger Fstop numer (8.0, 11. etc) give you a smaller hole.
You'll need to play around with these factors to produce the DoF that you want to create for your photographs.
For a tutorial (and a lot of math) on how to use DOF and how it works, check out this webpage. Also, check out this really cool YouTube video. It's 20 minutes long, but a really good visual explanation on how DoF works and how all of the above elements that I just explained work together.
If you really want to get more lesson in photography lighting, I HIGHLY suggest this book, Light: Science and Magic: An Introduction to Photographic Lighting
If you would like to see some of my photography work, please take a look at my Photography website - WyldFire Studios.
Questions?
Let me know. I'd be happy to help you answer any questions.
No comments:
Post a Comment