Thursday, August 29, 2013

Making of a Costume: the Vest (Part 1)

This past week has been a really turbulent whirlwind. I won't get into any specifics, but lets just say that our family could use a lot of good thoughts, healing vibes, and prayers, if you're so inclined.

But in the meantime, remember when I posted some fabrics that I had purchased in a motley of colors? 


I had purchased 3/4ths of a yard of various colors of linen from JoAnns Fabrics on sale. (yay!) I used it to piece together a "mini vest" as part of one of the many hall costumes for Convolution 2013. In this case, I am making a very fitted vest that goes to the top of my waist / bottom rib bone.

Here's a shot of the vest front that I drafted out on muslin (I still hadn't yet found my pattern paper. The red lines are the original "marks". Then I made my mockup to check fit.

The mockup fit, but I did make some minor alterations:

  • the muslin piece was a bit too short, so I added one inch to the bottom of the vest
  • the bust dart needed to be moved over by a half inch, so that alteration was also noted.
  • the armhole needed to be adjusted slightly for better movement in the arm

I noted where on the pattern I wanted to "piece" together the different colors, including the need for a seam allowance for each "piece".

Here's the back panel piece (to be placed on the fold. I made a small alteration to the arm hole from my original, as well as adding the extra inch at the bottom

Here's the pieced together lining. (Yes, you heard that right, the LINING!).


I put the finished lining with the fronts attached on the mannequin to see how it fit. As you can see from the mannequin, the vest only goes to the top of the waist. (The front panels are the same green as the back. Luckily, piecing together the back panel was easy as it is all straight lines.


Once the back piece was done, I started working on piecing together the front. Here's one very small piece of the front panel, which will be also be in three colors.


More later!

Saturday, August 24, 2013

Happy Gift Recipient

There's something to be said when the recipient of a knitted gift is delighted about it, and SQUEEs upon receipt.

It's the type of person that understands the value of a handmade item that makes the effort worthwhile.

Friday, August 23, 2013

Pattern Paper

Whenever I buy a pattern or if I am drafting my own, I like to use "marking" paper. It's about as wide as some fabrics (45") and comes in various size rolls. It's not that expensive either.

I ran out of my previous roll a few months ago, and could NOT find the other roll that I was pretty darn sure I had purchased. Imagine my delight at finding it in the garage as I was pulling stuff out for the 'Costumer Guild Bazaar/Flea market' that's happening over this next weekend.

SCORE!

It's pretty hefty paper -- not quite construction paper heavy, but it's thicker than tracing paper or the "onion" skin paper that you get with most commercial patterns, such as Simplicity, McCalls, or Butterick. Plus, it has a one inch grid marked on the paper so you can easily match marks on your commercial pattern or use as guidelines for your drafted pattern. I *love* this stuff. It's sturdy enough to use through the making of multiple garments of the same pattern.


Previously, I had been using a roll of paper that doctor's normally use in their exam rooms to cover the medical bed. (My nursing contacts had gotten me a few rolls). However, the paper is rather thin and prone to tearing if you're not careful. Plus, for big patterns, you have to tape several pieces together. There's a noticeable difference between the two roll sizes.


Unfortunately, the only place I've been able to find this paper is in the LA Garment District at Michael Levine's. I'm sure it's available at other places, but since had been down often in previous years, I picked up 2 rolls, which lasted quite a long time. We hadn't been down in the Garment District for a while, and so I consequently ran out...or at least I thought I did until I found this spare roll!

If you're interested, here's the pertinent information for it. You won't be sorry that you got some.


Thursday, August 22, 2013

Three-Glove Curse

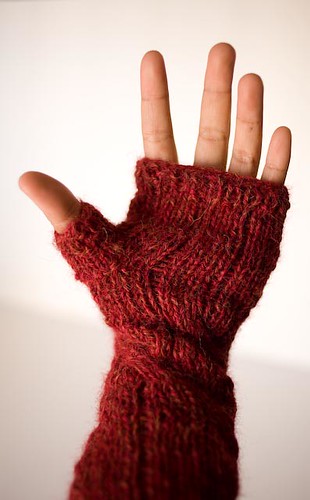
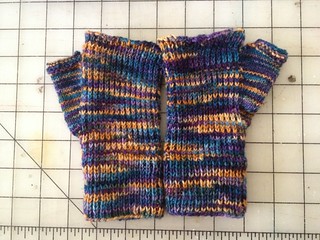
Back in May, I picked up this lovely skein of yarn from my LYS. It's Manos del Uruguay in the color "Alegria" which means "happy" in Spanish. I LOVE the rich colors, and thought to make myself a pair of fingerless gloves.

I think I've talked about this on the podcast, but I have a 3-glove curse. I tend to lose one of the gloves in a pair; either in the process of making the gloves or shortly upon finishing the project.

I've had to replace one of the pair of these gloves at one point.
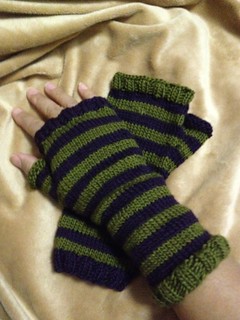
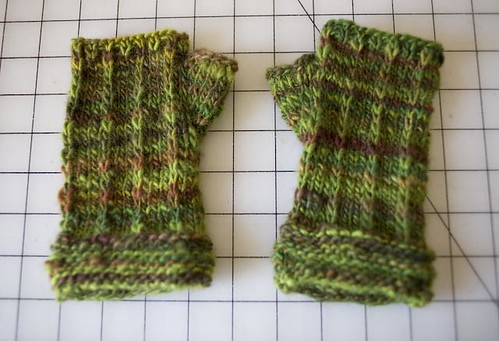
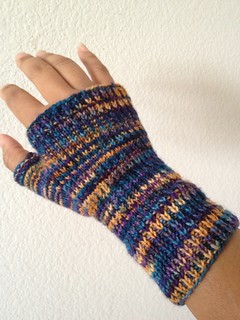
  Witchy MitsDashing HandwarmersHand Thingees

Usually, it's the ONLY skein of yarn that I have, it's handpainted or discountinued yarn.....and I have to carefully eek out enough yardage to make a 3rd pair.  UGH.

The other day, I finally finished the 3rd glove for my "Happy Fingers" pair.
Untitled 

Maybe I should take Sandy's advice and use a pair of mitten keepers to ensure that I don't lose anymore.
  Untitled

Monday, August 19, 2013

Crafty Kittens

As I mentioned before, we had adopted two 4-month old Maine Coon kittens (Sam & Dean) from a local no-kill cat shelter. In addition to the kittens, we also adopted a lovely one-year old gentleman whom we named "Pharoah".


The boys are getting along famously, and want to be around us when we're busy doing things.

Of course, this also meant helping with all things sewing. Dean & Pharoah decided to help "supervise" my sewing of a costume piece for ConVolution. They languished ontop of some scrap fabric and just watched as I cut & pieced together a garment.

Luckily, they were content to just sit and watch instead of trying to be ever-so-helpful.


So, what am I working on, right now? Well, I'm can't show any photos as of yet, but here's the fabric I picked out for it; a motley of colors in linen.

Thursday, August 15, 2013

Flabbergasted - I Won First Prize.....

Some time ago, I had woven one of my very first scarfs on my Ashford rigid heddle. It was just a simple tabby scarf in a red & black marled yarn.

Red Marl

I ended up giving it to my friend's mom who lives back East. She loved it, and unbeknownst to me, entered it in their county faire.

 
(Pict taken from behind glass, so it doesn't look quite the same).

FIRST PLACE! I'm floored, flabbergasted, and really touched that she thought it was good enough to enter into the county faire contest. I'm even more surprised that it won. It was the very first scarf that I had woven.

Geez.

Now, I have to figure out how best to thank her. Maybe another knitted or woven item is in order.....

Wednesday, August 14, 2013

Making a Pair of Elvish Gloves for ConVolution

For ConVolution, I want to have a series of outfits that I can wear throughout the weekend. One is a "generic" elvish outfit. Some time ago, at an outdoor festival, I had seen someone selling very beautiful leather gloves that were Elvish in nature. However, their asking price was a helluva more than I had wanted to spend (a hundred or so dollars).

Consequently, I opted to make my own, as I thought to make more than one pair. I made some preliminary sketches of what I wanted -- based on what I liked and didn't like at the ones I saw from the festival. Their version was nice, but it had very stiff seams that cut across the palm of the hand, which I didn't like. They also used a very stiff leather, and I felt that a garment weight would work much better for gloves.


I wanted to build one or more outfits that would work with these gloves, but first, I had to make the gloves.

In order to start this project, I traced out my hand on some graph paper, and started sketching out the makings of a pattern for both the front and back of the hand based on my drawings. I wanted it to end about the second knuckle of my fingers.


I added a generous seam allowance on all edges (so I could play with ease & fit), and I also drew in my design marks.

I made one mockup of the full glove without any design features just so I could get a visceral feel of the finished glove. This first mockup wasn't quite what I wanted, but was in the ball-park. I took those changes and marked them onto my master pattern. I played around with how it would be constructed.

In fact, I made three separate mockups in muslin; in three separate ways to see which one would get a better fit & look.  I had an "A-HA" moment after making the first one that resulted in an "easier" construction to get the look I wanted. Consequently, I used differing construction techniques to see what would work best for the final product.
  •  #2 has seams that go up both left & right sides 
  • #3 has a "fold" on the left side and seams on the right.


I also tried some design features on the back of the glove mockups to see if I liked how it looked and felt.


I finally decided to go with #2 with some minor alterations. Because muslin is a fabric that won't necessarily "stretch" like leather, the mockups I made were slightly a bit too snug on my hands.

We had some lovely green suede lying around so I started making the final version. I used purple stitching as an offset to the green. (I decided not to add any design features on the back of the hand; opting rather for straight forward functionality.)


There's still some work that I'd like to do, such as getting silvery leather paint and painting stylistic leaves or something appropriately Elvish or Tolkein on each section, but I'll wait for a bit until I can finalize my other designs.

I am finding that I do like the design process, and find it pretty fulfilling to bring something from concept design to pattern to completed piece. There are times when it is a pain to make these ideas come to life (in terms of "how the heck do I construct this?!?", but very satisfying when you finally get it right. I find it "easier" to accomplish this effort sewing-wise versus knitting.

Monday, August 12, 2013

Kittens!!

I've otherwise been a bit busy these past four days, because we adopted two four-month-old Maine Coon mixes from a local cat shelter, and I've been busy playing with them and trying to get them integrated into our household. I'm also trying to teach them to NOT play with Mommy's fiber and fabric.

Their names were "Galaxy" and "Jackson", but I opted to change them to Sammy (aka Jackson) and Dean (aka Galaxy).


They are really a bundle of joy, albeit a bit of work. And they are absolutely adorable, especially when they are asleep.


These boys PROMISE to be huge kitties when they are older.


My older cat, Anpu, is not happy about the situation, but he's getting used to them.

Wednesday, August 7, 2013

Tiara Hat for a Friend

Last year, I gave a good friend a gift certificate for any small knitted item of her choosing. After some contemplation, she decided on a tiara hat. I did a search on Ravelry, and found a lot of knitted tiaras, but not specifically a hat. I eventually found two that met the criteria:


She settled on Frigging Princess, and the colors, which were black & white. Since she's a person of some sparkle, I found a new yarn from Cascade called, Hollywood, which has flashes of angelina or some such in the yarn. It's very sparkly. She mentioned wanting to add beads to it afterwards, so I hope that the sparkly yarn meets with her approval.

The hat, itself, was pretty easy to knit, although I did have to learn a bit of intarsia in the round. It was a bit fiddly at first, but I got the hang of it relatively quickly.

Monday, August 5, 2013

Knitted Wonder Woman

Remember when I posted about the Knitted Klingon that I wrote about after WesterCon66? Well, I had heard on the grapevine that she had also knitted a Wonder Woman Costume for BayCon 2013.

After emailing with her back & forth (about the Knitted Klingon) with the creator, Shael, I asked her about her Wonder Woman outfit. She sent me some photos that her friend, Jenny, took of her it.

(Photos by Jenny Finster used with permission).

Doesn't she look fantastic? I asked Shael some questions about her Wonder Woman outfit. Here's what she had to say:

Me: it looks like you knitted it as a single one piece mini dress?

Shael: I refer to it more as a tank top because of the blue sections have a slit in it. But I guess it could be considered a mini dress. It is one piece, knit in the round with color changes for the belt and the skirt. I crocheted a pair of arm straps in peach yarn. The wig is a crochet hat with yarn hooked into it. Oh, one correction about the Klingon wig. It's not braided. It's just Lion Brand Homespun hooked into the hat. The Homespun frays in such a way to give it a slightly kinky look 

Me:  Are the stars knitted appliqué? or crochet?

Shael: The stars are all crochet and sewn on. 

Me:  Did you use intarsia for the eagle?

Shael: No. The eagle is also an knit appliqué that can be purchased as part of a different knit Wonder Woman costume (yes, there is more than one) at http://www.etsy.com/shop/chriswass. It is created by knitting a lot of short rows of varying lengths with a few color changes so it matches the background of the top it is going on. 

Me: And is the lasso just an i-cord?

Shael: Yup. it's about a four foot long cord. It's for decoration only. 

I can't wait to see what Shael does at the next Con!

Friday, August 2, 2013

Infecting my Eldest Niece with Sewing

I love sewing (and all the other crafty stuff that I do), and I want to be able to infect those around me with that same love of it. One of the things I wanted to be able share with my Eldest Niece is that with sewing, you have the capability of making one-of-a-kind thing for yourself that is useful AND pretty.

And that the process wasn't difficult.

So, while she was working on her skirt, we also designed for her a book bag that she can carry her books around with her on outings (so she'd never have to be without a book). It had to be big enough to carry one or more of her books around, but not something huge. We settled on a vertical style bag, and what she wanted from it.

Here are the initial drawings that we sketched out. We measured out some of her books with a tape measure, and she made the final decision on how big it should be.


While we were shopping for skirt fabric for her skirt, we also found some fabric for her bag. The purple sateen was a remnant and perfectly matched the purple leopard print (I highly approve) fabric that she found. She also found some cute heart shape buttons.


And the bonus? She found all of the stuff that was on sale. She kept looking at prices and putting things back if she thought it was too expensive. (How many 11 year olds do that?!)

Creating the bag was easy. It just needed five pieces:
  1. front piece -- that would also have a front pocket
  2. back piece -- that would also be the front flap, 
  3. side strip piece -- that would go around the edges
  4. handle -- purple belting
  5. handle tabs -- that would attach the D-rings to the bag
Here's the lining portion of the bag (being attached to the fashion fabric). You can see the three parts: front, back, and side.

And the serged fashion fabric being pinned together. I did have to interline the fashion fabric to make it more sturdy for use as a bag.


I used the leftover bias tape from her skirt to edge the flap (with her approval, of course), and then she arranged the buttons she picked out. And we were done!


She was super excited about her new bag and being able to carry her books around with her. She ended up using her bag during her visit with me to carry her books while we sat drinking hot chocolate in coffee shops. I do hope this teaches her she can learn how to make her own things, and even matching accessories to her outfits.

She watched me sew a good chunk of her bag, and I hope she realizes how easy it is to make what you need!