
Of course, I didn't get out of there with "just" the buckles. I also picked up a tiny bit of leather (to make straps), as well as a few odds & ends. (It's rare I can just run into a good crafting store and get out with just one item.)
Later that day, I started with the strap making for the bag. This took a long while to complete because I sat putzing wondering how I wanted to accomplish certain things. Plus, I had to do all of the grommetting before I could add the lining (which would hide all of the grommets.)
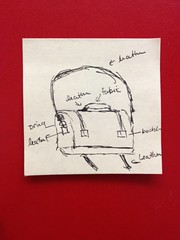
According to my diagram, I needed to make a minimum of 4 leather straps (two leather straps to go around the body, one strap for the bag handle, and one strap as the long purse handle).
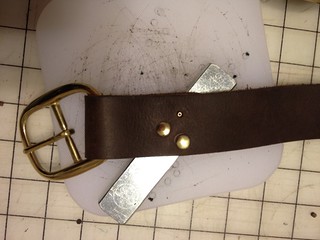
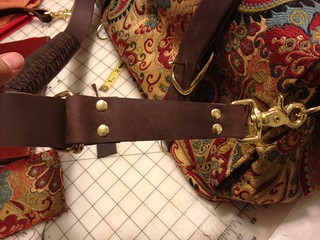
First, the body straps needed to be cut, and the buckles added. I have a strap cutter, so it makes creating different width straps easy. Punching and grommeting leather-on-leather is pretty easy as well.
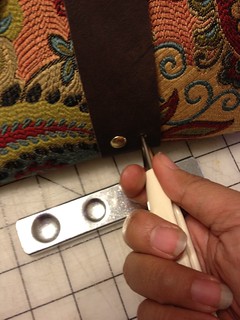
But the straps needed to be added to the body of the carpet bag, which is a little bit trickier to accomplish. First, I punched holes in the leather, then used the awl to pierce holes in the bag, and then it was a matter of grommeting the strap onto the bag.
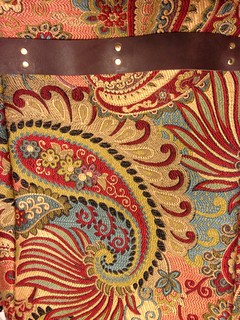
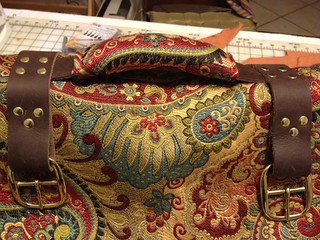
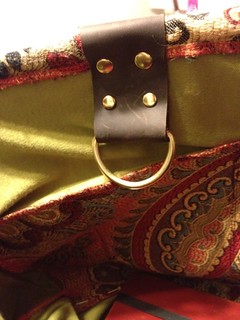
Here's one strap added to the bottom of the bag.
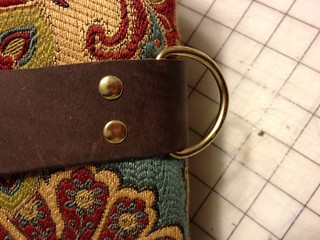
I also added a few touches here and there for usability. This D-ring is to hold the strap in place on the front of the bag.
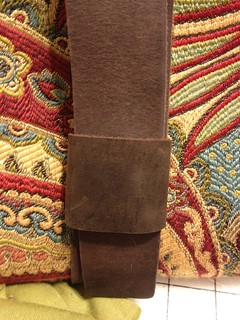
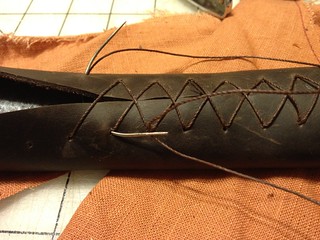
And I also added a leather version on the backside side for when the bag is belted shut and the strap wraps around the body. I took some softer oil-tanned leather and stitched it shut. (The stitching is easy, but it does take some time to accomplish. A curved needle & waxed thread are my friends.)

Before I grommeted all of the strap down, I had to make the bag handle for the top of the bag. This part took the longest as I knew I wanted a "fabric" handle. And it needed to be under the bag straps for added stability. I made a mockup of the fabric handle to ensure that I had the correct size and width.
Then I cut out a length of leather, sewed fabric around it (stuffed with poly fill), then grommeted the whole thing down.
At this point, the most work-intensive parts were completed. Cutting out the leather straps was easy. Grommeting the straps to the bag was a bit harder as the shell of the bag had already been sewn together, so it was a bit awkward in places to hammer the grommets in place.
After the "hard" part had been completed, it was a matter of doing some of the smaller or easier things.
I also made some smaller straps that were added to the inside of the bag.

Why?
So I could clip my keys to the inside of the bag. And allow me to put the straps somewhere if the bag wasn't buckled shut.

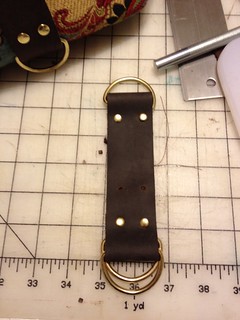
I also wanted an adjustable shoulder strap. This took a little bit of thought. I didn't want the unfinished side of the leather strap showing once it was adjusted. I could have used a belt buckle to adjust the straps or two D-rings. (I didn't have an adjustable buckle to use that worked well). Eventually, I opted for the D-rings.
I also sewed a shoulder strap "pad" that would do double duty:
- allow me to "hide" the adjustable strap so it wouldn't flop around
- act as a shoulder pad
That pretty much completes the "leather" portion of the bag. This portion took about 4 hours to complete, because it involved small "fiddly" work that just took extra time. Plus, I had to make test a few ideas out before committing to them.
Up next? Sewing in the lining.
Awesome work and explanations. Terrific pictures too.
ReplyDeleteLoving this blow-by-blow.
ReplyDelete